
Much of veggie farming is playing garden defense. Yesterday’s garlic surprise attack was handled as an immediate emergency action, by hand-picking larvae before they could really tunnel in. The other no-chemicals approach is row cover, which seems to be laid out on more crops as each season. (More words to follow.)
Fieldwork
Attack of the leek moth
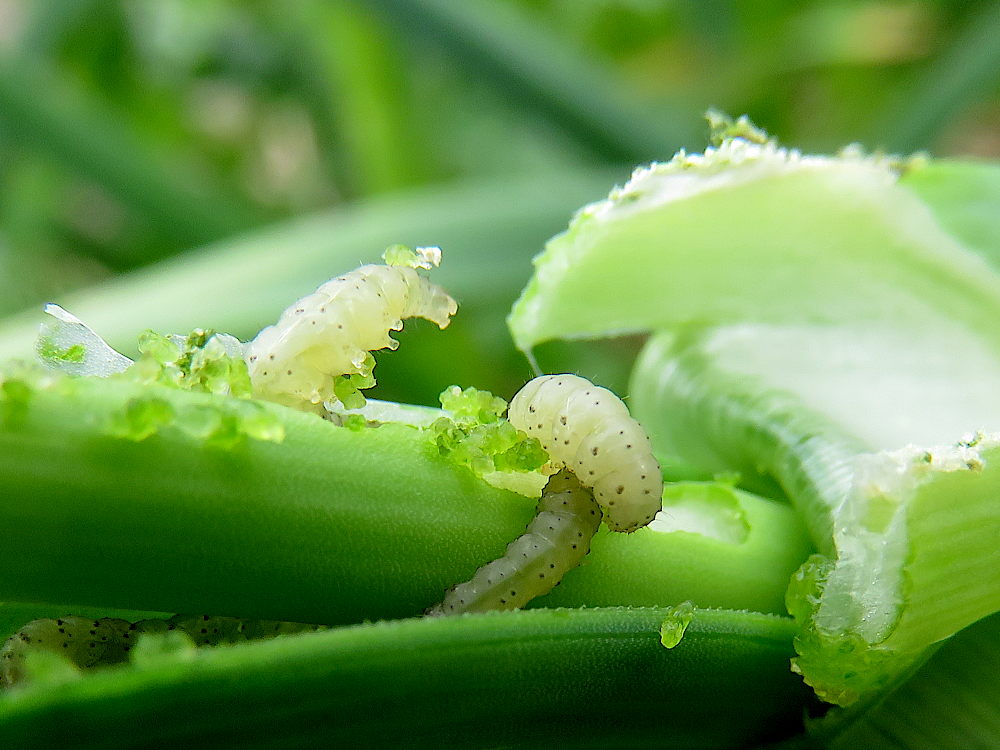
Checking for scapes today, only a couple of days after the last all-good garlic check-in, and found absolute carnage thanks to a leek moth invasion. For years, I’ve heard about these voracious leaf devourers ravaging alliums—garlic, onions, leeks—in the general region, but they’d never shown up here. Until now. After hours of hand picking and squishing, the situation may be somewhat under control.
FACT-FINDING: I did a bit of quick research to get the bigger picture. Leek moths (Acrolepiopsis assectella) are nocturnal, operating in full darkness. They overwinter in plant debris, emerge and mate when the temperature gets up to around 50°F/10°C. There are usually three generations a year, around here in mid-May, June and July. The first generation grows up (fast, in around 3 weeks) and starts laying another round, and so on.T hat means, in unusually warm or cold weather, there could be more generations per year, or less. Each female has around 100 eggs, lays them singly not in clusters, usually on the underside of leaves near the base of the plant (but, naturally, look EVERYWHERE!). There’s of course lots more, but that’s what I need to know for veg protection—garlic under row cover (and it would be pretty safe to uncover them during the day).
Plug sheet gamble, part 2
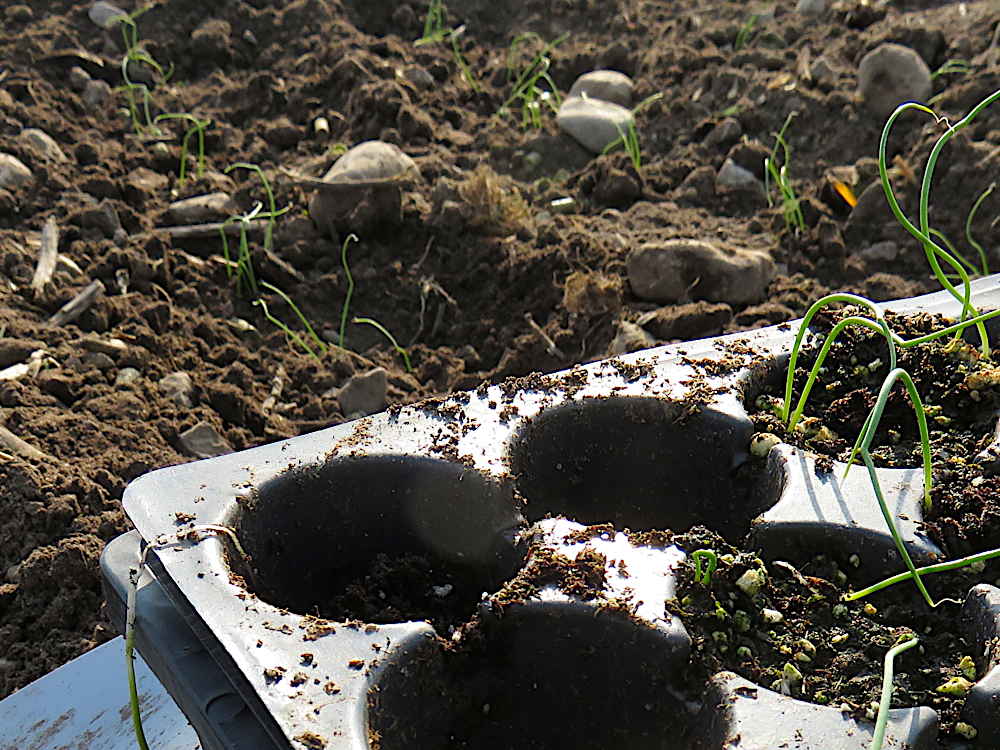
Only a few days after these green onions emerged, they’re in the field and heading into the ground. Haha, there’s no doubt this is a lot more labor intensive than using a seeder. Unless the weather conditions are really extreme, like a long, hot drought with scorching daily temperature and bone dry ground, it’s hard to argue for the plug sheet approach. But not impossible. Let’s see how they do…
IN THE PHOTO: A sharp and critical eye will notice that the seedlings in the tray seem pushed up against one side, instead of satisfyingly centered. This was my error, watering them in with a spouted can, along with a bunch of other seedling trays sitting outside. Onions don’t quickly put out lots of secondary roots that spread through the seedling mix and hold it together. Instead, at first there’s mostly just the radicle, that long white root that comes out of veg seed, heads down and, for most other vegetables, also branches out. So the plugs got kind of soupy and the force of the water pushed the onions to one side. You can see one hanging over the edge because it stuck more to the drainage hole in the cell than to the plug of seedling mix. Details! I should have remembered to use a shower.
Wheel hoe underdog challenge!
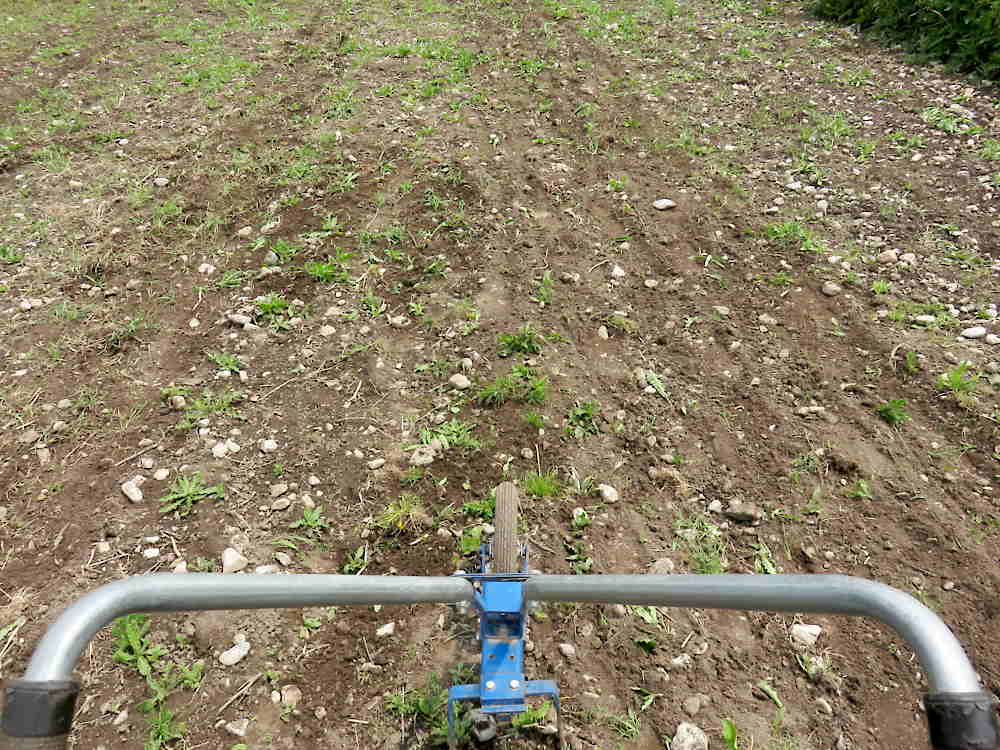
It doesn’t sound like a fair contest, the wheel hoe going up against the tiny tractor, but that’s the experiment underway this season. With all the rain recently, weeds are primed to surge. So far, it’s mostly thistle and clumps of grass itching to expand, with pigweed, lamb’s quarter and a couple of other regulars starting to emerge. This area, not yet planted out, has already been hoed, but that haze of green won’t stay down for long. A matter of days… With the 48″ rototiller on the tiny tractor turned by diesel horsepower rumbling like a tiny tank, it’s easy to put things off a bit. The tiller will churn up whatever’s in its way in no time. This fine wheel hoe has instead only an 8″ blade and a lone human…pushing. Every little bit of growth makes the going harder. The time to get in is early, when the blade can more or less glide smoothly and evenly, and you can move travel up and down with fair ease. There are other things to consider here—time, fuel, effect on the soil…more on all that as the experiment goes on—but timing is number one!
IN THE PHOTO: The wheel hoe is facing a strip that has just been walked. It’s hard to see the line between hoed and unhoed, especially compared to the cleanly erased path left by a rototiller. The weeds are sliced just beneath the soil—like cut flowers, they still look fine. Give ’em a day, especially a sunny, hot day, to dry out, and the difference becomes clear. Weeds, gone!
Cloning potatoes
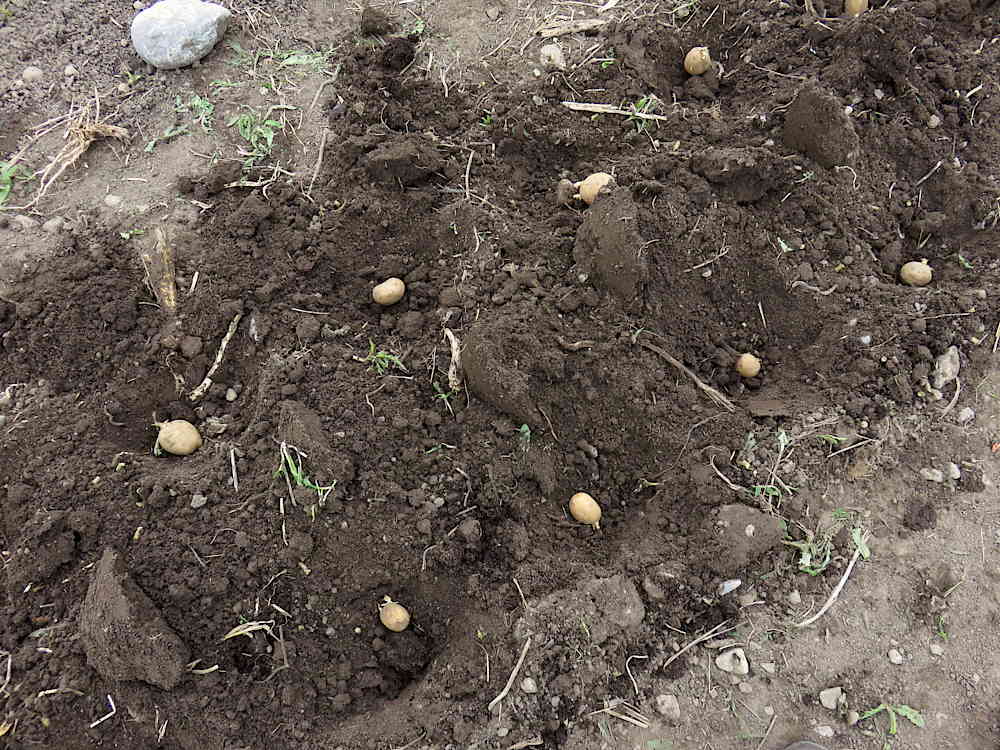
What a difference a word makes. Planting potatoes sounds so normal, wholesome, so farm and garden. Call it cloning potatoes, and now it sounds…weird. Really, it’s nothing special, just another word for the same old thing. Of the common garden veggies around here, potatoes and garlic are cloned: no seeds, no bees and flowers and pollination, instead, plant a piece of the original. Put a potato in the ground and it’s off to the races: vegetative propagation, direct multiplication—so simple!
In the photo: Yukon Gold seed potatoes. They’re regular potatoes, just smaller, and they haven’t been sprayed with sprout inhibitors (unlike many/most/all supermarket potatoes sold through the winter and till the next potato harvests).
Transplants love drab weather
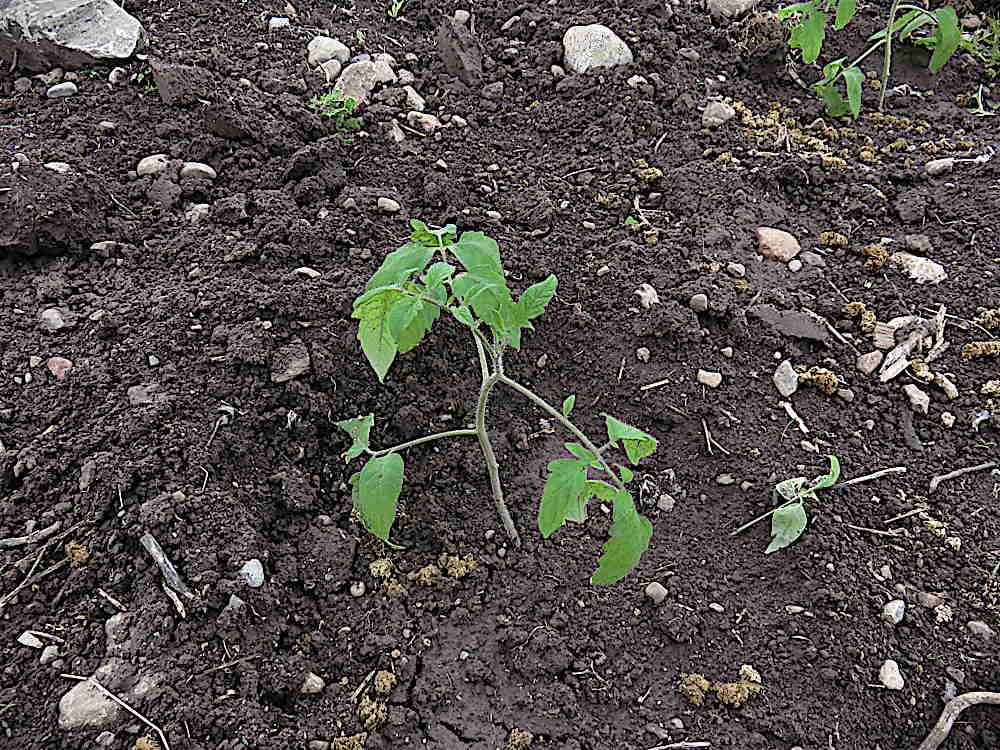
Transplants, like these tomatoes, do well in mostly overcast, even rainy weather for the first two or three days. Funny the way things in life can turn in an instant. One minute it’s put them in the sun, the next, welcome some cloud cover. My transplants start out under fluorescent light, a weak imitation of the sun: putting them out for a few hours, for at least two or three days, and back in to weaker light of the grow rack every night, gets them used to the sunlight. Once transplanted, though, they’ve got more to adjust to than sun. Their roots have been exposed and jostled. The nights usually get pretty cool in May, 20°F below what they’ve been used to. Maybe they sense the general vastness they’ve suddenly found themselves in, with a plant version of, “Oh my.” Whatever all is going on, it’s an adaptation. Full days of hot sun add the stress of having to pump more water into their leaves to keep from wilting. Although they’ll generally survive that sort of thing—as I’ve observed firsthand…—it’s easy to see the difference when the first few days have a good amount of cloud cover, and they really get rolling, stems thickening, the leaves turning a deep green. There are all sorts of ways, often way closer to ideal, to start seedlings indoors. For my simple, low-tech, rough-and-ready approach, this is how it seems to work!
In the photo: The little golden brown blobs scattered around are alfalfa pellets, used as fertilizer. They start of as hard pill-like cylinders, and expand to crumbly little blobs after being wet, then continue to break down as they join the soil food web.
Boldly low-tech grass clearing method
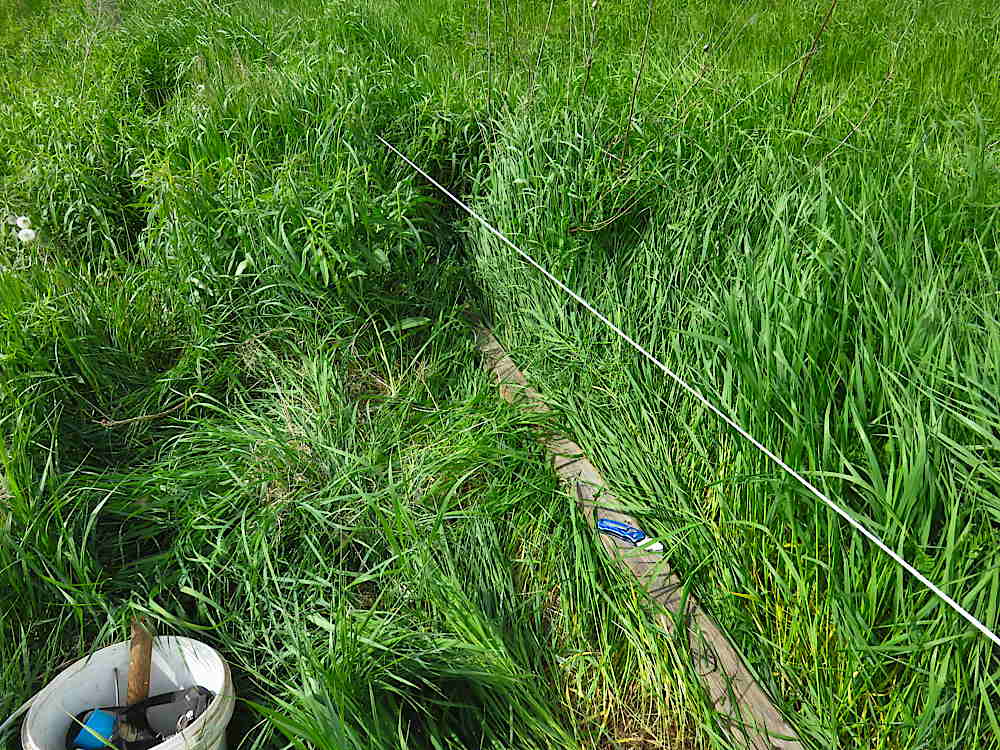
An experimental procedure, effectiveness so far unknown. In some spots, sections of tall grass are swallowing the single strand of electric fence that has so far protected the veggie patch from deer. To keep a nicely unpleasant jolt running smoothly, the grass must be cleared! I’ve used various methods in the past. There’s been the 48″ deck mower on the tiny tractor. Running over the strip under the fence line with the same tiny tractor. Or the handy string trimmer, aka weed whacker, that spits out microplastic particles as the nylon cutting line wears down. And the low tech large garden shears. This year, I’m doing things as manually as possible. If I had a scythe… Since I don’t, and the garden shears haven’t been at all as quick and efficient as I’d hoped, I had a new idea. Lay down a plank under the line—here it’s a 2x4x8—to bend the grass, slide it over a bit so the strip of bent bottoms under the plank is exposed, and slice through with a utility knife, using the plank like a ruler. It went pretty quickly, with only 60-70′ (18-21m) in total of sections to do. And the grass is gone! Whether this really works we’ll find out in how long it takes to grow back. Hopefully, the cut grass will dry into a mulch that helps block future growth. I’m modestly optimistic—the minimum expectation for me to try it at all. Stay tuned!