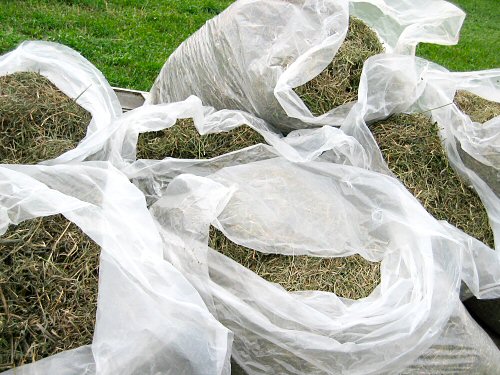
Fat bags of kinda fluffy grass-and-alfalfa mulch are the satisfying end of this little experiment (well, the real end comes next spring when we see how it does at sheltering the garlic for the winter). For this second batch, the bags are actually step 2, not part 4: I eliminated the greenhouse drying stage by letting the cut dry in the field and bagging it on the spot (which was always the plan—cut, wait, bag—the first time was just a bad weather thing). A small but to me really satisfying part is reusing those big clear leaf bags. We go through at least three or four new ones almost every week of the market season, for fresh cut spinach, mesclun, and other greens. They’re used once, and then I’ve been saving them for the last three years for JUST THIS PURPOSE! It’s great to see your plans materialize, right before your eyes!! Little things, big pleasure…
experiments
At the wheel
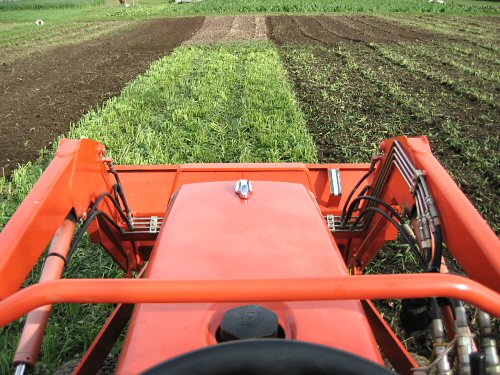
Tilling in the monster oats green manure/cover crop is a task where the Kubota compact tractor sure comes in handy. The oats is tall, dense and seemingly unstoppable by cold. It took a double mowing to get it down to a manageable state, and even then, it’s a slow till. The walking rototiller could’ve gotten the job done as well, but it would’ve taken several passes and a couple of tanks of gas, so I was happy to be at the wheel for this one. Originally, the plan was to let the oats winter kill, and work it in in the spring, but there’s just so much of it, I decided to take it out now rather than lose an extra week or two next year, waiting for it to break down. Decisions!
Zinnia vs calendula
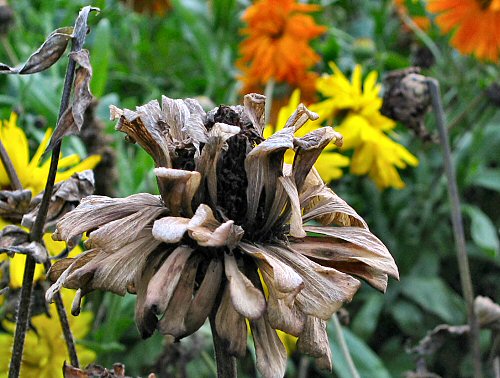
A vibrant slash of orange and yellow—the half-row of calendula seemed to be fairly unfazed by the recent blast of sub-zero cold, where the zinnias didn’t do so well. Another bit of first-hand frost experience to file away. Elsewhere in the flower test plot, the very few centaurea and asters seem to be kinda OK, still holding color. Otherwise, it’s all terminal shades of brown.
Putting food by
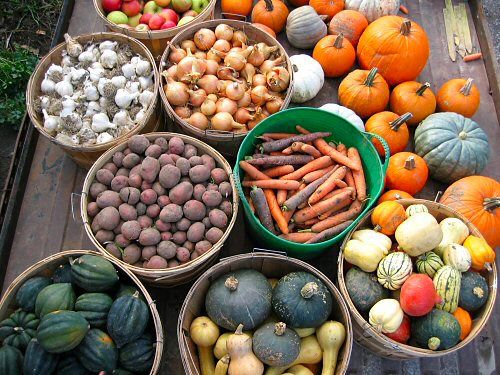
With the farmers’ market over, time to turn to fall-and-winter things. This year, I’m for the first time organizing a proper veggie selection for storage (it’s about time I started…training for that future CSA root cellar!). Instead of the usual bushel baskets of this and that, casually left around the barn to take their chances with temperature and location, now, there’s a bit of plan. For a root cellar, the basement of the farmhouse, the side with a dirt floor that used to be filled with potatoes when this was a fully working, big family farm. For the veggies, today’s haul has a mix of potatoes, assorted winter squash and pumpkins, various carrots, onions, garlic, plus apples picked up at the market. It’s a first step, there’s still lots more in the field: beets, spinach, collards and kale, herbs, and more carrots to go… Harvesting isn’t history just yet!
Harvesting Brussels sprouts
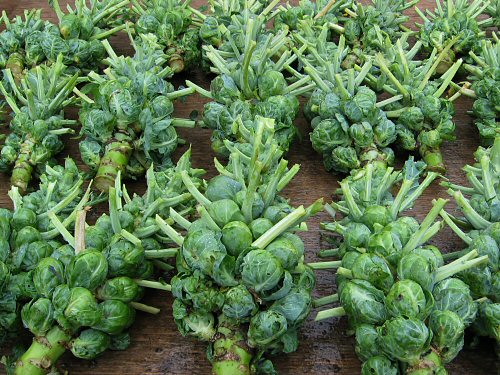
That was interesting! I’ve harvested Brussels sprouts by picking the individual heads, but for our first bigger harvest of about 60 plants, to speed things up, I decided to take the whole thing.
First try: chopping the base of the stem with the machete-like harvest knife was like hitting a piece of hardwood. Wow! Tough and cut-resistant… Next up, a sharp hatchet fared no better: a solid whack hardly penetrated.
So, we pulled ’em up, roots and all. They set in pretty good, but the main roots are shallow, so even with knocking off the clumped soil, this went quickly.
Next, we discovered that removing the roots is easily accomplished with a short, fairly rigid hand saw. Once we figured out the right starting angle, one and half strokes cut through the stems like butter: zip-zip!
Then to the harvest knife: swipe off the head, and then, holding the base of the stem, about four downward lopping strokes, rotating after each, to shear off the leaves. Kinda odd looking results, but efficient all around.
The sprouts, catching up from the summer drought, haven’t all filled out, still, a healthy yield of full-size to tiny heads from each one.
It was a completely novel, different harvest process than for all the other veggies. All the chopping and cutting was…fun!
UPDATE: The kind of odd presentation was loved at the farmer’s market—certainly said, “Fresh!”
Making mulch, part 3
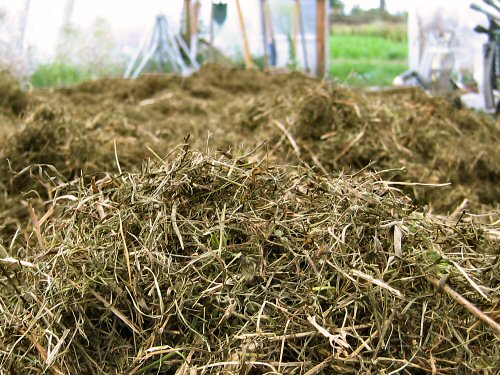
The grass and alfalfa mix spread in the greenhouse a few days ago is drying nicely—it’s almost done! It was a tad touch and go at first, the rows in the field were starting to turn black and decompose, and no sun in sight. So I turned it a couple of times a day for the first couple of days, doors wide open on both ends let through lots of air…and things worked out! Seems like a nice mix, with good bulk, not too fine. Then again, my mulch experience is in its early days, so we’ll see. Rough calculation: there should be enough to spread a fluffy 3″ (7.5 cm) over the new garlic plot. This experiment so far: not too labor-intensive, room for easy improvement to the process, seems like it would scale well (for covering larger areas), and RELAXING (some fieldwork is particularly enjoyable)… Grass-and-alfalfa mulch may have a big tiny farm future!
Making mulch, part 2
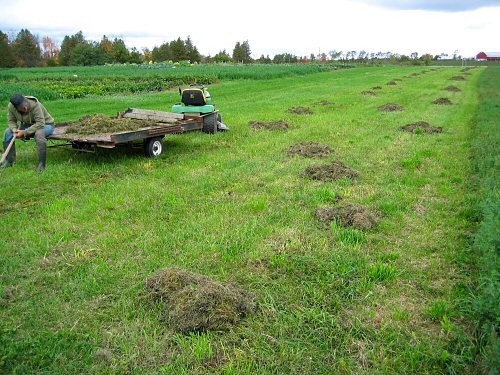
Working just ahead of more rain, Conall (fighting a cold that’s knocking people out around here—farmers can’t get sick!) and I raked the mini-windrows of grass and alfalfa into little mounds, piled it on the trailer, and dumped it in the greenhouse to finish drying. In the week since it was mowed, there was enough rain here and there to keep it damp, which wasn’t in the plan. Oh, well. A grass catcher for the riding mower would be the time-saving mechanical approach. This was a lot more fun, quite relaxing, a couple of hours well spent. Now, let’s hope it’ll dry, not rot!