Compressed air and rototiller repair

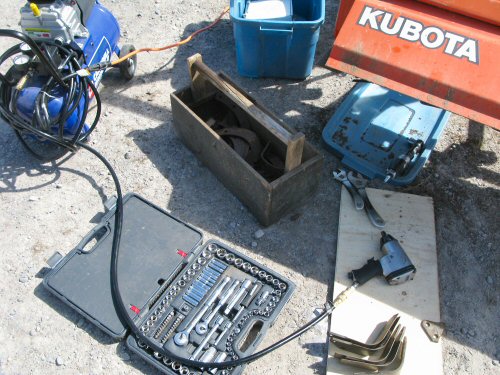
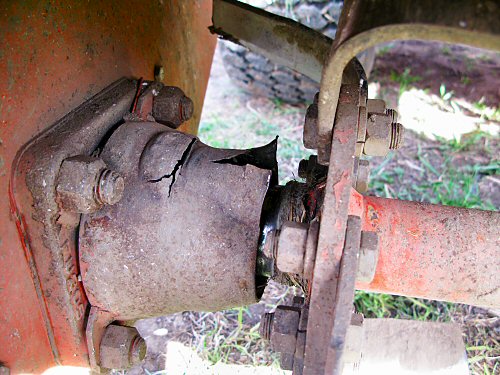
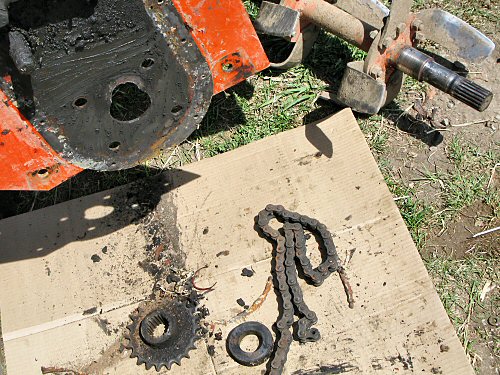
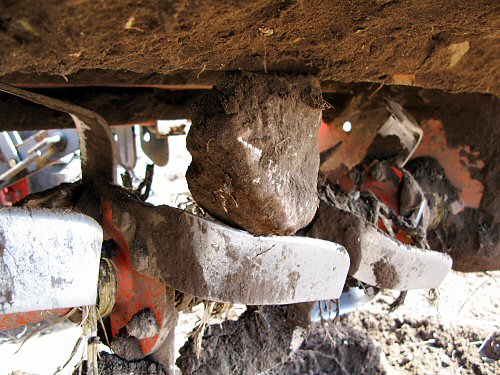
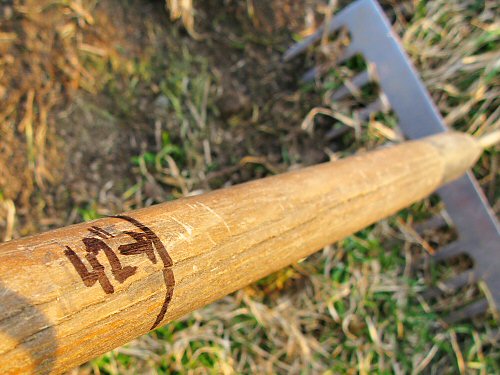
Looks like a whole lotta gear for swapping out one broken rototiller tine. Two bolts. BUT, this was a chance to try out the air tools with the new, tiny (8 gallon) compressor. So far, all it’s done is inflate tires.

The compressor is a smaller-scale replacement for the heavy duty one at the old farm. It’s not an absolutely essential bit of gear, but it does a lot of farm work: inflating, cleaning out things like screens and filters with blasts of compressed air, loosening big nuts and bolts (impact wrench), and removing lots of nuts quickly (air ratchet). And it can do more. I use it at least once or twice a week.

This unit is the top end of the home handyman line. The smaller tank means it can’t put out full pressure continuously for too long.

Sometimes, getting “home” gear for the tiny farm just doesn’t make sense, the equipment isn’t up to what you need it for, or, it breaks. But you often don’t need or can’t afford the same heavier equipment as, say, a more tractor-driven farm. Then, the choice is to rent/hire, or buy lighter duty IF it will really work.

Buying used equipment is another great approach, but, you need lead time—you want a tool there when you need it, not only after a good deal comes along—and you need extra buying skills to make sure you’re getting good used gear…

In this case, compressed air is used quite frequently, I couldn’t justify the cost of a commercial/industrial compressor, and I wanted it right away (here, the difference was two or three hundred dollars, and that adds up). Of course, I figured this one would work out, but you don’t know for sure until you try!

The impact wrench did just fine for de-bolting and re-bolting (I finished tightening up by hand). Now I know this little compressor can handle all the usual tasks on a tiny farm scale. Another CHECK on the new-farm, getting-set-up list. That’s good!

Rototilling results…

My first post title was “Pounding away,” but that sounded too brutal when it comes to garden soil. Still, that’s what we’re doing, what has to be done to stay on a reasonable planting schedule. Rototilling chops up the turned-under strips of sod into smaller, more easily digested pieces. The pic shows the result of one pass of the Kubota compact tractor with 48″ tiller. It’s still pretty rough, you can see clumps all over the place.

A quarter acre is getting this treatment, enough for the earliest direct-seeded crops. Hopefully, we’ll have the rest of the field disked well before it’s needed. Meanwhile, one or two more passes with the rototiller, hand raking, spreading a healthy amount of compost, and we should be ready to go. A rough and ready hay field-to-veggie garden conversion that should work out fine. As always, we shall see!

Soil inspection

A sunny, still chilly, fairly busy outdoor day. Did some test tilling this morning, with the Kubota compact tractor and 48″ rototiller. The solid ground hasn’t fully thawed out, but the plowed area is already nearly 50°F (10°C) at 6″ (15cm) deep. So I thought I’d have a go on a 30′ (9m) strip, to see how well it’d chop up with the Kubota.

The full plan is for disking—big plow, big tractor—by Peter down the road. That would break up the moldboarded strips, finishing up with the little (but mighty!) Kubota. But between the weather, and unexpected things happening, you never know when a date with off-farm machinery will fall through.

I want to get the early stuff—spinach, garlic (yes, have to try spring planting this year), onions and so forth—in as early as possible. So we’ll probably be prepping an area with just the Kubota.

In the afternoon, Andie (aka Andrea, aka Max) dropped by for the first time, to check things out. She’s finishing up school, and planning to spend a couple of days a week for the summer, learning about small-scale farming the hands-on way… We strolled around, Andie tried out some seed starting with a tray of arugula, and we chatted.

Everyone’s first visit to the farm is a bit different, and there are all kinds of reasons why people want to get out in the field. This time, a good deal of the conversation involved university, graduate studies and the like, along with…tiny farming. It’s good to have an idea of who you’ll be working with, both ways—a comfortable, interesting fit really makes a difference in the tiny farm experience!

This season, there’s a bit of a blog plan: to show a lot more of the people side of the market garden! Today, as often happens, I forgot to take photos while we were actually doing stuff, so right at the end of her visit, Andie checked out the freshly rototilled ground, and I snapped an official Her Day 1 pic. The soil looked good, it’s a clayey loam (pretty much like at the old farm), with the sod breaking up nicely, and Andie seemed happy with the prospects, so we should be checking in again with both real soon! :)

Working the tiny tractor

Rototilling with the Kubota compact tractor

Working with the tiny tractor always looks like fun: after three seasons, it’s still fun for me, and just about everyone else seems to enjoy it, too! This Kubota compact tractor is dead simple to operate, rugged and reliable, easy on diesel, and nonthreateningly…tiny. And it’s as close as we’ve gotten to the other world of big, mechanized agriculture. Tilling with the 48″ rototiller is the Kubota’s main in-the-garden-beds field duty (and that’s something I try to keep to a minimum). I’ve come to rely on it for this one critical task, and to a lesser degree, for moving earth, manure, compost and other things with the front-end loader. Particularly, when time gets short and weeds on open sections start to go crazy, it’s great to have around. Here, Libby tries rotilling for the very first time, working up two sections for planting out fall brassicas (broccoli, cauliflower, cabbage,…). And, yep, looks like she’s having fun!

Onions and potatoes go in

A satisfying planting day: all of the onion sets (around 2,500) and 300 lbs (136kg) of potatoes are in.

For the onions, Raechelle (first day in the field), Lynn, Jamie (a new CSA member), Shannon (here for a month), and I made quick work of the onions: Stuttgarter yellow cooking and yellow Spanish.

It’s amazing how much fun people working together in a garden can be, there’s a positive, happy, energy that I think comes from sharing time in the dirt (maybe that’s just the tiny farming romantic in me, but I think not… :). Plus, potentially tedious tasks are done in no time!

For an encore, Shannon and I polished off the potatoes, finishing just as the sun set and another chilly evening set in. This year, I used the furrower attachment on the Horse walking rototiller to plow what turned out to be excellent trenches, in ground that had been tilled up about a week ago. Varieties are Yukon Gold, Chieftan (red), and Kennebec. In this batch, all varieties were about chicken egg-sized, so, no need to cut ’em into pieces. In-row spacing is 12″ (30cm), between row is 24″ (60cm), with a bit wider path every two rows. We covered them by hand-raking. In all, 40 x 50′ (15m) rows, which is about 2000 plants.

Every year, I’ve tried a different potato approach. Last year, I made much shallower trenches with a hoe. As far as set-up, this time around was the best yet.

The onions are in a bit later than usual, I’ve had them done as early as mid-April, but no worries, and potatoes are around the usual timing. I grow a relatively small quantity of both of these crops, they always sell out, and they feel like a good fit for CSA and farmers’ market from the middle of summer on, so having them at the absolutely earliest date isn’t that important at this stage. And what would tiny farming be without lots of room to improve?! :)

Big rototiller breakdown

This is the not-good look of torn metal, not something you want to see on gear that’s both fairly essential to the tasks at hand, and ALWAYS expensive to repair. Right in the middle of some very satisfying tilling on Thursday, I heard a mild, unalarming scraping-squeaking sound coming from the rototiller on the Kubota compact tractor, so I stopped to check, just in case. When I rotated the tines by hand, I noticed the shaft had a lot of play on the left side, you could move it up and down a good inch or two. I cleaned off some wound up bits of plant and then dirt from the end and found the cap protecting the bearings had been split and peeled back. Uh-oh. It turned out to be not great, but could’ve been a lot worse. Somehow—not enough grease, or dirt finding its way into the bearings and gearbox, or both, or…something else—the shaft that drives the tines had completely pulverized the bearings and had been rotating directly against metal! Imagine the heat, the tortured, red-hot metal-on-metal—but it was still tilling real good… In the pic below, you can see where it ground out its own path, that extra piece of  hole on top of the larger one. It had burned through the tiller housing, another plate behind it, and a heavy die-cast fitting that supports the shaft (that bolted-on square piece in the pic above), and jogged up enough to split the dust cover. Man!

Of course, PARTS are always at hand, it just takes cash and a call to the tractor dealer, and presto, delivery by next day. Like an expensive little miracle… I hate buying parts, you need ’em, have absolutely no way to tell what they’re “really” worth, and they cost a fortune. This little boxful: $400 (well, besides the 4-bolt flange bearing, oil seal plate, bearing cover, and a couple of other bits, that includes the annual air and oil filters, and oil…). Anyhow, that’s the way it goes: things break down, gotta be fixed! This morning it was put back together, like nothing had happened at all…

Field day!

Winter-killed brassicas

Left to the last possible harvest in the fall, brassicas like kale, Brussels sprouts, cabbage, broccoli and cauliflower (above), were eventually winter-killed and now have to be cleaned up—one of the first field-readying jobs of spring! Today, I started. (EVERY day is a field day from here on in, through November at least, or the first heavy snow that sticks.) A day of tiny farming fieldwork is really just a whole lotta gardening… Now that the ground has dried out enough to be tillable (that could’ve been yesterday, but…errands and CHICKENS), and warmed up enough to direct seed the crops that germinate in cooler soil, it’s a whole new world of things to do…and think about doing. There are two basic ways to ponder the progress of the season’s garden: by timing and by area, each useful in its own way. Timing is mainly about the plants: when to seed, when to water, when to harvest. Area is about where to locate particular plantings, which in my case doesn’t mean absolutely running out of space, since there’s lots more field to expand the garden into if I wanted to (which I don’t), but more like where to position stuff efficiently, so you’re maintaining crop rotation, but not having to, say, drag hoses all the way down the garden to a couple of newly seeded beds that need daily watering in (although there’s a field production plan made up, there are lots of adjustments on the way—where to put stuff will come up again and again!). So, the start of the season is mainly about area, because you have to prep beds and get veggies in in a rough order—cool soil seed, then cool weather transplant, then warm soil seed and transplants—and the timing is a constant: it’s all right away! One way I keep overall track of this garden is by counting sections: it’s about 2.5 acres, divided into 40 50’x50′ squares (each fits 10-16 beds, depending on width). At some point in the next six weeks or so, almost all SHOULD be planted out, nearly 40/40. Today, I started seeding in one…

Tilled and untilled: Partially composted cow manure was spread and incorporated in the fall. Now, a light rototilling to prepare for seeding is all that’s needed. Today, I used the tiller on the Kubota compact tractor.

Rock beats tiller: There are lots of stones in this field, they work their way up continually, and even a fist-sized rock, caught in the right way, can stall out the 48″ rototiller on the Kubota (it’s a tiny tractor!). No problem: remove and restart.

Getting set to seed: I work mostly one or two sections at a time, prepping an area with the tiller, marking the beds, then seeding (or transplanting). This way, I can get the crops that need to be started in as quickly as possible. Here’s the cart towed by the riding mower, loaded with assorted seeding gear (and some transplants being ferried to the greenhouse).

Making beds: Oh, there’s A LOT of tiny farm history behind my bed marking methods. :) I’m still working on the most efficient way to set up beds. Right now, it’s fairly streamlined, involving a 100′ tape measure, stakes, and pacing off distances. This year, I’m planting in 3′, 4′, and 5′ beds (that’s path included), depending on the crop.

Customizing the Rake: Every season, I re-ink faded measurement markings on a couple of hand tools I use the most. Here’s a convenient mark for 42″ from the top of the handle (that’s the planting area width for a 5′ bed. There are other marks further up the handle, and the whole rake is exactly 5′. It’s convenient for quick checks, especially on the favorite rake that I use for touching up beds right before seeding. And so, off we go…!