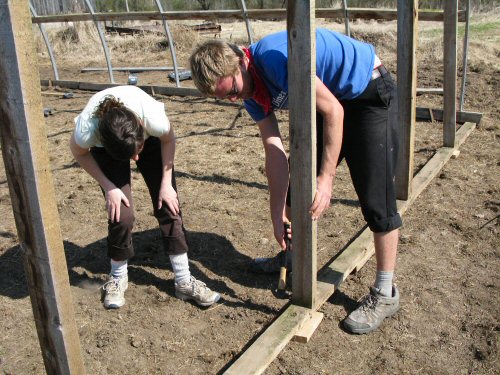
With the clamoring demand for greenhouse space around here, getting the hoophouse finished now that the frame is up is a PRIORITY. Yet here we are, a week later, framing the end walls and installing the wood along the sides for the roll-up section of the sidewalls. A stretch of wet, cold weather was the main cause for delay. Plus a really long list of other critical things to do at the same time.
For maximum satisfaction on the tiny farm, you want things to effortlessly flow along, from one small task or specific problem, to the next (IMHO, of course!). Right now, there are lots of phone calls to be made, things to follow up on, info to find, bits to write and forms to fill, stuff to source and buy, all sorts of more abstract, open-ended, DISTRACTING activity. Eventually, it will settle down into a more-or-less all-garden flow…
In the pic, Jordan and Lynn work on reassembling the end walls. The ground isn’t absolutely level, there’s a gap to fill underneath the 2×4’s along the bottom (the sill plate). This isn’t a problem as the weight of the hoophouse sits on the 4×4’s running along the sides—they’re firmly anchored, so we’re set.
In this case, we can’t cut the studs longer to extend the wall, because we’re going to reattach the existing, pre-cut plastic. Everything has to come together the way it was. I should’ve numbered and marked each rib and piece of wood as it came apart. I’d usually have thought of that, but in this case, I only marked the main plastic, so that we could reverse it. Now, fitting it back together is a little puzzle… After this, there’s not much more to do, just wait for a windless day to skin with plastic. Onwards!


Ah the rites of spring. This is where we could use a clone. Or two. I have to keep reminding myself I can get it all done but only one thing at a time. It will be great to have the hoop house running. I use individual hoop houses of sorts, but am planning on digging a walapini, or underground green house, this summer.
Oh do I hear you Art. Mike, what you wrote cuts to the quick of all farm tasks and planning. The frustration factor can run high when too many fires need quenched simultaneously. Does anyone else suffer “to do” list insomnia? Ha Ha. I still think your whole Tiny Farm is amazing.
Julie
Finding a windless day might be quite hard considering the weather over the past weekend, don’t know about where you are, but down here in Mississauga we almost had our greenhouse walls fly away, and they’re pretty permanent. Think something was said about the strongest winds in 40 years or something like that.
Do you move your hoophouse?
You could really add some strengths to your end walls by driving in a couple of steel tube posts next to the sills and then attaching them to the sill (drill and bolt or use brackets)
Brian
I’ve been puzzling over sufficient support for my endwalls, in struct. engr. terms, to take the overturning moment created by wind from one end to the other. I’m amazed when I see a design such as the one illustrated, with nothing into the ground at endwalls. My hoops will be extremely lightweight, being 1/2″ plastic conduit, which does not provide any real resistance from endwise winds, so the endwalls need to take all of that force. I’m planning at least 3 lengthwise purlins of same conduit, firmly attached to all hoops. The l/r isn’t much help in compression from endwise wind, but… This morning I decided on 4×4 posts to 36″ below grade into the clay which starts 18-24″ below grade, packing further clay around the posts farther up in the hole.