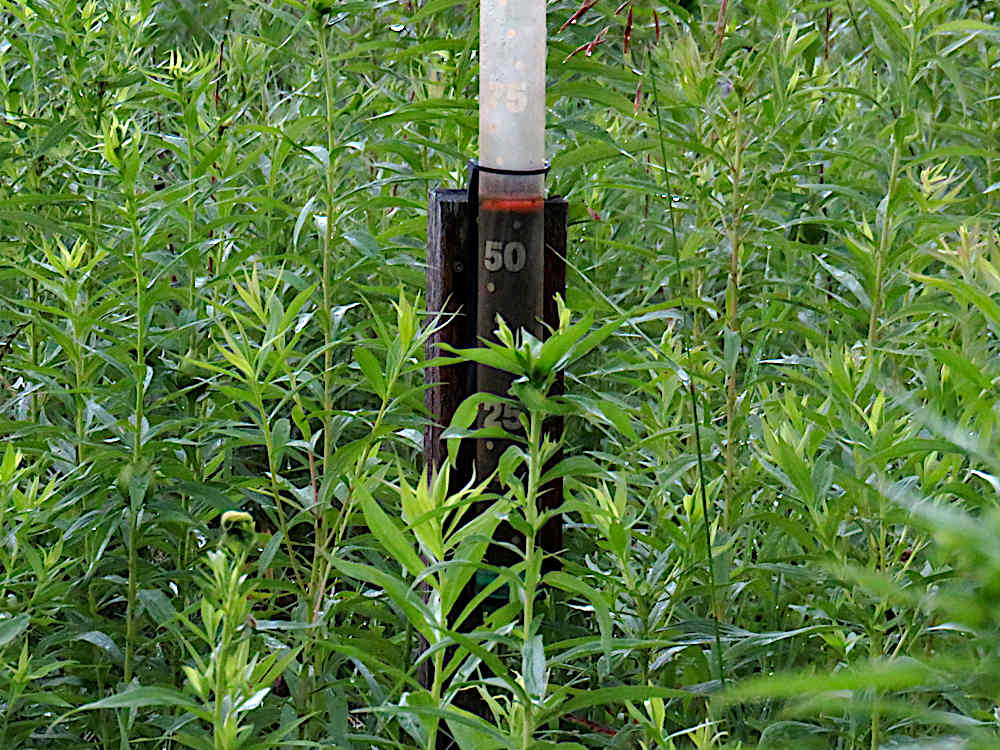
The jumbo rain gauge really can be seen from 50′ (15 m) away. That plus a decent zoom on my camera meant I didn’t have to wade into tall wet goldenrod to see how much today’s thunder and rain added up to. Two inches at least, accounting for the little that hadn’t been emptied out from a sprinkling last night. Erratic weather means some nice patches as well as extremes. After our second mini-heatwave, it’s been just beautiful. Sunny, low to mid-20s, with breezes and no humidity. And now, some rain. Well, a lot of rain. Still, weird for being old days normal, and great! Another week like this in the forecast. And then, what’s next?!
Flashback: 2007
Seed starting tools
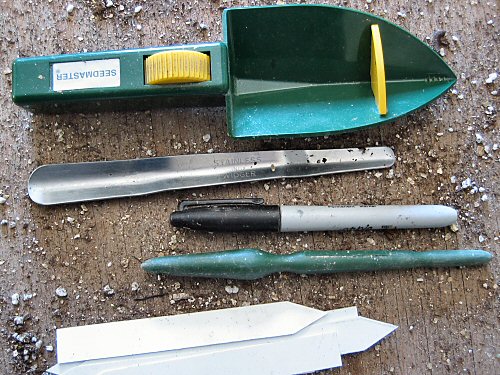
It doesn’t take much to get seed started indoors. Fingers, mainly. The Seedmaster is a bit of a gadget from last year, not liked much at first, but rising on the tiny tool chart. You roll the yellow wheel, which clicks and causes the tool to vibrate, shaking seed down and over those little ridges (speed bumps) near the tip. At first, the wheel was stiff and the whole process seemed slow, but this year, it’s loosened up and once you get used to holding it at the right tilt for each type of seed, it definitely works faster for me than finger-pinching tiny seed. It came with four yellow inserts, with different sizes of cutout at the base to further slow down different sizes of seed, but I keep it fitted with the largest. The stainless steel transplanter tool acts like a shoehorn, and works great for popping out plugs when potting up (it’s all in that little bit of a curve!). The permanent marker and plastic plant labels are of course indispensable (DON’T GET MIXED UP!). The green dibber (dibbler, pointy tool, whatever) is nice in principle: it comes in handy for poking little dents and holes, but fingers often work faster.
Monarch down
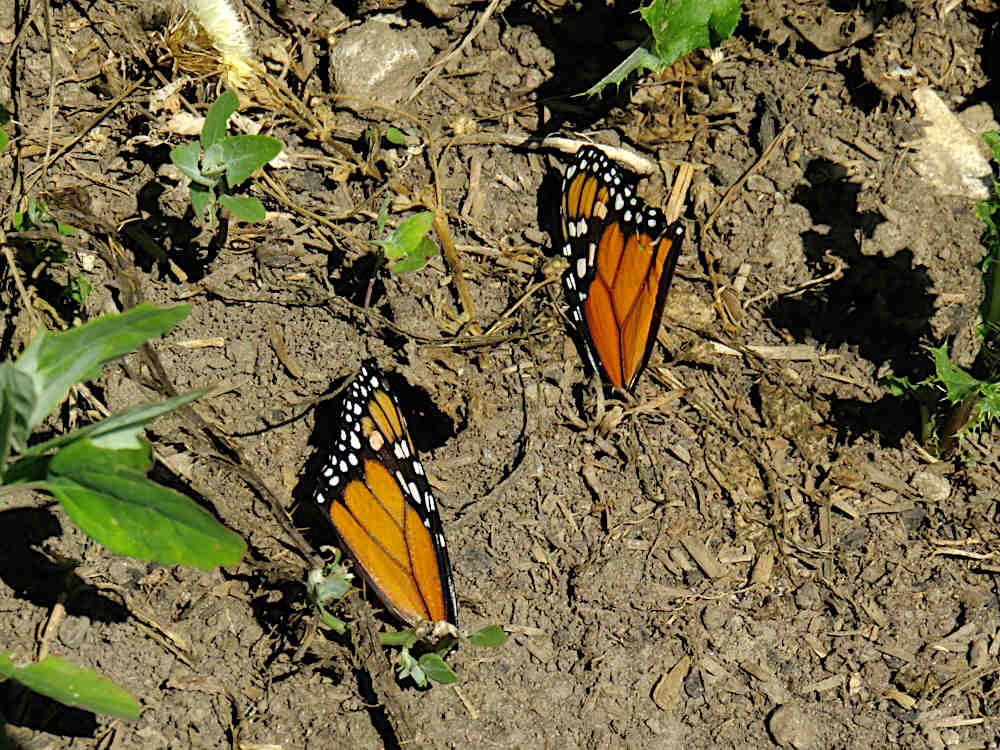
Glancing down, I thought it was two Monarch butterflies taking a break together. Turned out to be two Monarch wings, with no body to connect them. Probably a nutritious protein snack for some predator. Looking into it a bit more, I discovered from photos that these are only the big wings. Monarchs have two fully independent pairs of wings, the big ones for power, and little ones tucked in back for steering and whatnot. When their wings were torn off, the much more delicate little ones probably got shredded, partially eaten, or just blew away. And so Nature goes. The big wings still carry the brand! :)RESEARCH: Monarchs exclusively eat milkweed, which contains a heart attack toxin that they concentrate in their wings. Enough of it can cause heart seizure by disrupting a creature’s electrical system. But the poison is also super sharp and bitter, so if a whole butterfly is eaten, it’s usually violently vomited up, discouraging future Monarch eating. Psychological defense through non-lethal pain, like deer and the electric fence. So smart Monarch predators rip off the wings. These specialists include some birds, praying mantis, field mice. There’s nothing about Monarchs that isn’t hardcore and fascinating.
Tied down garlic harvest
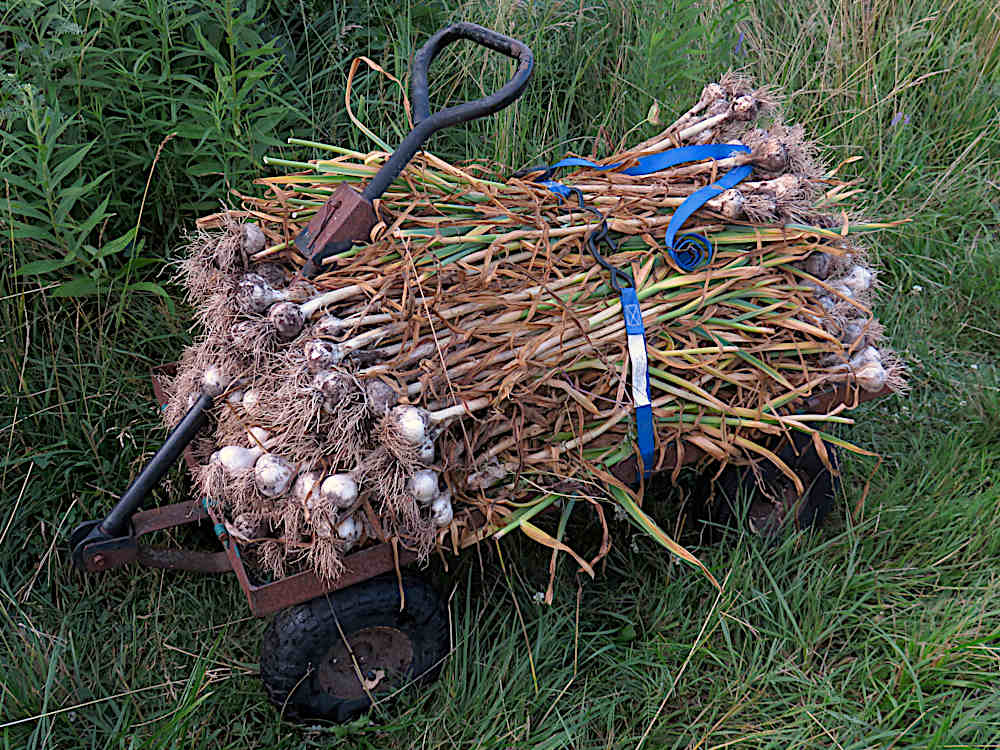
Who needs sides when you have ratchet tie-downs?! A load of harvested garlic, stacked on a trusty hand wagon that has been trundling around all sorts of things for many, many years. They’re off to be stacked on a wire table in the barn to dry out!
As the leaves die back
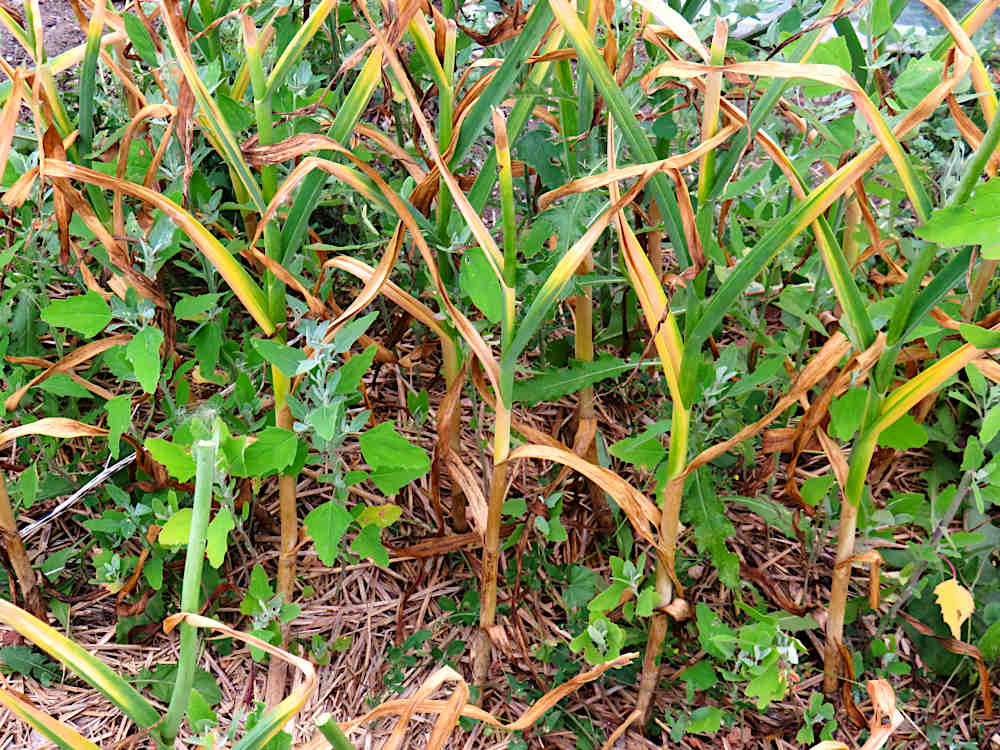
The rule of thumb for garlic harvest, as far as I’ve gathered, is they’re ready to come out when the bottom third of the leaves, or 2-3 leaves, start dying back. I’ve always sort of followed that, but mainly checked by harvesting two or three from different spots every couple of days, starting when the first leaves begin to yellow, how often depending on the weather. This year, because they’d been under row cover the whole time—the anti-leek moth strategy—getting 15% less sun according to the cover specs, I decided to wait longer. They were uncovered into full sun about 10 days ago, and I decided to let them do all the clove growing they could do.
There may be a more scientific, measured way of timing the harvest on big commercial garlic farms. Sensors could be involved! On this smaller scale, an educated guess and harvesting samples has been my approach. If the last month was very wet, an earlier harvest is a good idea. One extraordinarily wet June, rainy and always overcast, left the garlic sitting in pretty damp soil all the time. Even harvested early, at least half had swollen and split the skins at the bottom, making them not great for through-the-winter storage.
Garlic apparently does most of its clove growth as the leaves start to die off—a change of focus. This continues till about half the leaves have started dying back, which makes sense of the rule of thumb. Once the yellowing starts, it goes pretty fast. The idea of not letting them yellow too far is that every leaf blade is a layer of the papery skin that holds the bulb together. The leaves extend right down around the cloves, and once they’re dead on top, they could rot underground. But, if it’s not real damp down there, the buried leaf just starts to dry out. So if it looks alarmingly dead up top, it shouldn’t be a problem, more like the bulbs have started curing—drying out—in the ground. I’ve been checking.Doesn’t sound very precise, in this precisely measured digital world. And these field guesses can be wrong. Overall, though, going by simple experience, topped up by reading and chatting, continues to work out just fine!
White and green onions, weeded
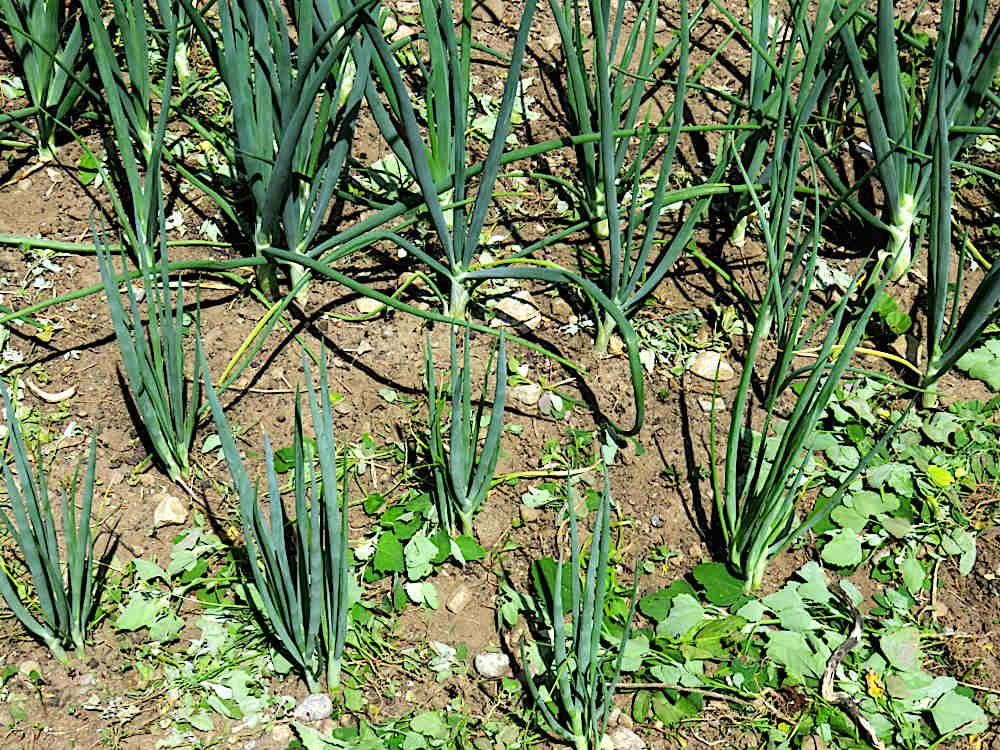
Freshly weeded white (top rows) and green onions. Lots of uprooted lamb’s quarters lying around, enough for a big salad (they are quite tasty, nutritious, too, as you can count on me to say). I haven’t really looked at the white onions to see how they’re starting to size up. It’s the first time growing them, and I’m curious about how they turn out, and how they’ll taste! They all seem to be doing great, with a little weeding to help them along.
Proof: Beet seeds are really tiny dried fruit
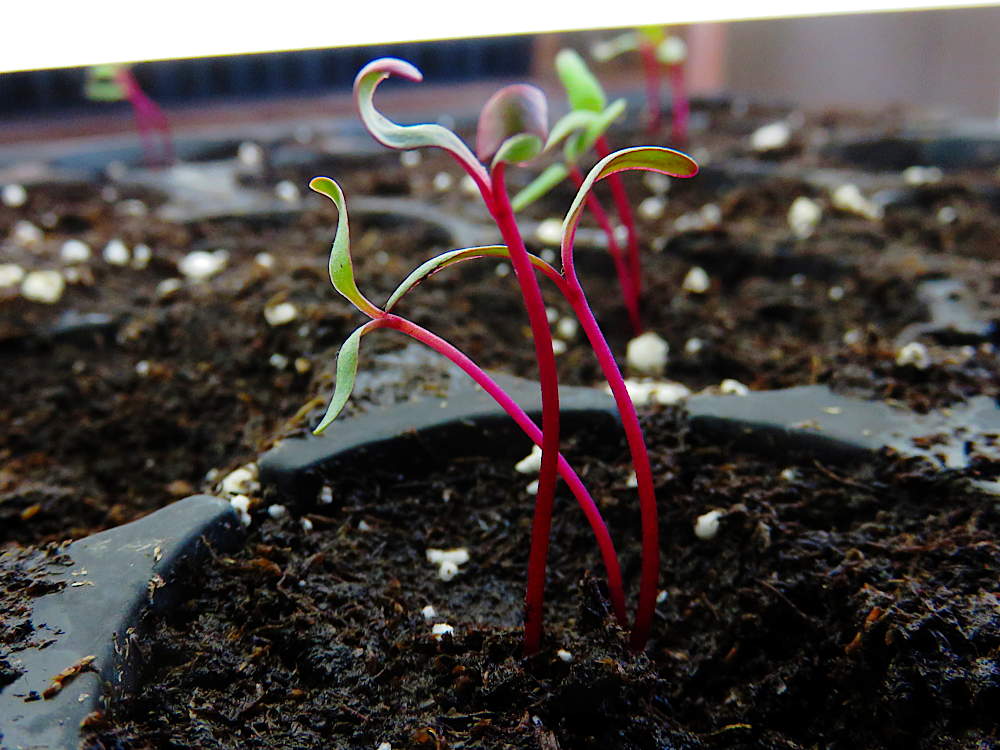
One of the basic things you learn about growing beets is that the seed isn’t actually seed, it’s small dried fruit that contain up to three or four tiny seeds. You’ll often get a tight little cluster of seedlings emerge, which could be a problem if you were precision seeding, going for exact spacing and no thinning. That sort of preciseness has never been a factor on this tiny farm—dealing with the vast volume of tiny carrot seed poured out by Earthway seeders in early years totally eclipsed any thinning issue one may have had with beets. Still, here’s PROOF. Beets aren’t transplant crops, but in this gardening year, I decided to try some in plug sheets. One shriveled fruit per cell. And here you can see, one “seed”, three seedlings! Could’ve also cut one open, but what’s the fun in that! They’re looking quite stretched under the fluorescents. Carrots definitely don’t like to be casually transplanted—they grow, but in my one experiment, they produced stubby little carrots. Probably something to do with the tap root being disturbed. Beets could be the same!
Melon tendrils twine
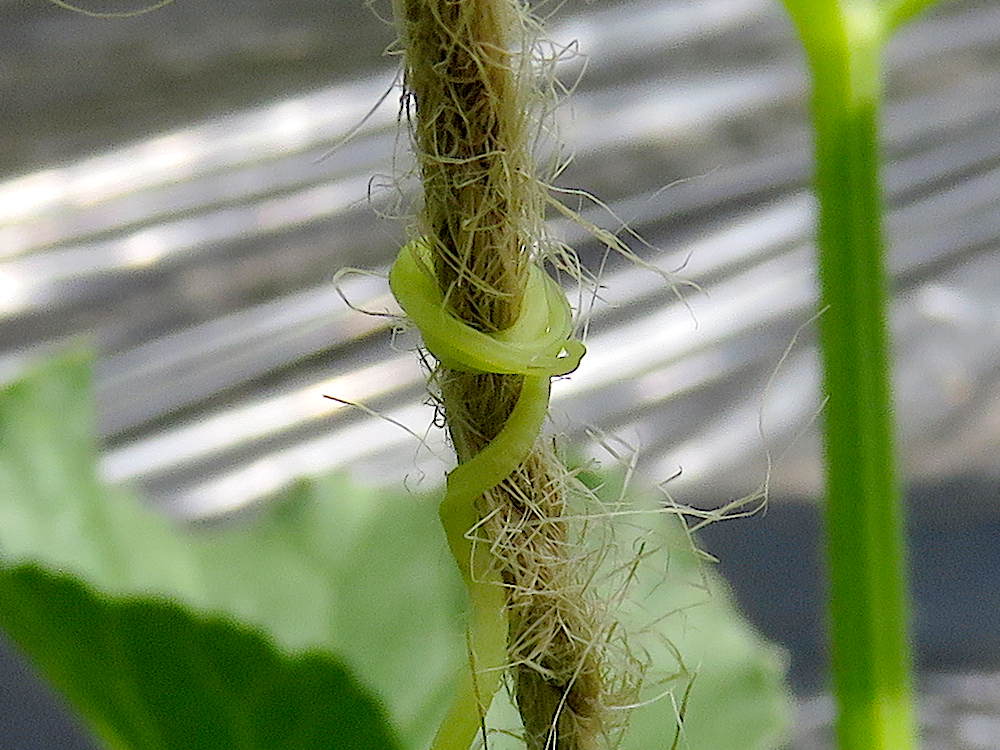
This is what I’d been waiting for: a melon tendril at last took the offer and coiled itself firmly around the conveniently positioned twine. It’s part of my misguided trellising idea for a few cantaloupe plants. I haven’t grown melons often, and always let them sprawl on plastic, so I guess I’d forgotten that trellising melons is not a great idea. Just the thought of heavy fruit hanging doesn’t make sense. But rather than think about it, I built a little A-frame, and then started crisscrossing twine in a vague 3D grid. Well, I’ll reclaim my screws and scrap wood at the end of the season, and the jute twine can return to the earth.