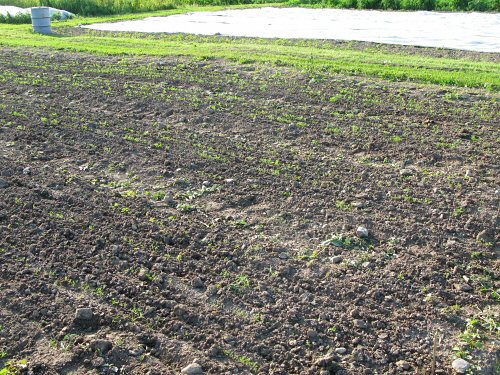

Not much to look at, yet, but the last plantings of 50-day-plus fall crops are doing fine. Here, carrots and, protected from flea beetles by floating row cover, one of two sections of brassicas, including broccoli, cauliflower and kale. There’s a bit of timing risk here, depending on the weather, if growing goes slow, they might not make it to maturity in time for market. But the sun’s been shining for a couple of days now, and the long range forecast is for more of the same. If all goes well, these will be ready for harvest through October!

And the summer-seeded spinach couldn’t be doing better. There are two plantings, the first on July 22, and the second (left of the photo) a couple of weeks later. Here, Lynn hoes the first set: in this summer’s wet, cooler, cloudier conditions, germination was absolutely solid, as good as or better than regular spring seedings. Fall spinach has never been this good, by far. Excellent!

How do you keep the row cover down?
The flea beetles got all my cabbage and broccoli. They look like brown lace. Sad to see.
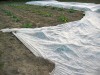
Sheri: I use a combination of rocks and burying. The field has a lot of rocks, more come up every year, forced up during the freeze and thaw of winter, and we’ve built up a good anchor rock collection. The main row cover size we use is 50’x14′, and the usual routine is to anchor the corners and the mid-points with really heavy rocks, 15lbs each. Then, it’s anchor every few feet with either smaller rocks (they have to be at least 6-7lbs), or by the burying method, which is: scoop out a couple of handfuls of soil, then push the row cover into the small hole and bury it with the removed soil. For burying, the earth has to be loose, hand-scoopable, or it’d be quite a bit of work having to dig all those little holes. The soil here is quite heavy, so burying is really only practical if it’s been recently tilled (which is usually the case right after transplanting). In looser, sandy soil, this might be easier, and you may also be able to bury the entire edge in a shallow trench.
Couple of tiny tips: Burying takes a little longer, but it’s usually overall less work, since you don’t have to pick up so many rocks when you remove the cover. BUT, if you’re cultivating under the cover, removing it and then putting it back, rocks will definitely be easier. Also, a small pile of smaller rocks doesn’t equal one bigger rock of the same weight, wind will roll the smaller rocks off.
How carefully you anchor the edges to eliminate gaps can also make a difference in effectiveness. For pest control (here, it’s flea beetles and cucumber beetles), effectiveness seems to depend on pest pressure level: how many are around, and how much they like the particular crop and variety (these DO make a difference). Beetles can get in through small openings in the edges. Most of the time, little gaps and spaces that open up under stronger wind are OK, but sometimes, when the bugs really like a crop (like, um, bok choi in spring comes to mind for flea beetles), you have to keep the edges down real well or they’ll get in there.
If your covered area is quite small, you can be meticulous, but if you’re doing quite a big area by hand, it can take lots of time and upkeep to keep edges always anchored tight, so you kinda learn what you can get away with as you go. At least, that’s my experience. ;)
Oh, yeah, for frost protection, row covering is a lot easier, you mainly want to put something between the soil/crops and the sky, so edges aren’t a big concern. We’ll anchor frost cover with a few heavy rocks: at the four corners and at only a couple of spots down a 50′ length.
That’s where I’m at. There are no doubt other approaches, but these have worked out pretty well here, for our scale and needs. Hope the info’s useful!