
Hoophouse end walls

With the clamoring demand for greenhouse space around here, getting the hoophouse finished now that the frame is up is a PRIORITY. Yet here we are, a week later, framing the end walls and installing the wood along the sides for the roll-up section of the sidewalls. A stretch of wet, cold weather was the main cause for delay. Plus a really long list of other critical things to do at the same time.

For maximum satisfaction on the tiny farm, you want things to effortlessly flow along, from one small task or specific problem, to the next (IMHO, of course!). Right now, there are lots of phone calls to be made, things to follow up on, info to find, bits to write and forms to fill, stuff to source and buy, all sorts of more abstract, open-ended, DISTRACTING activity. Eventually, it will settle down into a more-or-less all-garden flow…

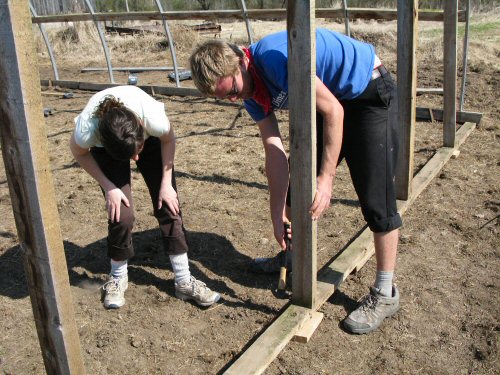
In the pic, Jordan and Lynn work on reassembling the end walls. The ground isn’t absolutely level, there’s a gap to fill underneath the 2×4’s along the bottom (the sill plate). This isn’t a problem as the weight of the hoophouse sits on the 4×4’s running along the sides—they’re firmly anchored, so we’re set.

In this case, we can’t cut the studs longer to extend the wall, because we’re going to reattach the existing, pre-cut plastic. Everything has to come together the way it was. I should’ve numbered and marked each rib and piece of wood as it came apart. I’d usually have thought of that, but in this case, I only marked the main plastic, so that we could reverse it. Now, fitting it back together is a little puzzle… After this, there’s not much more to do, just wait for a windless day to skin with plastic. Onwards!
People at work: hoophouse goes up!

Another beautiful and busy day in the field, with Lynn, Mel, Jordan, Tara and, for her first full day, Andie, all variously raking, tilling and building. And eating lunch (can’t wait for proper farm food to kick in!). The most VISIBLE accomplishment today: we put up the frame of the hoophouse, which is the main part of the job. This was mostly done by Andrea and Jordan, first-time building for both of them, with me holding hoops, furnishing tools, and starting them out with some how-to advice. Working with light, pre-formed metal is particularly satisfying, things can go up fairly quickly, to produce dramatic results (or maybe it’s just me, waiting for that greenhouse!!!). It seemed like the satisfaction at the end was pretty deep! :)

Screwing the hoops to the ridge is the main structural task. We used the bucket on the Kubota compact tractor as a raisable platform…

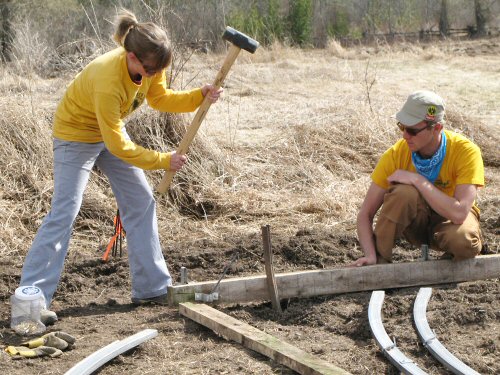
Since this is a re-assembly job, all the parts and pieces were there to be…assembled. First, lay out the 4×4 base, and pound in eight 3′ (0.9m) iron T-bar stakes to anchor the hoophouse. The T-bar is attached to the wood with lag bolts. Pounding was relatively easy, the ground is still soft, but a little bit of a workout. And if you look closely, near Andie’s foot and Jordan’s knee, you can see the brackets that the hollow steel hoops fit over, at 4′ (1.2m) spacing…

Next up, starting the frame. Attaching the first two pairs of hoops to the ridge is the trickiest part. The hoops slip over stubs in the ridge, then they’re screwed in place. A cordless drill and a couple of wrenches were all the tools we used. It’s wobbly at first, the more hoops you add, more stable it gets!

And there we are! Andie tightens up nuts on the cross-braces (purlins). In front, the lumber for an end wall is layed out. Halfway there. All in a tiny farm day’s work…