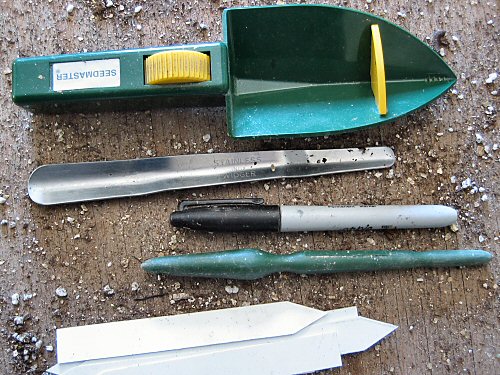
It doesn’t take much to get seed started indoors. Fingers, mainly. The Seedmaster is a bit of a gadget from last year, not liked much at first, but rising on the tiny tool chart. You roll the yellow wheel, which clicks and causes the tool to vibrate, shaking seed down and over those little ridges (speed bumps) near the tip. At first, the wheel was stiff and the whole process seemed slow, but this year, it’s loosened up and once you get used to holding it at the right tilt for each type of seed, it definitely works faster for me than finger-pinching tiny seed. It came with four yellow inserts, with different sizes of cutout at the base to further slow down different sizes of seed, but I keep it fitted with the largest. The stainless steel transplanter tool acts like a shoehorn, and works great for popping out plugs when potting up (it’s all in that little bit of a curve!). The permanent marker and plastic plant labels are of course indispensable (DON’T GET MIXED UP!). The green dibber (dibbler, pointy tool, whatever) is nice in principle: it comes in handy for poking little dents and holes, but fingers often work faster.
Tools
Equipment for large-scale agriculture is too big or too expensive, and many home gardening tools don’t work efficiently on larger jobs or break easily. Tiny farming on plots up to two or three acres requires its own special gear…
Grow racks at night
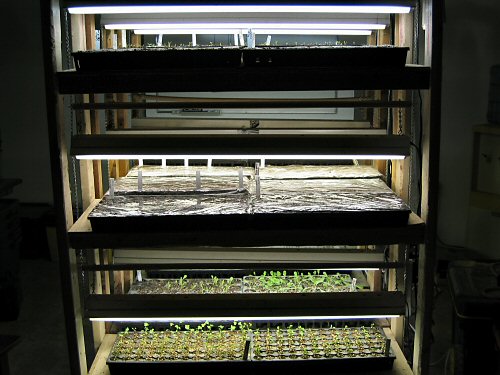
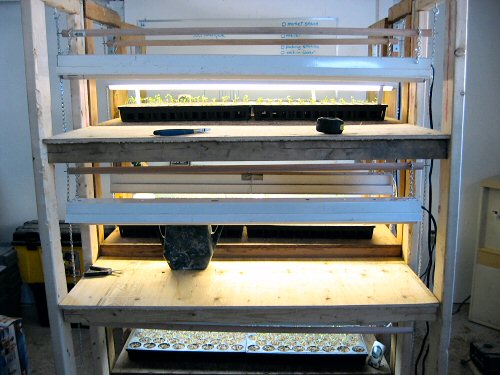
Plant racks, light stands…I usually call ’em grow racks. They’re filling up now.
Pushed to capacity, the three racks can hold a total of 36 trays, 12 each, or four trays per shelf. So, depending on the size of the plug sheet—I use 38s, 72s, 128s, 200s—I can start between 1,368 and 7,200 seedlings.
Sounds super-efficient. HOWEVER, it comes down to the light. With four trays per double fluorescent fixture, the light is pretty stretched, and a lot of rotating is in order.
Also, most of the fixtures are the old standard T-12 type, where the light is stronger towards the middle of the tube. You can clearly see the difference in growth if you leave trays in the same position for a few days. The newer T-8 type lights more evenly from end to end and uses less power, but I don’t feel like replacing all the fixtures (a couple in there are already T-8).
It’s an ongoing experiment to see which size plug sheet to best start in for each crop, given the light situation. That in turn determines if or how often I need to pot up to larger quarters before it’s time to transplant into the field.
All in all, I’ll get around 2,500 seedlings off the racks this year.
Grow racks in action
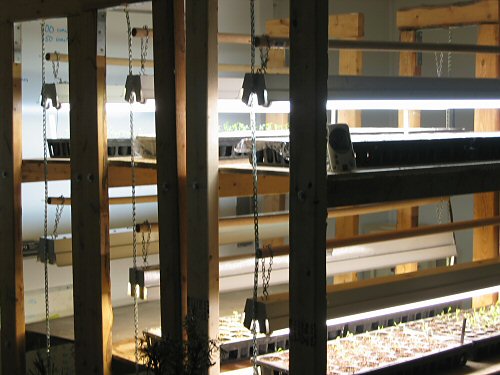
The grow racks are starting to fill up. First trays of eggplant and peppers, seeded yesterday, sit up top where it’s warmest. The lights run 14-hours a day, on a timer, with an extra hour or so of early morning ambient sunlight from windows on three sides of the room.
Seed starting station
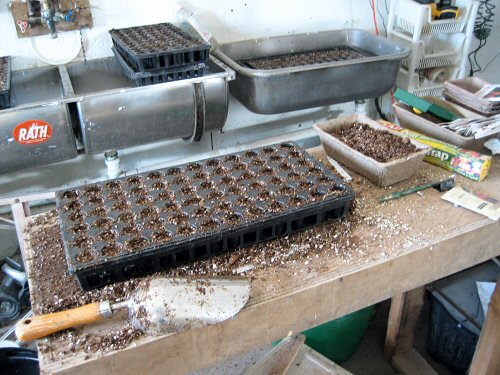
The seedling workstation… This high and narrow table is where I put seeds in cellpaks. The triple sink, a leftover from the dairy days when this was the sterile milk collection room, work out well for seed-starting, with all of the soaking, rinsing and draining involved. Today, the first eggplant and peppers.
New rack ready to roll!
The new grow rack, lined up with its brothers, ready to go to work. The carpentry’s real rough, but it’s sturdy and tried-and-true functional. The addition of 3″ casters has created an unexpected PLUS: when the racks are rolled together, the overall light from the fluorescents spills across the shelves, giving a little more to the plants on the outer edges of the trays. This is good! There is a fairly big difference in early seedling growth from being even a couple of inches further from the lights. (Before, moving the racks around was a pain, and you need to get at both sides quite regularly for watering, rotating trays, generally checking things out. Yay for wheels!) In the end, most things even out, but you take every edge you can get and…they do add up!
Raw materials

The materials for building a new grow rack just arrived. With this one, there’ll be three in all. It’s a bit a of milestone. I’ve used just two racks, built from ridiculously warped wood, to start literally thousands of seedlings over the last four years. Adding one more means a huge jump in production capacity. Well, 50% more, to be exact… Here we have wood, wheels (casters are a new addition this year for all racks), chain and dowels for hanging the lights. Cut up, screw together, add fluorescents…dead easy! And needed in the next few days when seed starting begins in earnest.
Valuable stuff!
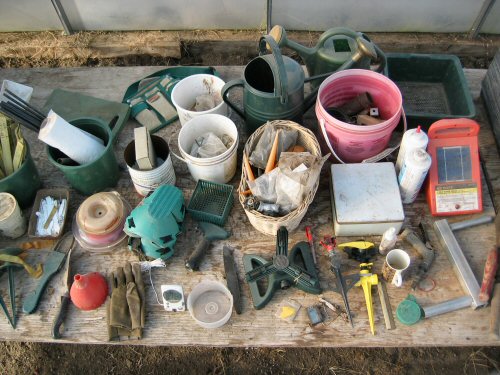
A tableful of useful gear, arrayed for further sorting after the greenhouse clean-up a couple of days ago. If you see this collection as probable junk, the remains of an uninspiring yard sale, anything less than EXCITING, then it may be hard to convey how much small farming involves an intimate, practically passionate, relationship with little tools and devices. At least, for me it does! I’m not into miracle gadgets, but I’ll try anything that looks cleverly useful, time-saving, labor-saving. Many don’t work out (at times because they’re scaled to TOO tiny a garden), but staying in a tight budget avoids much waste. Of course, first and foremost, there are basic tools that simply do what they’re intended to, work well, and don’t break, which is not that common. Each time you find one of those, it’s almost like falling in love! :)