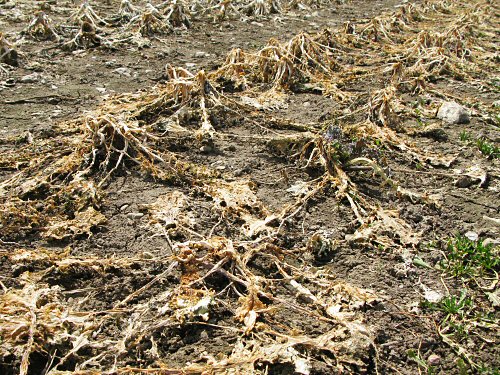
Left to the last possible harvest in the fall, brassicas like kale, Brussels sprouts, cabbage, broccoli and cauliflower (above), were eventually winter-killed and now have to be cleaned up—one of the first field-readying jobs of spring! Today, I started. (EVERY day is a field day from here on in, through November at least, or the first heavy snow that sticks.) A day of tiny farming fieldwork is really just a whole lotta gardening… Now that the ground has dried out enough to be tillable (that could’ve been yesterday, but…errands and CHICKENS), and warmed up enough to direct seed the crops that germinate in cooler soil, it’s a whole new world of things to do…and think about doing. There are two basic ways to ponder the progress of the season’s garden: by timing and by area, each useful in its own way. Timing is mainly about the plants: when to seed, when to water, when to harvest. Area is about where to locate particular plantings, which in my case doesn’t mean absolutely running out of space, since there’s lots more field to expand the garden into if I wanted to (which I don’t), but more like where to position stuff efficiently, so you’re maintaining crop rotation, but not having to, say, drag hoses all the way down the garden to a couple of newly seeded beds that need daily watering in (although there’s a field production plan made up, there are lots of adjustments on the way—where to put stuff will come up again and again!). So, the start of the season is mainly about area, because you have to prep beds and get veggies in in a rough order—cool soil seed, then cool weather transplant, then warm soil seed and transplants—and the timing is a constant: it’s all right away! One way I keep overall track of this garden is by counting sections: it’s about 2.5 acres, divided into 40 50’x50′ squares (each fits 10-16 beds, depending on width). At some point in the next six weeks or so, almost all SHOULD be planted out, nearly 40/40. Today, I started seeding in one…
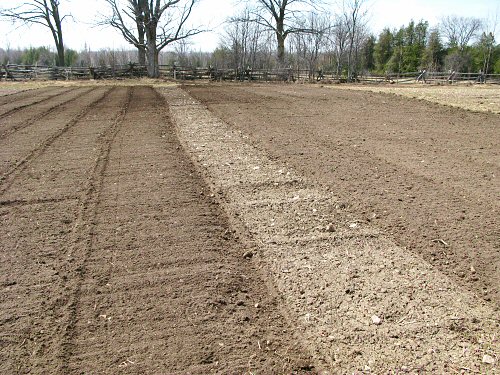
Tilled and untilled: Partially composted cow manure was spread and incorporated in the fall. Now, a light rototilling to prepare for seeding is all that’s needed. Today, I used the tiller on the Kubota compact tractor.
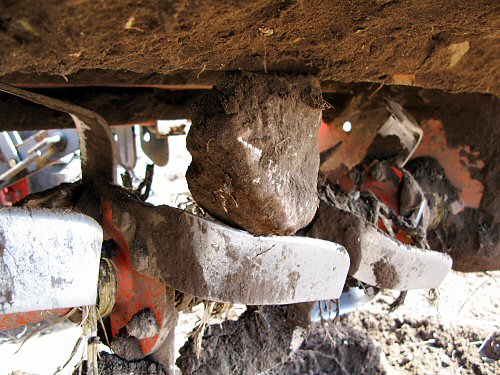
Rock beats tiller: There are lots of stones in this field, they work their way up continually, and even a fist-sized rock, caught in the right way, can stall out the 48″ rototiller on the Kubota (it’s a tiny tractor!). No problem: remove and restart.
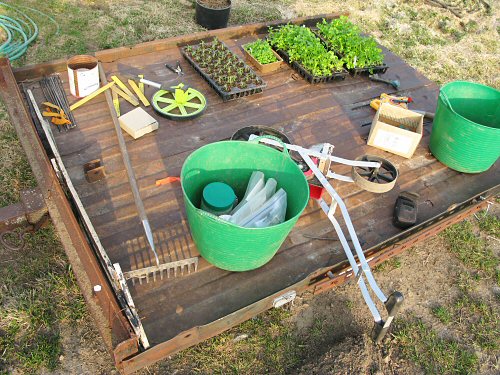
Getting set to seed: I work mostly one or two sections at a time, prepping an area with the tiller, marking the beds, then seeding (or transplanting). This way, I can get the crops that need to be started in as quickly as possible. Here’s the cart towed by the riding mower, loaded with assorted seeding gear (and some transplants being ferried to the greenhouse).
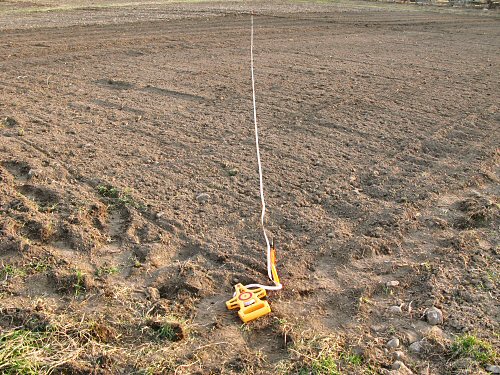
Making beds: Oh, there’s A LOT of tiny farm history behind my bed marking methods. :) I’m still working on the most efficient way to set up beds. Right now, it’s fairly streamlined, involving a 100′ tape measure, stakes, and pacing off distances. This year, I’m planting in 3′, 4′, and 5′ beds (that’s path included), depending on the crop.
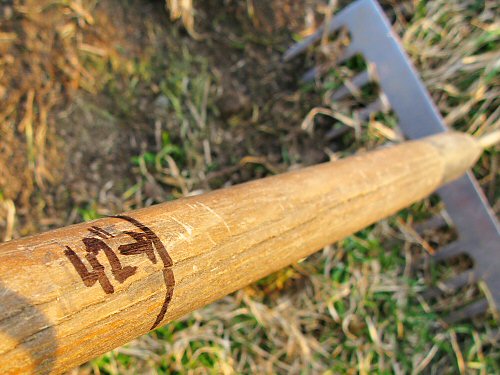
Customizing the Rake: Every season, I re-ink faded measurement markings on a couple of hand tools I use the most. Here’s a convenient mark for 42″ from the top of the handle (that’s the planting area width for a 5′ bed. There are other marks further up the handle, and the whole rake is exactly 5′. It’s convenient for quick checks, especially on the favorite rake that I use for touching up beds right before seeding. And so, off we go…!



Nice to see your fields brown and snow free. They look great. I enjoyed helping the farmer at my local CSA to clean up her overwintered brassicas yesterday (volunteer day). The cabbages were yucky but the overwintered kale was delicious.
Of you park your chickens on your garden plots for the winter they will make short work of cleanup. They will shred anything left from the fall, eat all the overwintering bugs, and fertilize. With a mobile coop, you can move them off before spring prep begins, and enjoy all the free-range eggs you can eat through the winter while they do your work. My chickens lived in their mobile coop (basically a tent on a frame with wheels) for the past two winters through temps down to -11 F plus wind chill and 1.5 feet of snow. As long as you keep them fed and watered, they should do fine. We had some in Wyoming survive -40 in similar housing. If you are going to have chickens, make them work for a living.
Love to see how you make tools work for your system. That is one of the secrets, modify stuff to make it work for you. Most people try to make their place and system fit the tools. Doesn’t work with land so well.
great post, i found it really interesting.
Ha ha ha….I always think of farming as being so much different from gardening, rather than just much MORE gardening. But then I see things on your blog like the big green tubtrugs (mine are purple and yellow) and I think OK, maybe it is just gardening. :)
I had no idea chickens could survive those low temps…if we get some chickens this year I may just try the mobile coup idea!
Irrigation – you drag hoses around 2.5 acres to water? Get drip irrigation! (Unless you already have and I didn’t see it in the journal history). 100% (+,-) water to root zone & a huge labor saver. Do it :)
Hello! I found your blog through Blotanical and I’m very excited :) I’m fascinated by organic market gardening. My family is just getting started with trying to grow our own fruits and veggies. I’ve loved to be out working in the garden since early childhood, so I’ve often dreamed of living out of town on a small property with a great big garden and maybe making some money selling produce. There is a rapidly growing interest in my area in locally grown food. Can’t wait to read more of your posts!