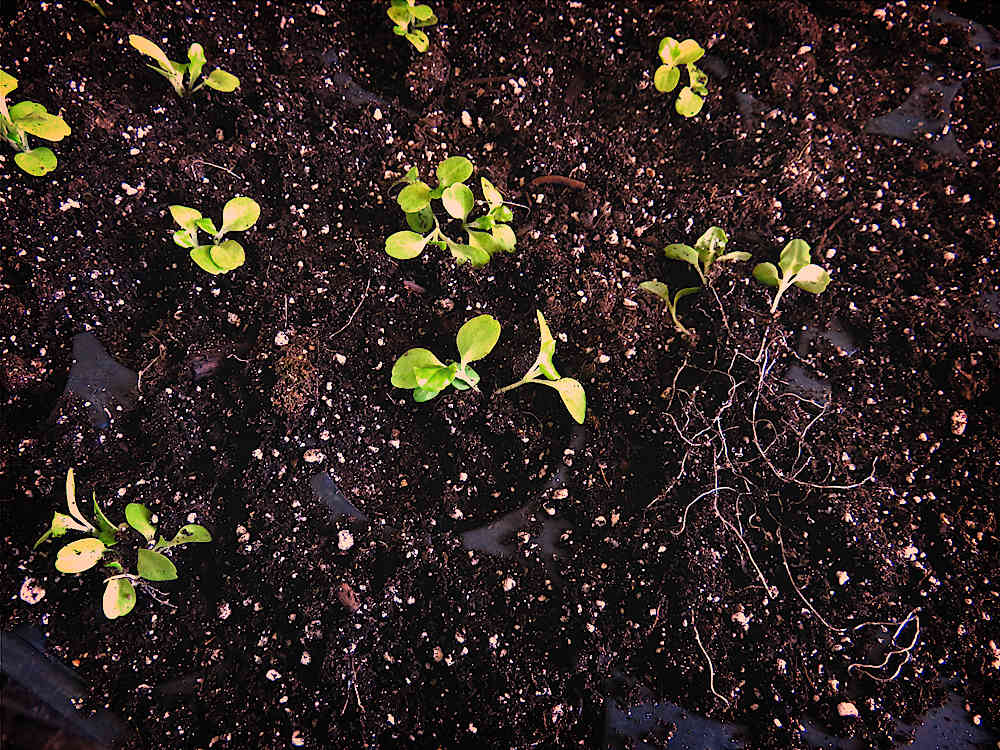
Bare-root transplanting lettuce—separating seedlings and replanting them with more space to spread their roots—isn’t something you’d do on a large scale. At Tiny Farm scale, it’s manageable and fun in a simple, relaxed way, like making flatbread, or prepping veggies for cooking. Very up close and personal with the plants. My usual approach is to seed them where they’ll stay until transplanting in the field, which saves time. With this round of lettuce, I was starting five varieties and wanted to see how they all germinated, so I seeded a bunch of each in a single plug sheet, and today I divided them as needed. Some are still two or three together, so as not to tear apart the roots too much, to be thinned later on. It all works out!
bare-root
Bare root Brussels sprouts
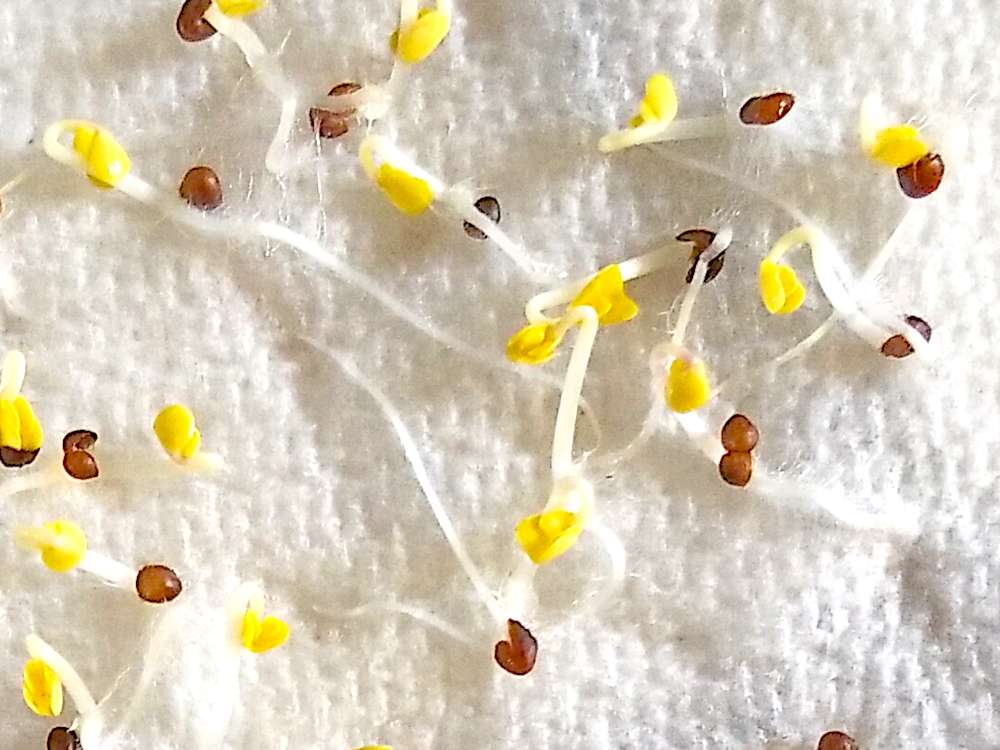
Yep, a wonder of Nature, up close. Three days or so after folding up the pinhead-sized seed in a damp paper towel, we have Brussels sprouts! Of course, this is only step one of many before we get to the deliciousness of actual Brussel sprouts. (Halved, tossed in corn meal and sautéed in butter is one way to go!)
Bare root germination like this is good for at least two things. It’s a useful germination test to see if old seed is still good. It’s also a way to start seedlings: transfer the sprouted seeds to a plug tray or pot, wait a few more days, and up they’ll pop. Let the greening begin.
The bare root approach adds an extra step compared to putting the seed directly in the plug or pot. It’s a little more work. It can be good with hard-to-germinate crops. Or if the seed is old, with a low germination rate, and you want to be sure that every plug has a plant. That it’s fun to see what’s going on is also a fine reason!
Bare root seed starting

It doesn’t get simpler than this for seed starting in controlled conditions: the bare root approach. Spread seeds on paper towel, place another paper towel on top, mist with a spray bottle, roll up (don’t forget to mark the rolls if you are doing more than one), and place in a ziploc-type sealable plastic bag. Then, put the bag in a warm spot, light not required. Be sure to check on the seeds daily, as they can use the oxygen! Within a few days, you will see the little white radicle tip emerge, and from there it is root growth in action. When to take them out is open to experimention: all the veggie seeds I’ve come across are pretty tough and wanting to grow, given the minimum reasonable conditions, so you can plant right at germination, or a couple days down the line with more root. As always, there are lots of variables to consider, play around with, and so forth, but you should be generally fine no matter what. Since I usually only do this for germination tests, I don’t actually plant them (cruel, huh?!). Other materials than paper towels (they shred easily when wet, an advantage when separating if roots start growing into them) and plastic bags could be used—kinda interesting, a while back I checked the book and called my certification agency to see whether there were organic standards for the paper towels used with this method, since they are in such intimate contact with the seeds at such an early stage and who knows what’s in the paper, but no…this is not covered, anything goes, if you’re certified, this would be, well, certified organic. Anyhow, this year, these seeds are for production: here, it’s sweet peppers, eggplant, and tomatoes! We’ll see how it goes!
NOTE: Yeah, I am still messing around with my phone camera and the sometimes cheesy photo filter effects in Instagram for Android…