Morning carnage

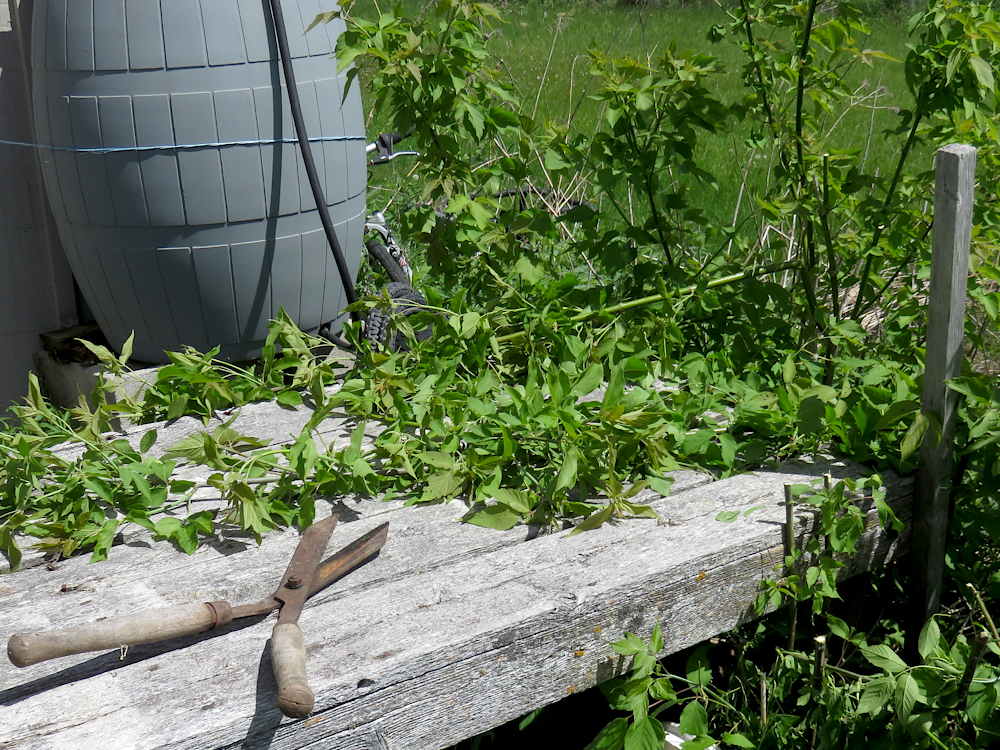
Weed tree, trash tree, table-eating tree, time to step back!

Cutting back the invading box elder from the work table, using antique garden shears, the best tool I have at hand, seems kind of brutal, but this is tiny farming. The whole idea is to direct some space, some land, to your liking. It is kind of militaristic in nature, there’s no getting away from that! Take over, suppress what you don’t want, install what you do, and hunker down to maintain position. I’m kidding, of course, actually thinking about farming and gardening in those stark terms is stressful, not useful or fun. IMHO, you layer on your story to suit the situation, and do what you have to do.

The garden shears only work well on the pencil-thick still-green upper stems, but that’ll do for now. Loppers—lopping shears, with long leveraging handles—would be perfect here, the tool for the job, though at the base this tree is probably a little past even them. So then, a pruning saw. I have neither, so a real saw, a sharp pocket knife, and some bending and twisting may be involved for a decent cutback. Or, much as I don’t want to invest in a box elder battle, I’ll get ahold of a pruning saw. I wonder how much the roots can expand, year after year, without any leaves to feed them…

Bed prep: Step 1

Overgrown garden bed after a first pass with the wheel hoe

Here’s a chunk of this year’s tiny veg garden, looking particularly rough in the harshly slanted evening sunlight. As unlike seeing for yourself as this photo may be, it does accurately capture the wild and not ready look of it all. Lush dandelion, prickly thistle and grass already starting to soar, mixed about with the dry dead stems of last fall’s overgrown then winter-killed weeds—that’s step 1 of hand-prepping the bed, completed. It’s not at all like what the rototiller on the tractor would’ve done.

For this first pass, I used the up-for-anything Valley Oak wheel hoe. It’s probably not intended for hacking through this sort of cover, even so, it does the job amazingly well, moving forward and pulling back, using both sides of the blade to slice through tough spots. The green, intact-looking plants have actually been cut off just below the soil level—a day in the sun and they’ll all be fairly dried out, shrunken and browned. Next step, raking it clear, then, another pass with the wheel hoe. Tomorrow!

Gushing is good!

A gushing water hose—nothing more normal and mundane wherever electricity for pressurized pumping, and of course WATER, are in plentiful supply. This tiny farm is in such a place, yet the gushing hose signals something much happier, an elevated event, because it’s proof positive that the dug well that irrigates the field is back in action once again after another frozen winter.

Priming the pump is usually a mid-May thing, when freezing is over. The operation is simple enough: slowly pour a couple of gallons of water into the pump so it backfills the pipe that goes into the well, turn on the pump, and wait for it to catch. It may take two or three top-ups and retries. When water gushes, the pump is primed for the season! It’s not foolproof, though, the pipe could’ve gotten hopeless clogged, or the well-used and dilapidated pump and tank could decide to give up a seal or conk out entirely. Then the simple would likely become costly repairs or replacement. But not this time!

Details! If the irrigation fittings look small, they are indeed. I’ve seen photos of irrigation set-ups on big farms that are full scale waterworks, orderly grids of giant pipes. Here, the setup is a 1″ plastic pipe that snakes above-ground out into the field—it’s the disconnected part on the left. The pipe can be this small because it’s only meant for low-pressure drip irrigation, hand watering by hose, or a few sprinklers at a time: not every day, all crops, all the time. Also, a dug well like the one here doesn’t have an endless water supply, you don’t want to get ahead of its reservoir size and replenishment rate. Finally, the longer the pipe, the lower the pressure the closer you get to the end. Here there’s about 400′ of it, and you can notice the pressure difference at each of the taps spaced along it. It’s not geared to intense large-scale production, instead, a low cost way to connect a fairly distant water source to a thirsty veggie plot when there’s the need!

A big little fix

Wheel hoe as tool carrier

Today, a tiny farming breakthrough—I found I could securely balance multiple tools on the wheel hoe, and easily wheel the whole setup between the tool shed and the field! When the tiny farm was operating at a larger scale, I’d hitch the flatbed trailer to the John Deere riding mower, load up with everything we could possibly need for a job, and drive on out. That was deluxe! But for a couple of hand tools—here, a hay fork, leaf rake, shovel—plus the wheel hoe, driving is just overkill. It’s not that far a walk. Still…guiding a wheel hoe while carrying tools is a bit of a balancing act, and I usually make two trips. This new way, using the wheel hoe as a tool carrier, flips it from irksome to fun! I figured out how to quickly insert tools so they brace each other and don’t slip out the bottom, and that was it…upgrade complete. (Yes, I could just pick up the not so heavy wheel hoe, but then, that’s what wheels are for! :)

Wheel hoe underdog challenge!

Wheel hoeing the field

It doesn’t sound like a fair contest, the wheel hoe going up against the tiny tractor, but that’s the experiment underway this season. With all the rain recently, weeds are primed to surge. So far, it’s mostly thistle and clumps of grass itching to expand, with pigweed, lamb’s quarter and a couple of other regulars starting to emerge. This area, not yet planted out, has already been hoed, but that haze of green won’t stay down for long. A matter of days… With the 48″ rototiller on the tiny tractor turned by diesel horsepower rumbling like a tiny tank, it’s easy to put things off a bit. The tiller will churn up whatever’s in its way in no time. This fine wheel hoe has instead only an 8″ blade and a lone human…pushing. Every little bit of growth makes the going harder. The time to get in is early, when the blade can more or less glide smoothly and evenly, and you can move travel up and down with fair ease. There are other things to consider here—time, fuel, effect on the soil…more on all that as the experiment goes on—but timing is number one!

IN THE PHOTO: The wheel hoe is facing a strip that has just been walked. It’s hard to see the line between hoed and unhoed, especially compared to the cleanly erased path left by a rototiller. The weeds are sliced just beneath the soil—like cut flowers, they still look fine. Give ’em a day, especially a sunny, hot day, to dry out, and the difference becomes clear. Weeds, gone!

Wheel hoe vs weeds

Wheel hoe in action

A tool in its element! Wheel hoes are great, and this particular one* is fantastic. Unchecked, you can see what weeds get up to given a week or two. This stretch of dirt was protected under the edge of the row cover that’s been protecting the zucchini to the right from cucumber beetles. Now there’s a dense mat of dandelion (weed or excellent salad green?: right now, weed), thistle, mallow, and lambs quarter. And there’s the steel blade that will run through them, gliding just under the soil, slicing them down. Brutal sounding, and all part of the garden balance. (The zucchini have powdery mildew, those white splotches on the leaves, which usually happens when there’s not that much sun. It can get really bad and ruin things, but usually, zucchini will outgrow it. It’s about sunny days…the weather. Another “we shall see…”)

*I got this wheel hoe well over a decade ago from Valley Oak Tool Company, one of the few companies that are a pleasure to recommend, purely out of appreciation for quality product that does its job!