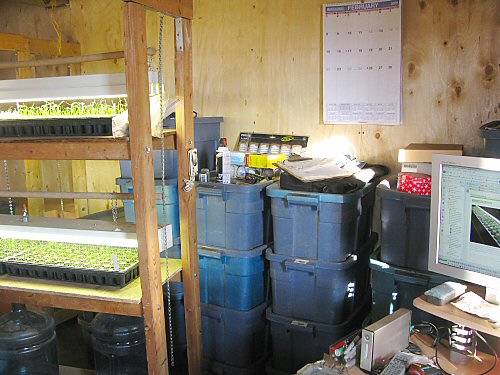
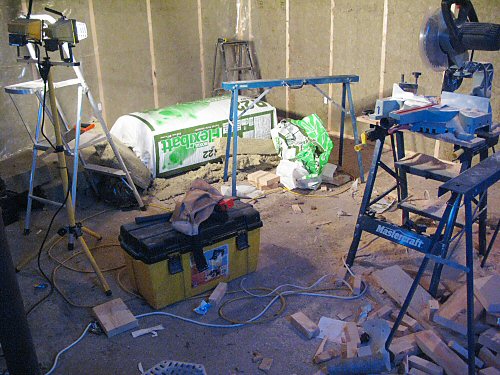
Things are moving along on all fronts, some less visible on the farm than others, like calls to locate various local suppliers, supply runs to the nearby village (pop. 2,400) and the bigger nearby town (pop. 70,000), and so on. The actual UNPACKING is going at a steady pace. The photo above pretty much sums things up so far for the new seedling room. There’s still a fair bit of finishing to do, and for that, we’re going to have to work from one side to the other, moving things back and forth. The computer is online, which is good, being able to check things out on the web is a big part of my tiny farming this time of year. I set up a couple of light rack shelves for the seedlings that’ve been started, but most of the lights are still packed away with the composting toilet. Around 25 harvest bins, doing moving duty, are still stacked, contents waiting for shelves—I labeled each one, so it’s not too hard too find stuff needed now. And the calendar is getting ready to flip again!
Tools
Equipment for large-scale agriculture is too big or too expensive, and many home gardening tools don’t work efficiently on larger jobs or break easily. Tiny farming on plots up to two or three acres requires its own special gear…
Grow lights on again!
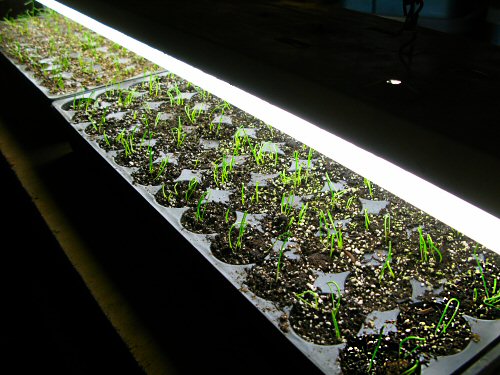
It took a day to sort things out after the move on Sunday, and now the onion seedlings are back in the light racks in the new seedling room, soaking up the cool white fluorescent light. Three trays in all of onions, along with a still-to-germinate tray of parsley, made the little old farm-new farm road trip, and that’s the season’s start so far!
Tiny farm moving – Part 2
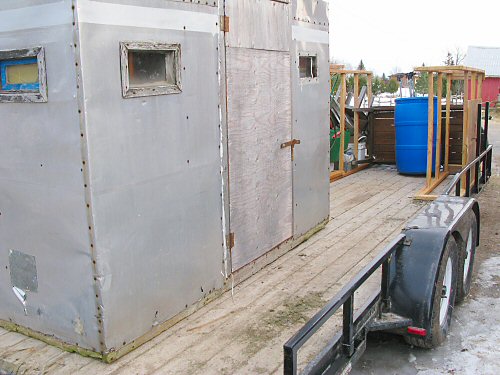
Moving day minus one. Tomorrow we take the second trailer load, the main haul (when moving a tiny farm, it’s good to have access to a 20-foot trailer like this one, it’s Bob’s) The first move day, Part 1, was at the end of November, with the Kubota compact tractor and some other bigger stuff, like irrigation pipe, the greens-drying washing machine, the Horse rototiller, heavier things. This time around, it’s all of the smaller, indoor tiny farming gear: seed inventory, light racks, plug sheets and other seed starting tools, books, computer, PAPERS (lots of paper, somehow, bins full of notes, print-outs, brochures, receipts, you name it), hand tools, and so on and on. The one big item is the composting toilet, complete with its converted ice fishing hut enclosure (which is crammed with fluorescent light fixtures and plug sheets for the move). We did a bit of loading today, but most will happen tomorrow morning. After this, there’s a final trailer load in March: John Deere riding mower, greenhouse, farm stand, a heap of valuable scrap lumber. Moving an entire line-up of tiny farming gear is a really interesting way to see exactly what STUFF we think it takes to grow food on a small scale, on a couple of acres. Of course, the equipment list can vary a lot from tiny farm to tiny farm, but this overall set-up is probably pretty similar to the majority of North American under-five-acre farms. It’s not SO much gear, but we still rely on a lot to grow. A lot more than a handful of seed and a pointy stick!
Fully enclosed, at last
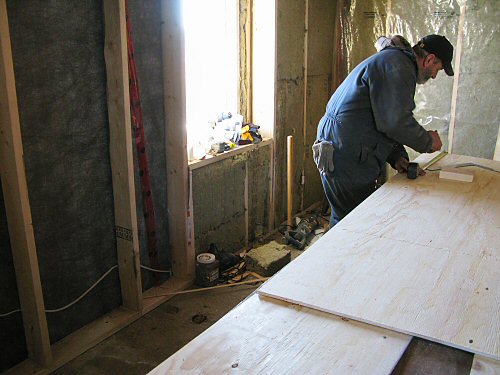
A 10-hour day with Bob, and plywood is up on the four walls of the new seedling room. It’s rough work, with an uneven floor and really uneven joists to cut around, either spend forever measuring and marking, or recut by increments for tight fits, or do the cut-outs generously and get things done quick. We took the rougher, faster route…and got done. There’s still the ceiling to go, but the room is already snug enough to heat, so the move is next! This feels like a weekly installment TV show, it seems to be taking so long. No wonder, we’ve only been averaging a day or two of building a week. But other things are moving forward as well, and the end of this little project is really just around the bend. That’s good!
New seedling room: doorknobs and AC plugs
More building the seedling room at the new farm. Bob came by on Sunday, and I stayed on to work solo for a couple of days. This is where we get down to details. What gets me here is the number of PARTS that suddenly come into play near the end. Where initial demolition and framing are really simple, with few tools and materials, now, there’s tons of stuff. Door handle kits, latch kits, electrical receptacles, switches, receptacles covers, electrical boxes for receptacles and switches, door kits, window kits, shims, low expansion foam, screws of different types and lengths, and then there’s quick-set concrete for patching the floor, drywall mud, caulking, paint, and more still to come. It’s interesting how the convenience of buying endless products eventually takes over, even when it’s rough carpentry, in a barn! OK, I’m going on a bit, it’s not all that complicated. Guess I’ve got FINISHING THE SEEDLING ROOM on the brain as the calendar flips…
Anyhow, the insualtion is now going in—that’s quick—and as soon as plywood is on the walls, I’ll be able to start setting up! You can see on the left of the photo the handy twin 250w indoor/outdoor halogen lights-on-a-stand, lighting the scene—last gig, they were lighting the barnyard for rinsing beets and carrots after dark… :)
Old broadcast seeder
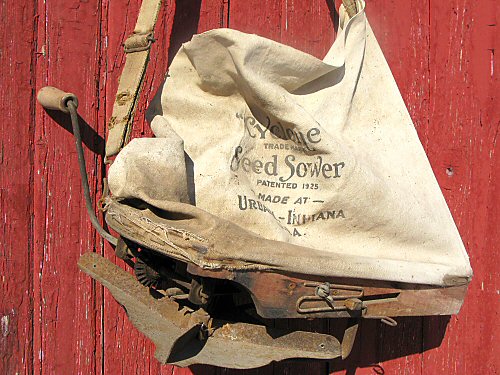
Found this antique broadcast seeder hanging on a nail in the drive shed, the Cyclone Seed Sower, made in Urbana, Indiana, sometime way back when (patented 1925). The canvas is torn, but it’s otherwise in good working order. Dunno exactly when it was last used, in the last decade or two. With a little patching—in a hurry, even duct tape would work—and a few drops of oil, it’d be good to go. In this case, time hasn’t improved on design: this seeder is essentially identical to the modern version I use, except the cloth and wood and most of the metal have been replaced by plastic. Operation is simple: fill the bag with seed, adjust the size of the opening, and start walking while cranking the handle—seed hits the plate and gets flung out by the ribs (here’s a more detailed description). Simple, then and now!
Another snow day

More snow. A few inches, I guess. I don’t pay attention any more, unless there’s too much snow to get out the door… I trudged out into the field, snow up to my knees, to check the greenhouse. It’s doing fine as usual, fully inflated (it has two layers of plastic, with a fan blowing air between) and shedding snow with ease. The greenhouse (and the veggie stand behind it) won’t be moved to the new farm until the snow clears and it’s easy to get at, hopefully sometime in March. I hope dismantling it doesn’t make it fall apart. The plastic is rated for four years, which means the UV resistance should be giving out any time now. I suppose the plastic will start to disintegrate. I don’t really know what happens when greenhouse plastic expires. Guess I’ll find out. Until then, I expect it to last forever! :)