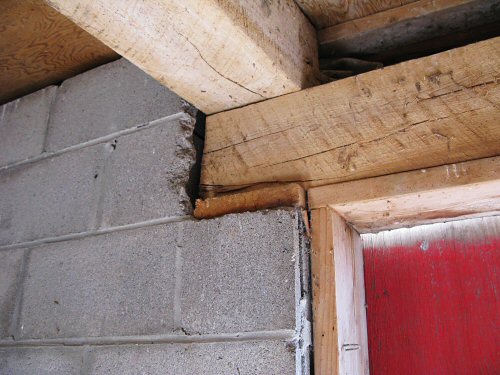
Made it back to the new farm to start demo for the new seedling room. I don’t get to do much bigger construction work, and this is really just interior framing and insulating, nothing complicated or structural, but it’s a fair-sized project, involving new windows and doors, what I’d still call big rough carpentry fun! The barn is a small one, 24’x30′ (7.3x9m), about 20-30 years old. The structure is simple, basic, easy-to-understand—what you see is what it looks like. The beam in the pic is one of a dozen or so that support the upper floor. What could be clearer! We’re turning half of the lower level, with its poured concrete floor and concrete block walls, into a fully winterized space that’ll hopefully be home to new herb seedlings by the end of January!
carpentry
Greenhouse upgrades
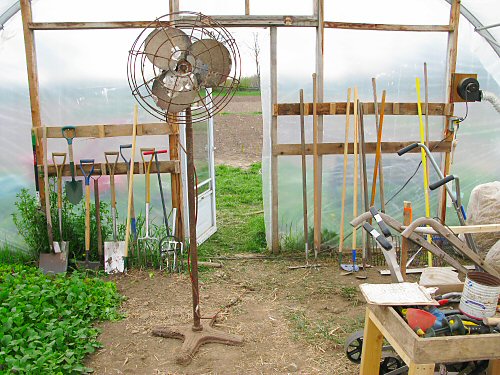
Another cloudy, cool, kinda chilly day. There’s always fieldwork to do, but this type of weather is also good for building, fixing, organizing…indoors. Today, some long-planned greenhouse upgrades. They may not look like much, but it’s a pretty big bunch of improvements! As part of Shannon’s kinda intensive “this is what I do around here,” hands-on experience (with full narration!) on this tiny farm, I showed her how to use a couple of basic power tools—cordless drill, chop saw—and she built simple legs for a wooden tray that I use for various small, often-used bits of gear (the tray’s shallowness is an automatic organizer: things can’t get really buried!). Really simple, rough carpentry, but if you haven’t used tools much or at all, and then you build something that’s immediately used in the course of the farming day…it all makes more sense! At the other end of the hoophouse, I put up another wooden crosspiece for leaning long-handled tools, and we separated the most-used and put the least used at the other end. Again, by avoiding a pile of stuff, everything’s easy to grab and put away. And then, we pounded a couple of 2×2 wooden stakes into the ground (pounding with a mini-sledgehammer was also on the farm experience menu today, I pound a lot of stakes for tomatoes every year as well…), and screwed another 2×2 as a crosspiece to make a leaning rack for the seeders and the wheel hoe (you can see one end on the right of the pic, one of the posts has orange tape on top). Finally, a machinery addition, a big, old, rusty, dangerous-looking high-volume fan on a really heavy iron stand. I’ve been meaning to work on greenhouse ventilation for ages…but always ended up using much smaller home-type fans. This one, which was actually being stored in the chickenhouse, I hadn’t noticed till now. It moves a ton of air, and reduces the temperature a full 10-15°F in the middle of a hot day. Cool! To look at, these little building projects are absolutely basic and kinda primitive, but they’re quick, easy, solid cheap, and really make a huge difference when you actually use them… (I just noticed in the pic how the right side of the end wall seems to be sagging, it doesn’t look that way at glance, I should check it out and see what’s up…)
Rack built
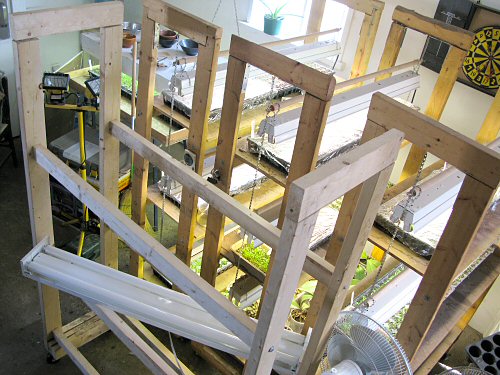
New lumber turns into new grow rack. This adds a fourth to the set, a measure of tiny farm growth. I started with two in Year 1, built another one last year (Year 5). It’s not like the focus here is on rapid expansion…this is the speed of staying tiny! ;)
Although I don’t build these often, it seems to get quicker every time. Well under a hundred dollars of wood, wheels, screws, bolts, brackets, hooks and chains, plus a chop saw, a drill and a couple of hours, and there it is! Light fixtures are extra. In the pic, the shelves still have to go on.
Lying across the middle supports is one of the four old fluorescent fixtures, given to me instead of being tossed in the trash. Not only free, they’re BETTER: these are the overhead lighting type you see in (horribly lit) offices, the tubes are spaced farther apart than in the standard shop lights I’ve been using, the light will spread more evenly over a larger area—for the seedlings, a lot less leaning and stretching…
New lumber
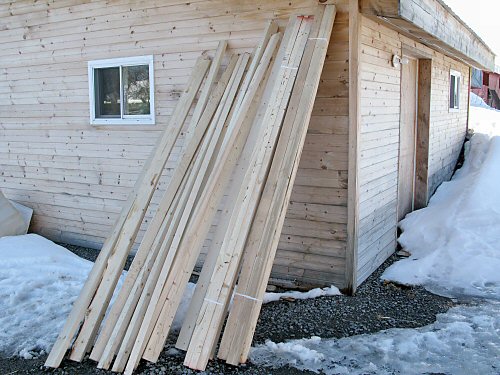
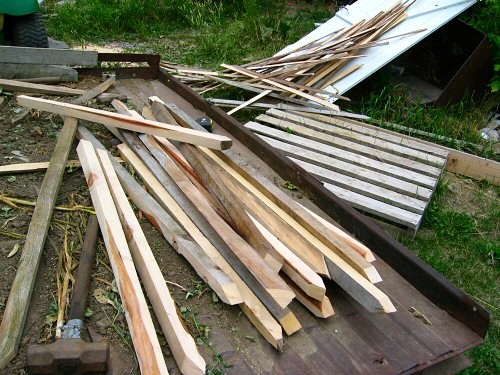
Went through the lumber delivered yesterday, selecting the straightest pieces for a new grow rack. There’s all kinds of scrap wood around the farm, except, there are never enough 2x4s and plywood… I order construction grade for most things, quite inexpensive but the boards have to be hand-picked if you don’t want a lot of warped wood. For rough carpentry, this works fine: the savings add up, and rough edges add character! There’s the grow rack, a double screen door for the Milkhouse, the composting toilet-ice fishing hut conversion, the chickenhouse reno, new tables and trays for the farm and market stands, more… All needed pretty soon. Spring building starts now!
Rough carpentry
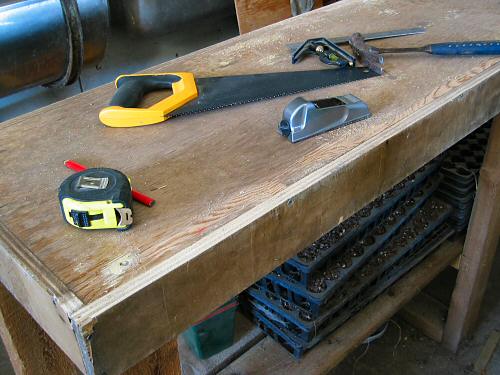
Added a shelf to the potting table today, a quick bit of rough carpentry. It also needs a couple of coats of varnish to waterproof it for the season, so I took the time to shave down the little edge where the sides join the tabletop. Normally, I wouldn’t bother with a minor detail like that, but I spotted the cool little surform plane (the blade is kinda like a grater) in one of the toolboxes and felt like using it! Rough carpentry may sound like nothing much, but it’s really a particular, essential skill of its own on the tiny farm. I’ve been learning as I go. The “rough” doesn’t mean sloppy or shoddy, just practical: functional, sturdy, simple construction, as much as possible using whatever materials are at hand, and not waiting around to get things done. Need a shelf over here? A workbench fit in right there? A couple of quick walls to turn a corner into a storeroom? A roof on the veggie stand? Grab the tools, hunt down the materials, and bang it up!
The simple shelf is a couple of 1×6 boards. It’s for keeping plug sheets handy when I’m seeding lots of trays of transplants at once. The potting table started out as a long, shallow bin, built from scraps of plywood, to hold harvested tomatoes. I later reassigned it: flipped it over, added legs, and voila! (There’s that trusty saw again.)
Roofing the stand

Finally got around to putting the roof on the farm stand. We recycled the old galvanized steel roofing that was replaced during the Milkhouse extension last fall. In the end, a quick job, three hours or so of matching pieces, handing them up one by one (watch the wind), and screwing ’em down. Luckily, there was very little cutting to do, sheets of old metal can be a real nightmare for slicing and gashing (working without gloves, I nicked a finger only once—every so often, it’s good to see a little bit of your own blood running red and true :). In the pic, I’m screwing things down while Bob selects sections. The farm stand is definitely not on course for the ambitious plans of earlier this season, but in good tiny farming fashion, it’s moving along! (Guest photo by Mami.)
Making stakes
In the building and fixing department, there’s always a queue. Jobs are usually one of three degrees of urgency: Right Away (fix it or we can’t go on!), It Would Be Really Good To Have This Done Soon, and When There’s A Little Extra Time (and that’s often, all the way to Fall). Today, it’s finishing a Right Away job: making up more wooden stakes for the tomatoes. Last year, I bought for very cheap a pile of scrap wood, 10-12′ lengths, rough cut to around 2″ square, from a local sawmill. This year, we found pounding stakes made from this stuff a foot or so into the ground took an insane amount of sledgehammer effort, especially when driving into dry soil. Cutting them down just a bit made a HUGE difference. Using a table saw out in the barn yard, we shaved about 1/2″ lengthwise off each width, winding up with maybe 80 1-1/2″ square stakes. It took a couple of hours overall to save many more in the field, not to mention energy, sweat, frustration. The little things do indeed make all the difference! (Also in the pic, painted white, an old door scrapped during the Milkhouse Extension, and a nice, solid pallet (probably from the seed potato delivery), both to be reused in the composting toilet enclosure, an IWBRGTHTDS project.)