Trimming leeks

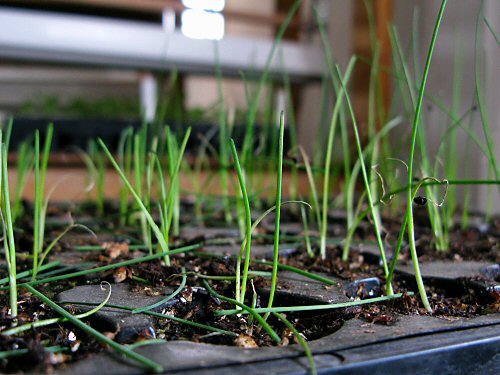
Trimming back leeks is really satisfying. Here, I’m doing the first planting. With most indoor veggie seedlings and my two-lamp fluorescent fixtures, it’s lots of tray rotating and light height adjusting to keep the stretching to a minimum.

Leek can reach all they want: at three inches (7.5cm) or so, I snip them back to about an inch (2.5cm). What could be simpler?! This goes for the onions coming up as well.

With nice low seedlings, the light can be better concentrated across the trays, and cutting back may ensure stockier growth, which is generally a good thing when it comes to seedlings (update: I read a pretty definitive-sounding study that disproved the growing-stockier part; either way, it’s worth trimming just for keeping them closer to the light).

This is the first year of starting both leek and onion indoors from seed (in the past, it’s been direct-seeded leek, and onion sets)—I’ve not actually DONE this before—so there’s the usual slight bit of reservation with trying something new. Seeing is believing. Fun (easy) so far!

Elsewhere, we got what looked like a foot of snow overnight. No problem, no extra work, except the lane, barnyard and path to the greenhouse had to be plowed again…
More fun with lettuce

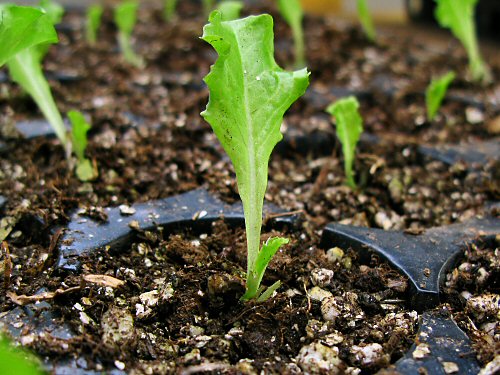
Some of the early lettuce I ended up leaving two to a cell, to see how they’d do. Now, I divided a bunch of those and potted them up singly to a much roomier 38-cell plug sheet (up from 72), and trimmed off all their leaves (and ate them). After the shock of transplanting straight from indoors to the greenhouse, the lettuce seedlings usually lose their bigger leaves anyway, so why not give them a head start?! It’s extremely time-consuming, all of this careful repotting and trimming—not practical for the market garden at all. But I know I’ll be closely watching the results of this early, cold-hoophouse planting, so I’ll see if they do better than the regular plugs. Later on in the season, I intend to keep experimenting in more practical ways, but time and many other things to do have their way with the best laid plans… (Hint: As a rule, it’s best to start seedlings in the biggest and DEEPEST container that you have room for in good light, and avoid potting up. The less you disturb roots, and the more room you give them to grow (especially, down), the better they seem to do when transplanted.)

Two arugulas

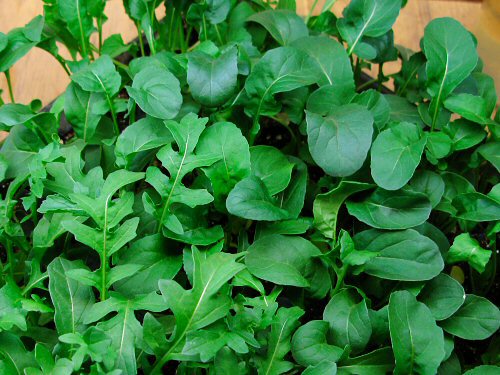
The arugula, about a month from seeding, is looking lush and…TASTY. While fiddling with macro focus and tripod (I’ve been using a borrowed one lately for indoor pics), I reached around to pluck a leaf. And another… I’ve been wandering back all morning for quick tastes. You either like arugula, or you don’t (can you be MADE to?)… It’s an easy, not subtle, veggie rush: first the familiar arugula flavor with that hint of mustard, slowly building as you begin to chew, and suddenly—wait for it—BAM, a little peppery explosion. I’m fairly new to this treat, it’s only since tiny farming that I paid attention, though I knew the taste, and only last season that I grew it out of salad mix, as a separate crop. It’s still a bit of a novelty. Here, the two varieties, somewhat generically named Rocket (smoother-edged), and Skyrocket, have quite different leaf shapes, but so far, I don’t think I could tell the tastes apart. These are two to a cell, and heading out to the greenhouse in the next week or so… (I should note, arugula grows fast, you can usually start harvesting 30-35 days from seeding, so planting this early indoors wasn’t exactly necessary, just a pre-season experiment.)

Fuzzy little rosemary

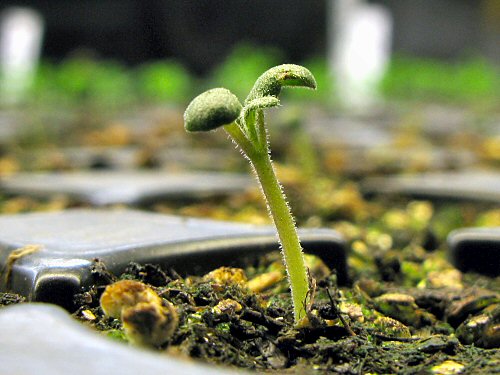
Hmmm, so that’s what tiny rosemary seedlings REALLY look like with their first true leaves. I’m experimenting with the new camera. On macro, it’s practically a microscope. I can focus as close as 1 cm (less than half an inch) away. That’s a little tough to manage, but with 12 megapixels of resolution, I can focus from a more reasonable 6 inches away and then ZOOM IN in the image editing program. Rosemary gets a whole new look compared to the old camera. What a cool tiny farming tool, if you need pictures…

Parsley update

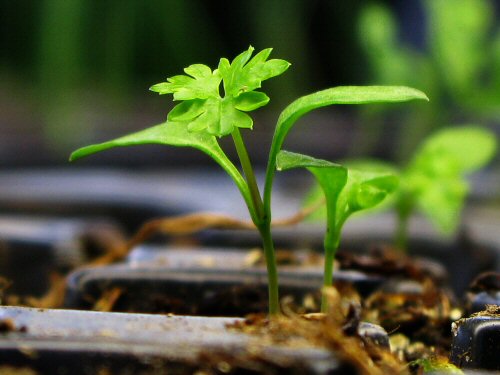
Around two weeks after showing up, the first set of curly parsley is putting out its first true leaves. This is Krausa Market, a “triple curled” leaf variety. Aka moss-curled. There’s also double-curled leaves, like the Forest Green and Green Pearl, also in the trays. Single-curled? Don’t think so… I still have a little time to leisurely examine seedlings and wonder about such things. I started thinking about the farmers’ market and all the SPEAKING that involves (on a busy Saturday, it can be practically 6 hours of non-stop veggie talk), and the gazillion kinda BASIC details there are to know about every single crop. What are the main types of leaf lettuce? Are muskmelons the same as cantaloupes? What’s the difference between slicing and pickling cukes, or American, European and Middle Eastern cukes? How do you pronounce Chioggia beets? Stupice tomatoes? How do you cook ____? The possibilities are endless! Of course, I don’t need to know any of these things. I don’t even have to know the names of the varieties. Veggies grow regardless. When questions come up, I could shrug and say, “Dunno” or “Good question!” Still, I’d rather have some answers, pass on whatever I’ve picked up along the way. Right now, I’m still wondering about triple- and double-curled parsley, but that’ll pass… :)

Tea and fungi

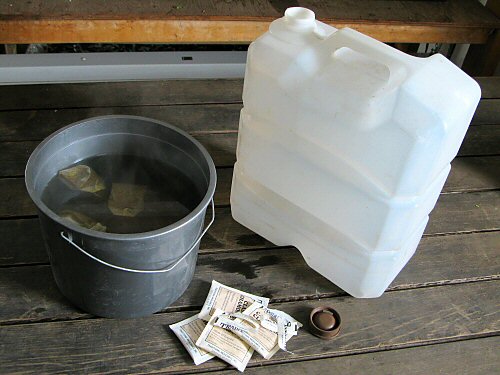
Chamomile tea prevents damping off—I’m a believer! It’s one of those natural but-do-they-really-work remedies, used where more product-minded folks would fork over a few bucks for a bottle of No-Damp fungicide… I brew up a batch of tea, dilute it by eye to a pale gold,  and apply every couple of days with a fine-misting spray bottle. I’m pretty casual about the recipe, and keep spraying until the seedlings are established (that’s my method, there are more precise instructions around as well, search online).

Damping off is the name for a bunch of different fungal infections that can hit seedlings in trays with similar effect. In my encounters, the damage appears right below the soil line, strangling the stem just out of sight. Dig up a stricken seedling and there’s a small section of the stem, all pale and shriveling to nothing, while above and below, all looks well (the symptom’s called “wire stem”). It’s pretty shocking to see in action. One minute, your seedlings are looking all perky, and then you touch one…and it topples over! Whooaa!

Up to a couple of years back, I’d lose a few seedlings, usually PEPPERS for some reason, never anything major, parts of a tray or two, but enough to be scary. I seed-start in soilless mix (so it should be disease free), trays and tools are given a good disinfection at the beginning of the season, there’s always plenty of air circulation, and I make sure the soil surface doesn’t stay wet—all the things these soil-borne fungi don’t like. Still, damping off was sneaking in, until chamomile tea spray came along… Coincidence?

Seed starting tools II

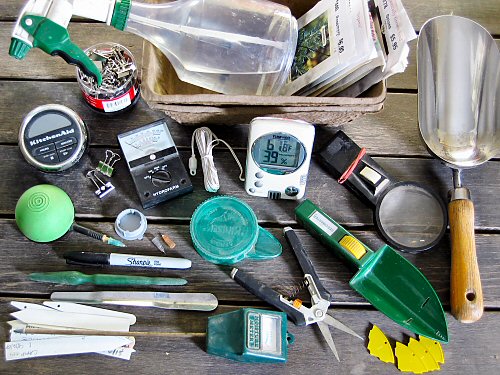
Here are ALL the indoor seed starting tools I have, most of them always-used, a couple not. Nothing special, and FINGERS I’ve found are handiest for most of the work at this scale. In any case, a few details (and there’s more on #1-5 in Seed starting tools, part 1): 1. The Seedmaster, a gadget for trickling out small seed as you rotate the wheel (the yellow pieces are click-in filters for different seed sizes); 2. assorted white plastic plant labels; 3. a dibbler or dibber or whatever, for poking little holes in soil; 4. a fine-point black waterproof marker (I like Sharpies) for labeling; 5. the mini-transplanter is essentially a tiny, stainless steel shoehorn for easy liberation of plugs from their cells; 6. a moisture meter, simply stick it in the soil; 7. plant snips for thinning seedlings; 8. Mini-Sim seeder: fill and shake out; 9. suction seeder with three tip sizes: squeeze the bulb, put the tip on a seed, release to hold, squeeze again to drop… ($25…what was I thinking?!); 10. digital timer for keeping track of repetitive tasks like bottom-watering trays one by one; 11. plant light meter, reads in footcandles, with settings for indoor and out; 12. digital indoor/outdoor min/max thermometer/hygrometer, mainly for keeping track of temperature; 13. magnifying glass with light, for examining seedlings (and GREEN MOSS) up close; 14. soil scoop for filling plug sheets and pots with seedling mix; 15. spray bottle with good quality spray head (more water per pull; I’ve used a wand mister like I have in the greenhouse, but the hose kept getting in the way, I may try one again for the seedling room this year); 16. small fibrepak flats, convenient for holding tools and seed packets on the potting table (left lying, the packets can so easily get wet…); 17. small bulldog clips, useful for all kinds of things, like organizing groups of seed packets. And the winners are…all of them, EXCEPT for: #9, which I found to be useless for my purposes; #8 which is great, but mostly for heavier hand seeding in the field, like for flowers; and #6, 11 & 13, which are more educational toys than essential tools, but still cool! (Wow, that was a lot of blogwork for pretty obvious stuff, but there you go! :)