The joy of decay…

Winter squash decays

During the growing season, decay is the last thing you want to see, let alone observe over time. In the off-season, what with culling veggies from cool storage, I’m a little more thoughtful about…decomposition.

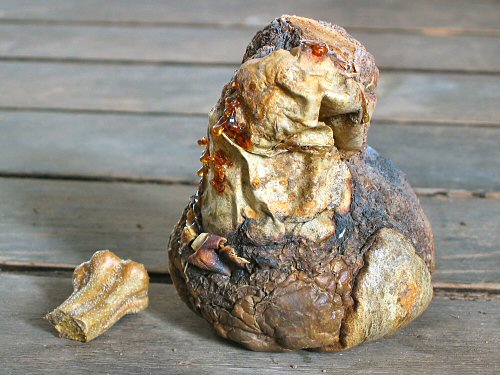
This miniature butternut caught my eye as it slowly returns to its essence in the Milkhouse. I’ve watched it instead of tossing it out. I like it! It’s soft, but seems to be drying faster than it’s rotting… Those little amber crystals, the product of ooze, are interesting: hard, translucent, sort of brittle, almost tasteless… I wonder what they are? I’m sure chemistry and biology would give me great, detailed explanations of the entire process of winter squash decay. But is that…good? Is that what I want?

I used to think that understanding how EVERYTHING worked was kinda the goal, you’d learn and learn and learn stuff and become…better. But tiny farming doesn’t seem to lead that way. You watch and you do learn lots of things when they’re useful, but simply tearing everything apart into little chunks of measurement and description, just for the sake of it, isn’t as appealing as it once seemed to be. I think I want to know LESS. Demand simplicity! Let the squash rot in peace… (Of course, things don’t really work that way, do they…)

Read more

Sooo, organic IS better!?!

New organic study  says organic vegetables are better

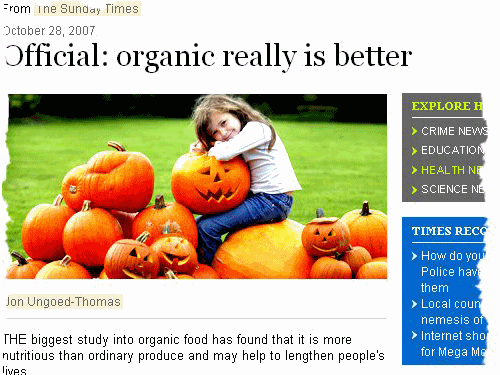
It’s not the politics, it’s kinda common sense… I was drawn into a link today on the Seasons Eatings Farm blog: “This article is informative.” That’s a pretty seductive word, “informative.” Click! And, lo and behold, a whole new chapter to the rather mind-boggling mess of the “organic debate.” Sure, it’s yet another study, and it’s only the preliminary findings, and so forth, BUT, it’s also the first full-blown, government-funded (European Union) scientific investigation of organic food, with seemingly unequivocal results. The reporter of this article is pressuring the UK’s government food agency to change its official stance that eating organic is a “lifestyle” choice and that organic food has not proven to be better for you, to reflect these findings. That’s interesting… Will it be like cigarettes and cancer down the road, class action lawsuits against Big Dairy for knowingly supplying crappy milk that caused premature osteoporosis that led to complications like unnecessarily broken bones…and death? Holy heck!

Read more

Spreading grass mulch

Spreading grass-alfalfa mulch on garlic

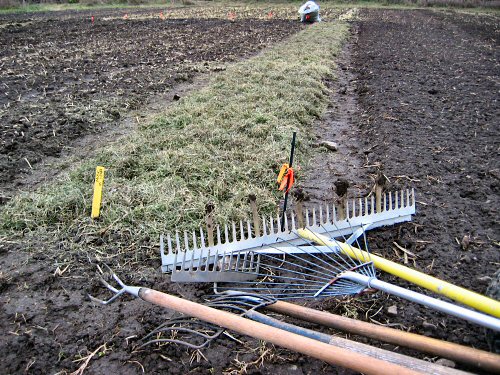
Today, I took advantage of a one-day reprieve from the cold—it was a pleasant 9°C (48°F)—to test the new grass-alfalfa mulch on a bed of garlic. I suspected spreading the light, loosely clumped mix would be more of a chore than tossing around straw, and it was. I first tried dumping it out, but the big clumps took forever to break up and spread, so I switched to pulling it apart by hand. The large bags of mulch weigh next to nothing, so that wasn’t hard, but you wouldn’t want to do it in the wind. Next, spreading it evenly. This proved to be a bit of a puzzle. I started with a hay rake, with three widely spaced tines, but this just slid through the grass, not catching enough to move it around. Out came an unlikely array of other hand tools to try: the compost fork (dark tines, right at the bottom of the pic), the 3-tine cultivator, a regular rake, and a leaf rake with round tines (the wide landscape rake was for marking rows in another bed). None of these worked well. Closely-spaced tines caught too much and cleared areas rather than covering them. I eventually used a combo of the 3-tine cultivator to break up the clumps, then skimming with the small rake to even it out. The results were pretty good, with a fluffy 2-3″ layer down the 50′. But it was delicate, picky work as the grass is very light. There are five more beds to go to refine my method (basically, figure out a better way)! I also planted a final 50’x5-row bed, using up the last of my seed reserve, bringing the garlic total to about 3,000…

Checking on rye

Rye

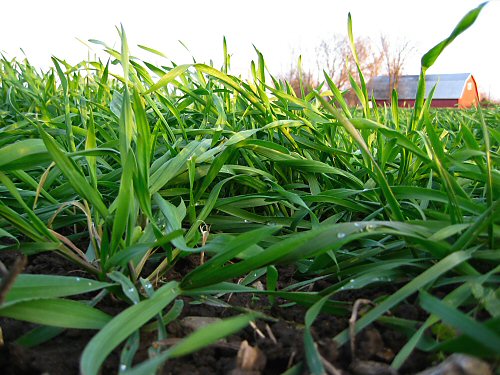
The fall rye has stayed low and not gotten too dense, but filled out nicely. As a cover crop/green manure experiment, I guess it’s doing fine. It’ll be there overwinter, and we’ll see how it does come spring. My only concern is that it gets too established and turns into a weed—it’s supposed to be potentially invasive—and that we’ll find out when the time comes!

Root cellar lite

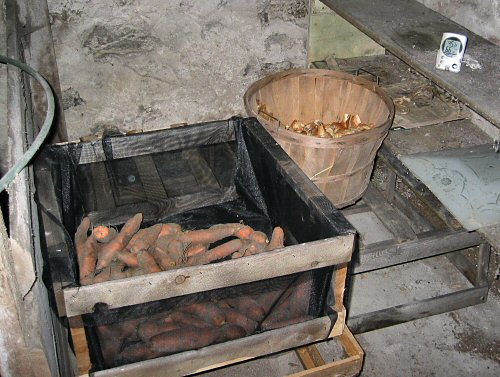
Finally got around to starting to sort out the spot for the root cellaring experiment. It’s in the basement of the house, against the north wall. I thought the floor was dirt, but it turns out to be cracked and rubbly concrete. Oh, well. It’s still fairly warm, around 60°F (15°C), but should cool down soon. I’m not doing much, other than clearing enough room for 8 or 10 bushel baskets. Monitoring temperature and humidity through the winter—a handy little digital min/max thermometer/hygrometer is already on duty—and seeing how the veggies hold up week by week is the main thing for this round. Some squash and beets are just out of sight to the left. The bulk of the veggies go in soon…

Harvesting Brussels sprouts

That was interesting! I’ve harvested Brussels sprouts by picking the individual heads, but for our first bigger harvest of about 60 plants, to speed things up, I decided to take the whole thing.

First try: chopping the base of the stem with the machete-like harvest knife was like hitting a piece of hardwood. Wow! Tough and cut-resistant… Next up, a sharp hatchet fared no better: a solid whack hardly penetrated.

So, we pulled ’em up, roots and all. They set in pretty good, but the main roots are shallow, so even with knocking off the clumped soil, this went quickly.

Next, we discovered that removing the roots is easily accomplished with a short, fairly rigid hand saw. Once we figured out the right starting angle, one and half strokes cut through the stems like butter: zip-zip!

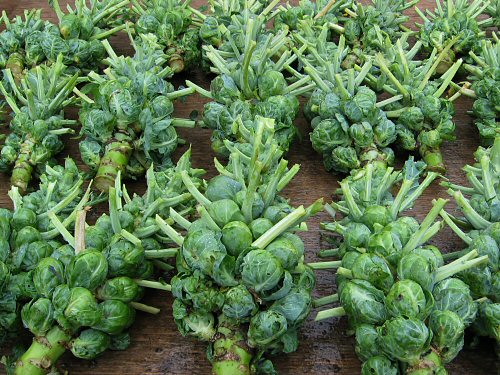
Then to the harvest knife: swipe off the head, and then, holding the base of the stem, about four downward lopping strokes, rotating after each, to shear off the leaves. Kinda odd looking results, but efficient all around.

The sprouts, catching up from the summer drought, haven’t all filled out, still, a healthy yield of full-size to tiny heads from each one.

It was a completely novel, different harvest process than for all the other veggies. All the chopping and cutting was…fun!

UPDATE: The kind of odd presentation was loved at the farmer’s market—certainly said, “Fresh!”

Return to Jerusalem artichoke

Various garden experiments are going on here and there. The new oats and fall rye green manure cover crops are doing well. There are five or six tarragon starters, three divisions from a potted lovage, coriander seed dried on the standing plants… Several varieties of hot peppers have to be given a final performance check. And so on. One I keep noticing and promptly forgetting again is the Jerusalem artichoke, planted so long ago. They’re definitely tough. The fuzzy-textured leaves seem rather delicate and wilt alarmingly without water, but they’ve survived with little weeding and maybe one watering all season, and they’re looking happy now.

Another unusual characteristic, compared to almost all of the other veggies and herbs, is how un-uniform they are, at least in this first year, with plants of all heights, ranging from around a foot to over three feet (30-90+ cm). There’s not much variation in leaf size, simply in…height. Well, JA’s supposed to be prolific—we’ll soon see when I check in on the gnarly tubers down below…!