Direct-seeding peas

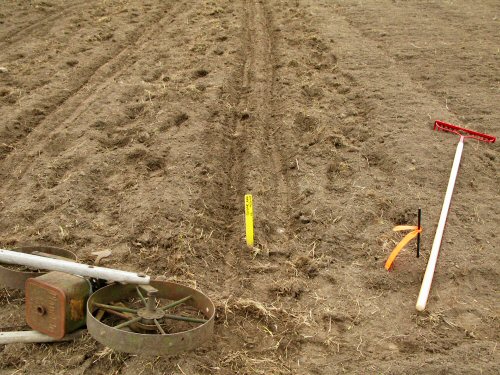
The first direct-seeded crop went in today: Sugar Ann snap peas. As usual, the peas were inoculated with Rhizobium bacteria: dampen the seed with a little water, sprinkle with inoculant powder, and shake.

Rhizobium bacteria enter legume roots and form a symbiotic relationship with their hosts, producing plant-usable nitrogen in exchange for carbohydrates and other nutritious goodies from the plants. The net result is…more nitrogen for all! Or as the inoculant package says: “bigger yields and better quality”!

Sounds great. I take it on faith (in the science, I guess), since I haven’t actually observed the with-and-without inoculation difference. I have a couple of times planted without, but I wasn’t taking measurements…

Each legume (peas, beans, clover, etc) needs its own species or strain of Rhizobia. Luckily, there are packets of premixed assortments that cover the common veggie legumes. What I’ve been using, called simply enough, Garden Inoculant, is good for beans, peas, lima beans and sweet peas.

The bacteria do establish in the soil so that they’re available from year to year, but I’m not sure how long and in what quantities it takes to get set up with the strains you need—until I find out, I’ll inoculate every time…

Then it’s on to the seeder. I’m using the older, heavier, probably-antique Planet Jr. over the usual Earthway.

And minutes later, 3oo’ (91m) done. It’s an almost painfully small start for April 20, but I’m figuring that every few days I leave the broken up sod to break down more, the better off we’ll be. Soon, though, all the rest of the early direct seeded crops will just have to go in!
Seedlings on the move

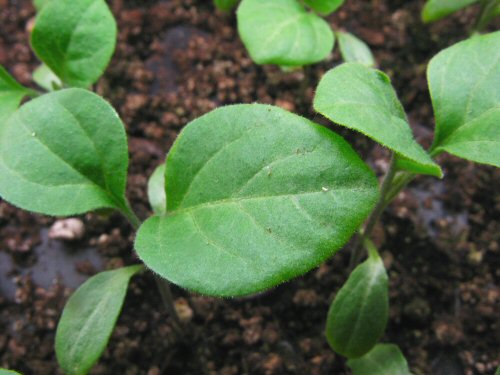
Seedlings seem to expand in spurts, like these Vittoria eggplant, growing quietly for two weeks or so since they first appeared, then suddenly reaching out to touch their neighbors practically overnight. Even the tomatoes, a week old in 200-cell trays, will soon be getting crowded. In just a few more days…

I haven’t yet stumbled upon or otherwise discovered the absolutely best time to transplant up. Generally, I try to move plants to bigger containers before their leaves start to overlap and steal each other’s light. But in practice, since potting up means the same number of seedlings take way more space, the timing ends up being determined by how much room there is under the lights.

The first plants started, in late winter-early spring, tend to also be quite cold-hardy—onions, the brassicas, various herbs—so they can usually be moved out to the unheated/barely heated greenhouse in March and April, making room under the lights for the next wave of seedlings. This year, until the greenhouse is set up, as the seedlings expand, there’s nowhere for them to go. Gotta get that greenhouse up!

Managing seedlings

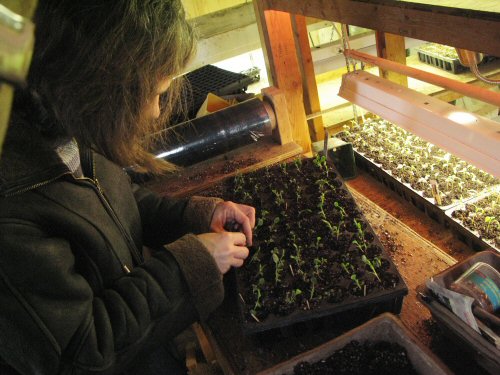
It will soon be time to move many of the seedlings to roomier quarters—there’s only so much space under the lights, so the greenhouse has to go up soon! Timing is getting trickier by the day, but we’re still doing fine. Here, Tara, at the very start of her tiny farming career, manages her first tray of cauliflower, splitting cells with two seedlings, and filling any empty spots. There’s not always time for this sort of micro-gardening, but there is right now…!

Making space and saving space

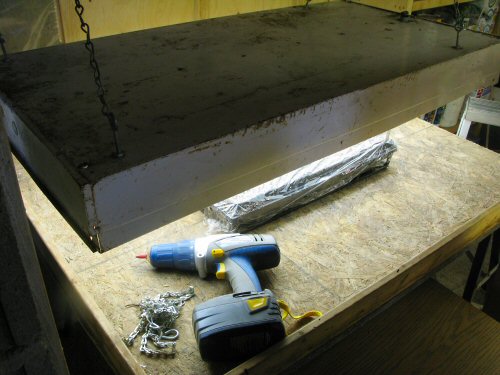
Hanging the lightbox is again this year part of the spring time set-up in the seedling room, when gear comes out of storage for seasonal use. In late winter, the fluorescent lights are put on the light racks, and removed after seedling production is over, usually in June, so the racks can be used as overnight harvest storage. And the lightbox, with its 4 fluorescent tubes, adds extra plant space when it’s need. I put it up today…

At the old farm, in the Extended Milkhouse, there was no space to waste, and it’s the same here in the new seedling room. That means clearing and converting the layout to fit the needs of the moment.

Tight quarters has a lot to do with the weather. Building a space insulated against our fairly brutal Canadian winters, and then keeping it warm enough for seedlings, is relatively expensive, and construction tends to be limited to the minimum you need.

In summer, the same insulation keeps the seedling room cool. It’s good to have a chill-out spot near the field, with phone and Internet (all the modern telecoms conveniences!), tea and cold drinks, chairs and a table…The more room the better. So, the lightbox goes up, and soon it comes down…

Tiny cultivation

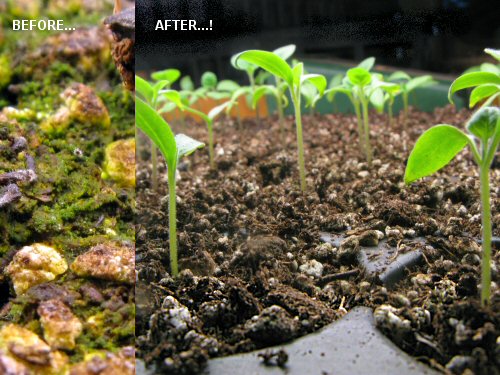
Tending seedlings on this tiny scale is pretty much literally fieldwork in miniature, especially with the pesky GREEN MOSS. The seedlings have to be watered, of course. And with the green moss, they have to be weeded as well. I use something pointy to stir up the surface of the peat-perlite seedling mix…

It comes back quickly, in a day or two, whenever the surface is wet.

I’m not even sure it’s moss, could be algae? Mold? Lichen?! I haven’t been able to ID it for sure, but I’ve often seen it called…green moss.

Not too appetizing to look at, the green moss has been quite harmless. At the old farm, I wondered if it came from the well, but here, we’ve been using filtered water and there it still is. It could be from the peat.

In any case, no worries, just a quick scuffling once in a while to keep it from sealing off the surface while the seedlings are small, which it looks like it would eventually do. I suppose I could find some clever, NATURAL way to kill it off, but I really don’t mind it. Once the mix dries out, the green moss is gone. At least, it disappears…

Tomatoes galore

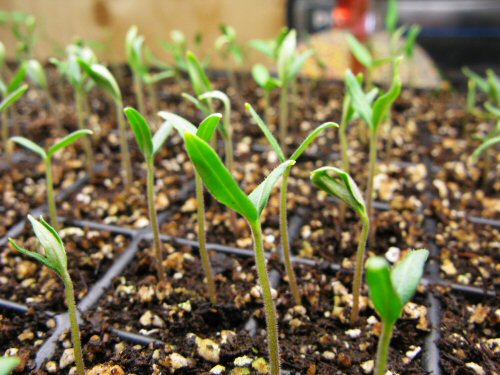
Tomato seedlings are suddenly everywhere! We planted out the whole of this year’s line-up in a couple of days, starting a week ago. The first tray (above) started popping in just 4 days! There are over 60 varieties, including around a dozen cherries. Except for half a dozen hybrids, they’re all heirloom.

Heirloom tomato seed seems to be more quirky than the hybrids, with noticeably different germination speeds and rates from variety to variety, and year to year. Here, we’re waiting on Cherokee Purple from some leftover 2006 seed—one’s up, there in the distance, the rest may come along soon, or not. Meanwhile, right beside, three rows of 2008 CP are up and at ’em, so we’re covered either way.

I haven’t really looked into all this—setting up more efficient storage than my current airtight-bags-and-cool-place method, whether the plastic lined packets from the big seed companies do better than the plain paper ones from many smaller seed houses, presoaking seed for some crops in a kelp solution or whatever, and so forth—because there isn’t much older seed, and most seem to do just fine. So much to try, so little time… Luckily, it always works out!

Advanced lighting automation

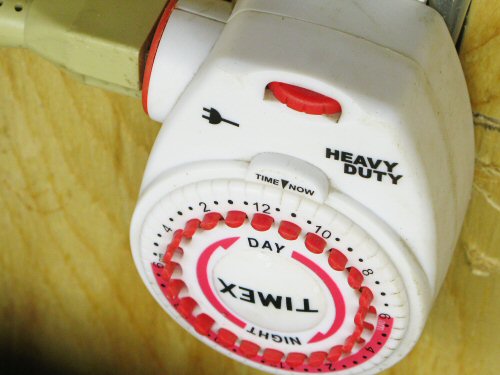
It’s “just” an ordinary C$15 AC timer, but a sophisticated automated lighting control system to me! It’s Heavy Duty for the three months of indoor seedling production in late winter-early spring. After that, this little unit is out of the picture as the transplant action moves to the greenhouse and the sun.  Until then, it’s set for 15 hours, turning on and off a total of 30 fluorescent lamps, right on time. (That’s four 3-shelf, double-lamp light stands, one 4-lamp light box, and an extra fixture hung up somewhere…) It’s really quite foolproof. Of course, it’s not…essential. But since we’re critically relying on ELECTRICITY anyway, why not a handy controller? Removing a couple of things from the tiny farming daily to-do list is always good…