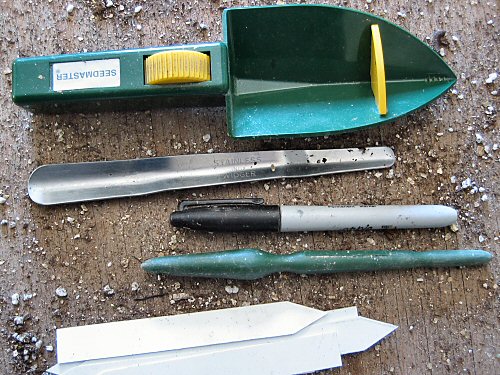
It doesn’t take much to get seed started indoors. Fingers, mainly. The Seedmaster is a bit of a gadget from last year, not liked much at first, but rising on the tiny tool chart. You roll the yellow wheel, which clicks and causes the tool to vibrate, shaking seed down and over those little ridges (speed bumps) near the tip. At first, the wheel was stiff and the whole process seemed slow, but this year, it’s loosened up and once you get used to holding it at the right tilt for each type of seed, it definitely works faster for me than finger-pinching tiny seed. It came with four yellow inserts, with different sizes of cutout at the base to further slow down different sizes of seed, but I keep it fitted with the largest. The stainless steel transplanter tool acts like a shoehorn, and works great for popping out plugs when potting up (it’s all in that little bit of a curve!). The permanent marker and plastic plant labels are of course indispensable (DON’T GET MIXED UP!). The green dibber (dibbler, pointy tool, whatever) is nice in principle: it comes in handy for poking little dents and holes, but fingers often work faster.
Series: Starting seeds
The tools and methods I use to start seeds indoors, to grow seedlings for transplant.
Seed starting tools II
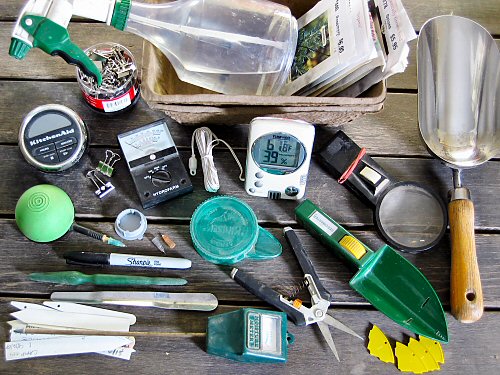
Here are ALL the indoor seed starting tools I have, most of them always-used, a couple not. Nothing special, and FINGERS I’ve found are handiest for most of the work at this scale. In any case, a few details (and there’s more on #1-5 in Seed starting tools, part 1): 1. The Seedmaster, a gadget for trickling out small seed as you rotate the wheel (the yellow pieces are click-in filters for different seed sizes); 2. assorted white plastic plant labels; 3. a dibbler or dibber or whatever, for poking little holes in soil; 4. a fine-point black waterproof marker (I like Sharpies) for labeling; 5. the mini-transplanter is essentially a tiny, stainless steel shoehorn for easy liberation of plugs from their cells; 6. a moisture meter, simply stick it in the soil; 7. plant snips for thinning seedlings; 8. Mini-Sim seeder: fill and shake out; 9. suction seeder with three tip sizes: squeeze the bulb, put the tip on a seed, release to hold, squeeze again to drop… ($25…what was I thinking?!); 10. digital timer for keeping track of repetitive tasks like bottom-watering trays one by one; 11. plant light meter, reads in footcandles, with settings for indoor and out; 12. digital indoor/outdoor min/max thermometer/hygrometer, mainly for keeping track of temperature; 13. magnifying glass with light, for examining seedlings (and GREEN MOSS) up close; 14. soil scoop for filling plug sheets and pots with seedling mix; 15. spray bottle with good quality spray head (more water per pull; I’ve used a wand mister like I have in the greenhouse, but the hose kept getting in the way, I may try one again for the seedling room this year); 16. small fibrepak flats, convenient for holding tools and seed packets on the potting table (left lying, the packets can so easily get wet…); 17. small bulldog clips, useful for all kinds of things, like organizing groups of seed packets. And the winners are…all of them, EXCEPT for: #9, which I found to be useless for my purposes; #8 which is great, but mostly for heavier hand seeding in the field, like for flowers; and #6, 11 & 13, which are more educational toys than essential tools, but still cool! (Wow, that was a lot of blogwork for pretty obvious stuff, but there you go! :)
Return to the trays
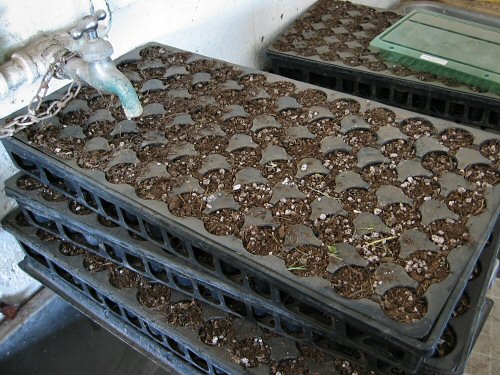
These 72-cell plug sheets, filled with now bone-dry starter mix, have been sitting in the Milkhouse on one half of the double sink since early last summer. They were extras from the final round of seed starting (the last of the brassicas). Now, it’s their time again, as I start the set-up for next year’s seedlings. I usually only do this stuff after the Holidays, but this year, I’m unusually anxious to get going. Maybe it’s a reaction to the unexpected snow and cold. After the recent, freakishly short winters that happened to coincide with my entire farming career, maybe I’m edgy about being cut off from the garden for so long. I mean, all I see is white. I want more greens and browns!! (And there’s the new adventure in fine dining to get started, sparked by Amanda at Apartment Farm’s recent peppy post: “Winter Gardening: Micro Greens”!)
Seed starting station
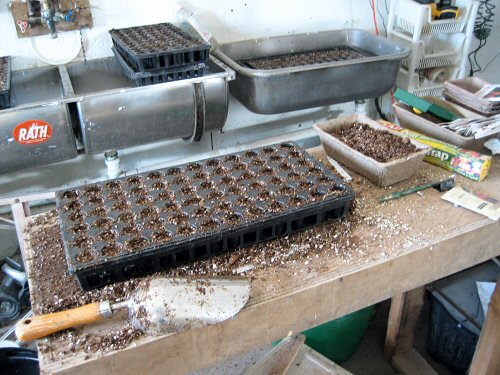
The seedling workstation… This high and narrow table is where I put seeds in cellpaks. The triple sink, a leftover from the dairy days when this was the sterile milk collection room, work out well for seed-starting, with all of the soaking, rinsing and draining involved. Today, the first eggplant and peppers.
The watering tray
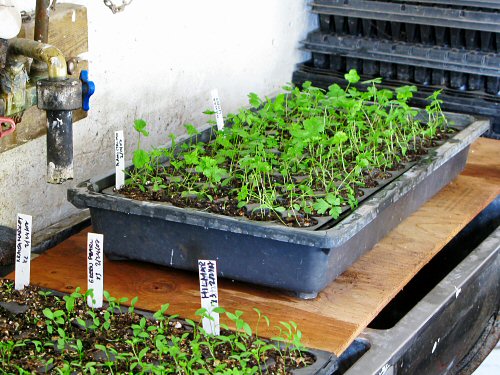
It’s funny how almost random objects can become practically indispensable tools. Like this rigid gray tray, given to me a while back, just the one, amongst a mixed bunch of plastic flower pots from bedding plants, passed along by a local gardener. For four seasons, I’ve used it to water the seedlings (all parsley in the pic): in goes a plug sheet in its webbed tray, sit for 10-15 minutes, then out to drain for a bit over the sink, and it’s back to the grow racks, good for another few days. I’ll keep this up until the seedlings are well-established, three weeks or more, depending on the crop. Perfect, except, at one point I’ll have maybe 50 plug sheets going at once, which means a lot of moving trays and tracking soak time. Not too efficient. I’ve been meaning to build a bigger watering tray, that can handle four or six plug sheets at a time. But I haven’t yet. As odd as it sounds, I’ve grown…attached to the one-at-a-time approach, and this particular, perfectly sized, always reliable gray tray! Every planting gets its own bit of focus each time it’s watered, developing its own little story on the way to the field. It’s part of the fun. Doing batches will be much quicker overall; the attention to what’s in each tray will be slightly less. Not a bad thing, there’s always lots to do with any extra time—continually improving by increments is also a main part tiny farming. With more seedlng starts this year than ever, I suppose I will build that bigger tray… Progress… ;)
Bare root seed starting

It doesn’t get simpler than this for seed starting in controlled conditions: the bare root approach. Spread seeds on paper towel, place another paper towel on top, mist with a spray bottle, roll up (don’t forget to mark the rolls if you are doing more than one), and place in a ziploc-type sealable plastic bag. Then, put the bag in a warm spot, light not required. Be sure to check on the seeds daily, as they can use the oxygen! Within a few days, you will see the little white radicle tip emerge, and from there it is root growth in action. When to take them out is open to experimention: all the veggie seeds I’ve come across are pretty tough and wanting to grow, given the minimum reasonable conditions, so you can plant right at germination, or a couple days down the line with more root. As always, there are lots of variables to consider, play around with, and so forth, but you should be generally fine no matter what. Since I usually only do this for germination tests, I don’t actually plant them (cruel, huh?!). Other materials than paper towels (they shred easily when wet, an advantage when separating if roots start growing into them) and plastic bags could be used—kinda interesting, a while back I checked the book and called my certification agency to see whether there were organic standards for the paper towels used with this method, since they are in such intimate contact with the seeds at such an early stage and who knows what’s in the paper, but no…this is not covered, anything goes, if you’re certified, this would be, well, certified organic. Anyhow, this year, these seeds are for production: here, it’s sweet peppers, eggplant, and tomatoes! We’ll see how it goes!
NOTE: Yeah, I am still messing around with my phone camera and the sometimes cheesy photo filter effects in Instagram for Android…
Bare root Brussels sprouts
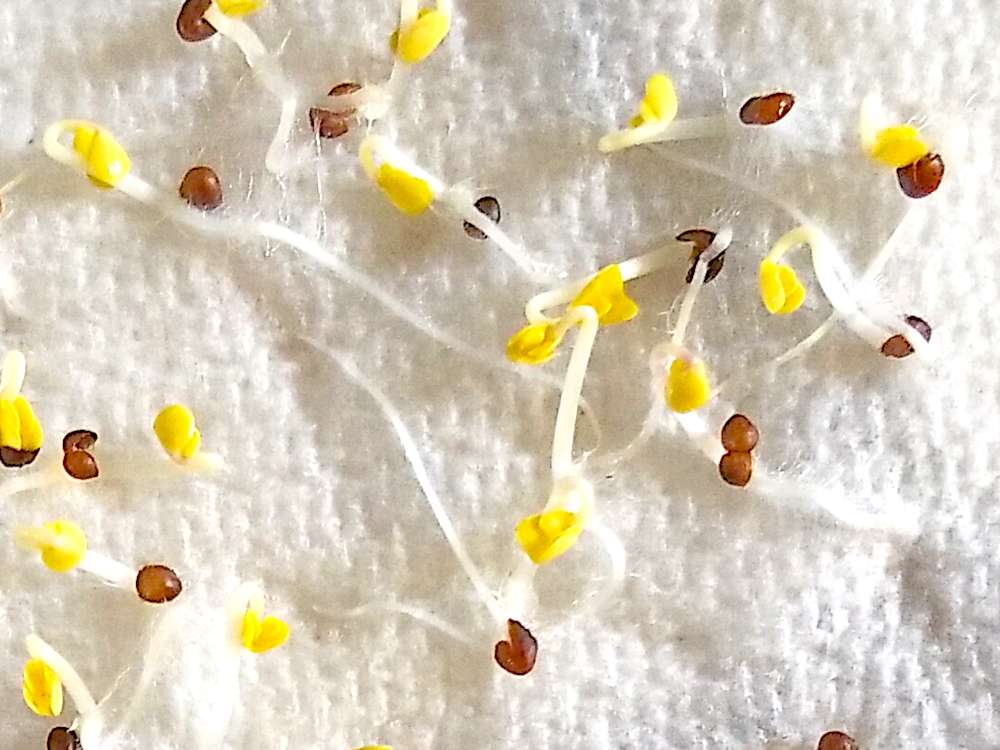
Yep, a wonder of Nature, up close. Three days or so after folding up the pinhead-sized seed in a damp paper towel, we have Brussels sprouts! Of course, this is only step one of many before we get to the deliciousness of actual Brussel sprouts. (Halved, tossed in corn meal and sautéed in butter is one way to go!)
Bare root germination like this is good for at least two things. It’s a useful germination test to see if old seed is still good. It’s also a way to start seedlings: transfer the sprouted seeds to a plug tray or pot, wait a few more days, and up they’ll pop. Let the greening begin.
The bare root approach adds an extra step compared to putting the seed directly in the plug or pot. It’s a little more work. It can be good with hard-to-germinate crops. Or if the seed is old, with a low germination rate, and you want to be sure that every plug has a plant. That it’s fun to see what’s going on is also a fine reason!