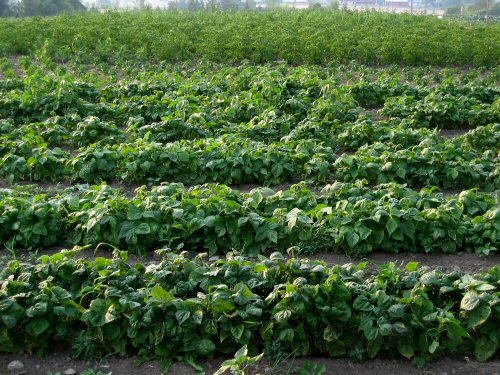
The first planting of snap beans is coming along quite well. Although the rows look nice and full now that they’re growing out, germination hasn’t been great this year, with annoying gaps that still have to be cultivated. If it’s not a matter of not enough water, I usually end up faulting it to the less-than-precise (but trusty!) Earthway seeder. A couple of days ago, I started looking more closely into what manner of germination troubles can happen underground. Yikes! For example, apparently some larval insects living in the soil (possibly earwigs, which are EVERYWHERE) will sometimes eat the emerging root tip (radicle), leaving the seed to absorb moisture with nowhere to grow, and quickly turn to paste. This would explain lots, starting with the pasty little blobs I discovered where beans should’ve been. I’m not sure if this is HOW it’s happening, but the little blobs are real enough—an exciting first! :) More as I discover it. In any case, we’re on our third planting, a fourth to go in right about now, and the first ones in are starting to flower. The selection this year is basic: green (Derby, Jade), yellow (Indy Gold) and purple (Royal Burgundy). Coming soon!
seed
Where carrot seed comes from
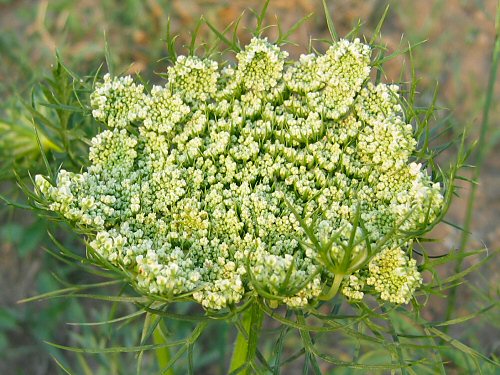
This is where those tiny, slow-to-germinate carrot seeds come from! For leaf and root crops, you often have to go out of your way in the veggie garden to see first-hand how exactly their seeds are produced—the crop is harvested and eaten before the flowering stage starts. Carrots are biennials, they go to seed only in their second year, so unless you’re seed-saving, or accidentally leave some behind over the winter (as we did here), the entire flowering process will remain a garden mystery. For carrots, if it was a mystery, no longer…!
Flowers on my mind…
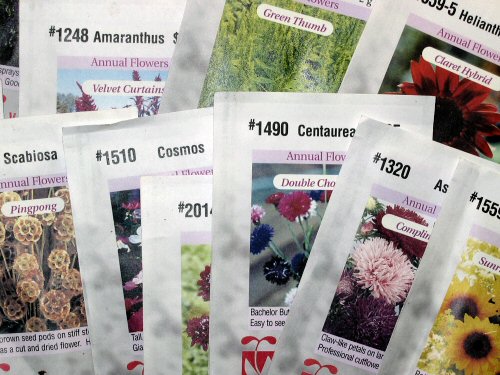
Most of the flower seed for the new cutting garden arrived today. Cool. This is going to be interesting! Apart from growing a couple of hundred glads in Year 1, flowers are new to me. The PLAN is to take it slow. I selected all annuals for direct seeding, and from what I can tell, this bunch will just grow themselves. Really! With all the veggie work to do, it’ll be basically put the seed in the ground and see what happens! (I have faith.)
Germination test
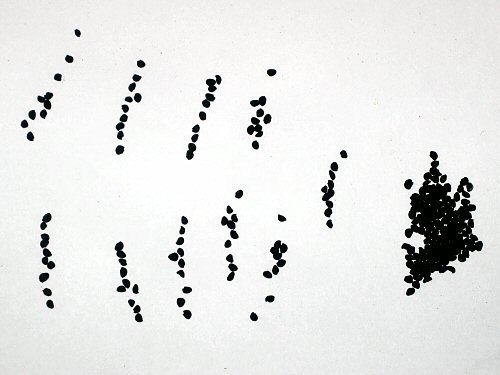
For some reason, I have 250 grams each of Ramrod and Summer Isle bunching onion seed from two years ago. Onion seed is supposed to be good for only a year or two, I’m too anti-waste (and curious) to just toss it, and I don’t want to find out if it’s viable when it’s in the field and I’m counting on the crop… So, my first ever germination tests! Pretty simple: count out a good sample (I went for 100), roll ’em up in a damp paper towel, stick in a plastic bag, wait, then count and figure the percentage. Both varieties were marked 88% germination in 2005 when they were fresh. Anything close to that and I’ll use it, around 50% and maybe I’ll double seed, lower and I’ll give it away… How scientific!
First direct seeding of the year!
O the excitement and satisfaction. The first 400′ of snap peas (Sugar Ann) are in! This is the first seed to hit the field this year!!
It’s a low-risk gamble for two-three extra early bushels for the market. With over a week of cold days, subzero nights and even snow ahead till mid-month, the peas may germinate unevenly, and there’s little more annoying and unproductive than picking a not-dense-enough pea planting (you pick forever to get relatively little).
Last year, I seeded out this early with two varieties, and neither worked out as well as the next seeding 10 days later.
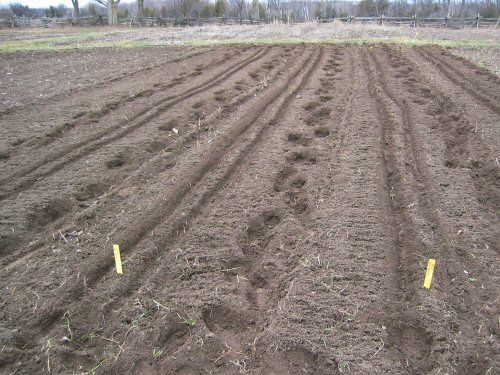
Here you see the results of my current bed marking technique: using a 100′ reel-type measuring tape, I mark the path centers on both ends with a label stake, walk ’em out, and pull up the stakes. Presto!
These beds are 4-1/2′ wide. The spacing between the double rows is a little wide to what I usually do (4-5″), but the freshly tilled soil made maneuvering the Earthway seeder close to the first row difficult (tight double rows for bush peas let the plants support each other and you don’t have to weed between).
It’ll work out! Delicious edible-pod peas in 60 days?!
Plug sheet action
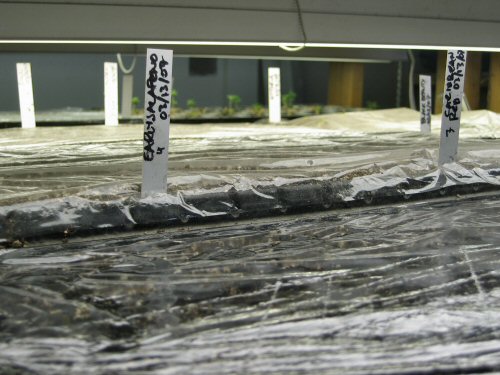
Plastic cling wrap is everywhere. I tried it out last year as a replacement for clear tray covers and it seems to work fine. The method so far: fill the plug sheets with seedling mix, place tray in water so mix is soaked from the bottom up, drop in 2-3 seeds per cell, cover lightly with more mix, soak surface with spray, apply plastic wrap (it sticks nicely to the wet edges of the plug sheet), fill out label marker with variety/date and plunge through plastic (those labels are all that stand between you and variety chaos!), then it’s off to the racks. Now, the trays don’t have to be watered for a week, the mix retains more heat, and you can check moisture by looking at the condensation on the plastic. At first, I wondered about adequate air circulation and whether the fairly closed conditions would encourage algae, but the seedlings emerge on time with no unusual algae problems. As soon as the first couple of seedlings appear, it’s off with the plastic. I re-use the plastic as well, over the 4-5 weeks of seed starting, and the bit of waste in the end, well, I think it’s moderation in everything that counts. (In the top right of the pic, the Vittoria eggplant is tenting its cover, having pushed up vigorously in just six or seven hours overnight. It’s a feisty one!)
Seed starting tools
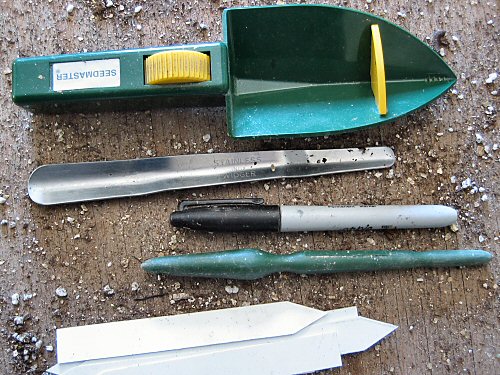
It doesn’t take much to get seed started indoors. Fingers, mainly. The Seedmaster is a bit of a gadget from last year, not liked much at first, but rising on the tiny tool chart. You roll the yellow wheel, which clicks and causes the tool to vibrate, shaking seed down and over those little ridges (speed bumps) near the tip. At first, the wheel was stiff and the whole process seemed slow, but this year, it’s loosened up and once you get used to holding it at the right tilt for each type of seed, it definitely works faster for me than finger-pinching tiny seed. It came with four yellow inserts, with different sizes of cutout at the base to further slow down different sizes of seed, but I keep it fitted with the largest. The stainless steel transplanter tool acts like a shoehorn, and works great for popping out plugs when potting up (it’s all in that little bit of a curve!). The permanent marker and plastic plant labels are of course indispensable (DON’T GET MIXED UP!). The green dibber (dibbler, pointy tool, whatever) is nice in principle: it comes in handy for poking little dents and holes, but fingers often work faster.