Inside and out…

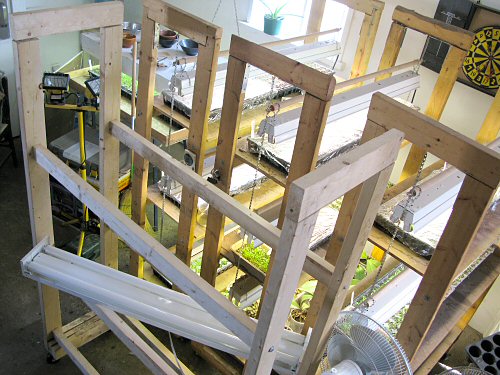
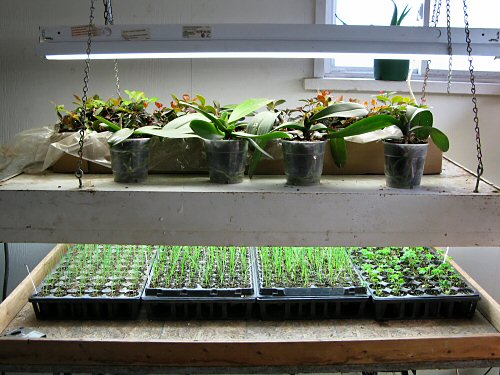
Inside, in the increasingly GREEN Milkhouse, this year’s artificial sun set-up is done. It’s about fitting in as much area-under-lights as possible, while making sure all of the trays are easily reachable, for watering, rotation, thinning. So, there are the four grow racks, and the lightbox (that’s leek, onions and parsley under there), with its second level (why waste a flat surface that comes with chains?!). For now, this extra space is the new spot for the rescued-and-passed-along decorative plants (the heather was too dried out and didn’t make it, the wintergreen are doing fine, and the orchids seem OK…), but they’ll eventually be crowded out and moved somewhere else. The shelves are filling up fast… MEANWHILE, outside, it’s snowing and snowing, again. That’s a lot of snow. Around here, we’re definitely off to a later start this year than at least the last couple, but I’m still not particularly put off, not just yet. Although, it’s not supposed to warm up for another week, maybe two…

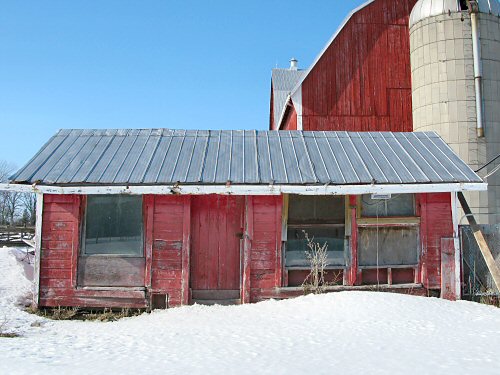
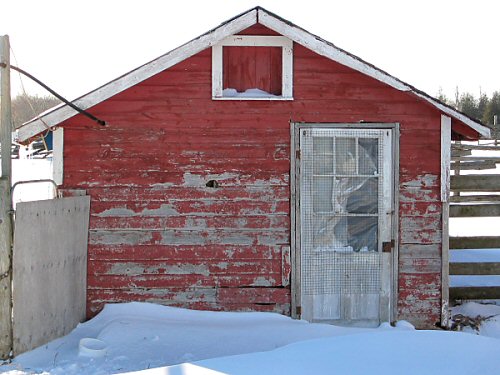
This is today’s peaceful but uninspiring view of the garden from the north-facing Milkhouse window…

Chickenhouse inspection

Checked out the chickenhouse today to make up a materials list for the renovation. Here’s a view of the south-facing side (the usual daily view is from the barnyard to the east; the barn and silo are to the north, and hidden behind them is the market garden). From this side, it has that ramshackle cabin-in-the-woods look. I quite like it: 200 sq. ft. of open-plan living, big windows for lots of natural light, electricity, running water…instant home! Like most things on the farm, it has its history. The structure is 80-90 years old, purchased 50 years ago from the farm that used to be across the road (now a village subdivision with a bunch of houses, and untended fields), dragged over by tractor, and set on a concrete pad. It was used as a pony barn for a while; harnesses are still hanging on the wall. For the last 15-20 years, it’s housed a few chickens and turkeys, or been unused. Now, it’s back! There’s not much to do, besides a good cleaning: banging in a defensive baseboard (in the pic below, that’s a GNAWED not-so-little hole under the window), a window to fix, nests to build for the layers, and a coat of lime to disinfect and whitewash (that’ll be interesting). Outside, T-bars and chicken wire to fence in yards, and that should be it. Most of the materials we can salvage on-farm: the fencing stuff, lime, and plywood should be all that requires cash! There are even a bunch of feeders lying around. All these bits from the past, unused and still in place after years and decades, would be a little creepy, if we weren’t coming across them on the way to getting new things started!

Rack built

New lumber turns into new grow rack. This adds a fourth to the set, a measure of tiny farm growth. I started with two in Year 1, built another one last year (Year 5). It’s not like the focus here is on rapid expansion…this is the speed of staying tiny! ;)

Although I don’t build these often, it seems to get quicker every time. Well under a hundred dollars of wood, wheels, screws, bolts, brackets, hooks and chains, plus a chop saw, a drill and a couple of hours, and there it is! Light fixtures are extra. In the pic, the shelves still have to go on.

Lying across the middle supports is one of the four old fluorescent fixtures, given to me instead of being tossed in the trash. Not only free, they’re BETTER: these are the overhead lighting type you see in (horribly lit) offices, the tubes are spaced farther apart than in the standard shop lights I’ve been using, the light will spread more evenly over a larger area—for the seedlings, a lot less leaning and stretching…

New lumber

Went through the lumber delivered yesterday, selecting the straightest pieces for a new grow rack. There’s all kinds of scrap wood around the farm, except, there are never enough 2x4s and plywood… I order construction grade for most things, quite inexpensive but the boards have to be hand-picked if you don’t want a lot of warped wood. For rough carpentry, this works fine: the savings add up, and rough edges add character! There’s the grow rack, a double screen door for the Milkhouse, the composting toilet-ice fishing hut conversion, the chickenhouse reno, new tables and trays for the farm and market stands, more… All needed pretty soon. Spring building starts now!

Rough carpentry

Added a shelf to the potting table today, a quick bit of rough carpentry. It also needs a couple of coats of varnish to waterproof it for the season, so I took the time to shave down the little edge where the sides join the tabletop. Normally, I wouldn’t bother with a minor detail like that, but I spotted the cool little surform plane (the blade is kinda like a grater) in one of the toolboxes and felt like using it! Rough carpentry may sound like nothing much, but it’s really a particular, essential skill of its own on the tiny farm. I’ve been learning as I go. The “rough” doesn’t mean sloppy or shoddy, just practical: functional, sturdy, simple construction, as much as possible using whatever materials are at hand, and not waiting around to get things done. Need a shelf over here? A workbench fit in right there? A couple of quick walls to turn a corner into a storeroom? A roof on the veggie stand? Grab the tools, hunt down the materials, and bang it up!

The simple shelf is a couple of 1×6 boards. It’s for keeping plug sheets handy when I’m seeding lots of trays of transplants at once. The potting table started out as a long, shallow bin, built from scraps of plywood, to hold harvested tomatoes. I later reassigned it: flipped it over, added legs, and voila! (There’s that trusty saw again.)

The Big Shelf

The choice storage spot for tiny farm gear, especially during winter, is this giant shelf, where it’s warm and dry. It’s at the back of the Extended Milkhouse, the last 3-1/2′ of the old ceiling, propped up on the leading edge by a beam across and 4″x4″ posts. It would maybe qualify as an upper level, if you could actually stand up: clearance is only 3-4′ under the new sloped ceiling. It’s 3-1/2’x20′ (1mx6m) of up out of the way space…a big shelf! About 7-1/2′ feet high, I get up there by ladder. Only one season old, it’s still startlingly clear, orderly, and almost entirely filled with immediately useful stuff as opposed to sure-to-be-useful-sometime gear (though the inevitable packing boxes saved just in case of return already have a presence). It’s dusty up there. At this end are the many fluorescent light fixtures (12, I think) for the grow racks. They hang from chains from those dowels in front, and the dowels in turn hang by the nails from more chains on the rack! When seedlings are all done, I remove the lights and use the racks for harvest storage. The oscillating table fan is used to give newly emerged seedlings a bit of a toughening up, conditioning breeze. Down at the other end, stacks of 3″ peat pots and plug sheets and trays. Time to start seedling room set-up!

Welcome to the chickenhouse…

Chicken coop? Henhouse? I like ’em all. This weather-beaten little building has been empty for a while, but a little fix-up and it’ll be ready to go. You can see the electricity cable and water hose snaking out at the top left of the pic. All the modern conveniences! The last tenants, three years ago, were half a dozen turkeys, lead by crazy Tom, an increasingly aggressive male known for a flying drop kick that could stagger a grown human. I didn’t have any close encounters with Tom, although I was curious. Before that, when I first started the garden five years ago, a dozen or more incredibly colorful ornamental chickens roamed the barnyard, darting out of hedges, zipping under fences, you never knew where they’d pop up. These were all, like the goats, kinda pets, and were eventually given away. Now, the loose plan is to get, well, WORKING chickens, for meat and eggs. At first, it won’t be directly part of the organic veggie garden, more of a side project that I’ll do with Bob. We were going to start last season, but that wound up on the still-to-do list. Yesterday, I took a quick look at the chicken-raising regulations—here in Ontario, there is a quota system that requires buying permits to raise chickens, with an exception for small numbers, and I imagine it’s similar everywhere in North America. Oh, well, more on that as it happens!