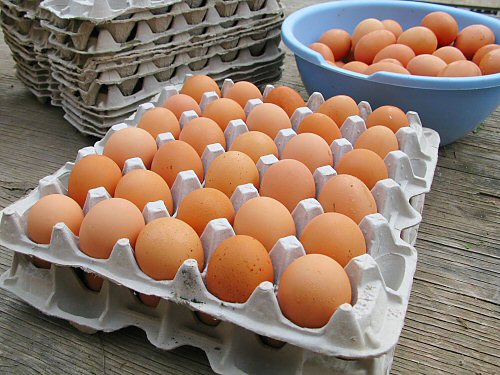
OK, so they’re just regular cardboard egg trays from the commercial kitchen world, and they’ve probably been around exactly like this for decades. BUT, they haven’t been around HERE. Lynn recycled them from Shelter Valley Folk Festival, where she was last week, where they were feeding big groups of volunteers. The trays are fantastic! Our chickens produce only about two dozen eggs a day, but that still adds up. I’d been keeping them at first in regular one-dozen cartons, then in bowls and small baskets. It was getting a little out of control. Now, they simply, efficiently stack in the fridge, 30 per tray. Every second week, like today, we bring a bunch to the farmers’ market as a bonus in the CSA shares, and the trays make transport a lot easier as well. Amazing. :)
recycling
Outhouse deluxe
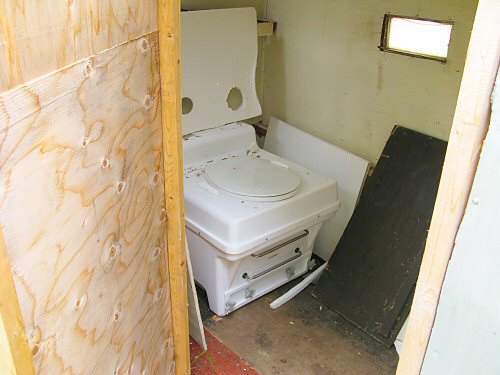
The outhouse updated! This Envirolet composting toilet, the deluxe AC electric model, is possibly the most unusual farm purchase I’ve made so far, mostly because it was quite expensive and I’m not 100% sure why I got it. With a hefty $500 off on special, it was still somewhere around $1,200, which on the tiny farm budget counts as a major purchase (the used John Deere riding mower cost the same, and it does fieldwork!). And considering that you can build a composting toilet for little or no money, from scrap wood… Call it divine inspiration, like: “You must get this toilet”? Anyhow, it’s here, it’s been here since around Feb. 2007 (the special offer was expiring), it hasn’t gone unthought-of or unmentioned,…and it’s finally, slowly, getting installed for this season! The general idea is to have facilities in the field, which is a lot more convenient than heading into the house. Still… These toilets do sound quite amazing: odorless, comfortable, able to compost six months of humanure into a thin layer in a slide-out tray. Models range from no power, to AC/DC (has a fan), to regular AC plug-in (fan plus heater for the coldest days). The more power, the higher capacity, as the fan or fan/heat speed up evaporation: this one is rated for 8 people x 3 “uses” per day. I guess I had visions of LOTS of toilet traffic from the field. And this attractive little waste-handler is quite an inviting intro to personal waste recycling, compared to a hole cut in a board (and you can use these in homes to replace regular flush toilets as well!)… For installation, the original plan was to build an enclosure, but this discarded ice fishing hut came up as a ready-built alternative. Converting it is only a few hours work, but it’s being done in little bits and pieces. First, the rotting door was removed and the frame widened to let the toilet in, the various built-in ice fishing conveniences—bench, shelves—were removed, and some rotting floor replaced. Next step, fitting the toilet’s ventilation pipe through the ceiling. And then, interior decoration! A coat of whitewash for a start… Coming soon!
Chickenhouse progress
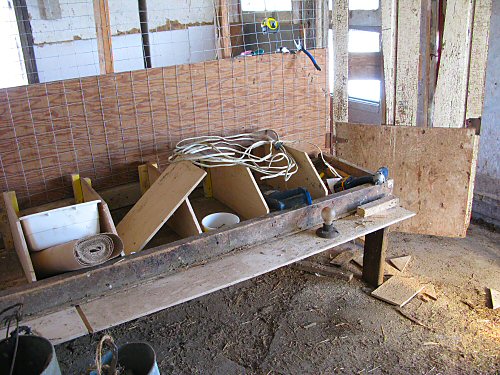
Work on the Chickenhouse has been moving along. It’s not a huge job, but all of the little bits and pieces take time, including foraging through the barn and drive shed for material to recycle. Here, you can see the bottom of the new door between the main sections, for baby meat birds coming in a couple of weeks, and the mature layers, due in June. And there are six new nest boxes. Most of the boxes I’ve seen in photos have a top, which I gather is partly to discourage roosting on the walls and the subsequent crapping into the nests. But I’m fully deferring to Bob’s design, based on his decades of all-around farming. He says it shouldn’t be problem. For me, I’ve been doing my chicken reading and chicken chatting, but it’s mainly learn as you go with Bob in the lead on this one!
Jack the Miniature Donkey has been amiably hovering around, checking out the construction with his head stuck in the door. Here, he’s hanging close to the Chickenhouse even when no-one’s home. The chickens will soon be his neighbors. He’s a friendly fellow, also quite territorial, and he can kick, so he ought to be good for protecting that flank! All in all, I’m really incredibly excited. I guess the city guy in me is still in there looking out… ;)
Orchid, wintergreen, heather…
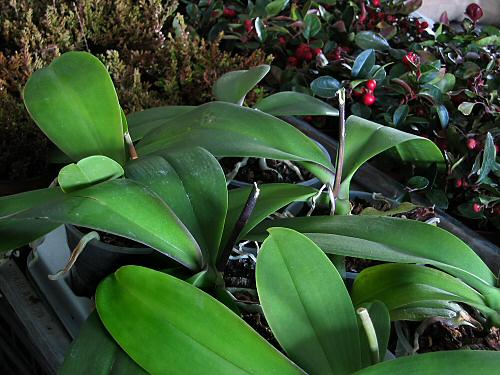
Surprise! I’m used to getting helpful recycling donations, like carefully saved flower pots, mesh onion bags, fruit baskets, plastic bags, even elastics, but a boatload of plants is a first. I was given about 20 each of potted heather and wintergreen, and six orchids. No idea what I might do with them. They’re from a big floral design company that makes up fancy settings for high-end special events, and throws everything out afterwards. I could easily be buried in random decorative plants if this stuff was to keep coming… In any case, these are here now! I looked up wintergreen, it’s a creeping evergreen shrub. Outdoors in winter, it holds its clusters of bright red berries—they stand out in the snow. Good eating for birds! Heather is quite the versatile plant, seems to have a cult of its own. A heather garden? The main stems of the orchids have been clipped, but apparently they’ll flower again. After a good watering, the orchids and most of the wintergreen are doing fine. Most of the heather came in bone-dry soil, and except for a few, it looks like they’re toast. Well, there’s space on the grow racks for a few weeks, so I’ll keep ’em around and see what happens next…!
Making mulch, part 4
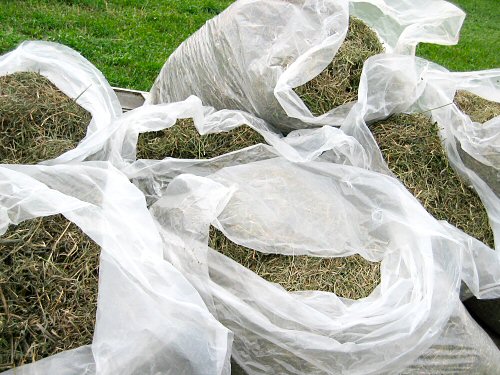
Fat bags of kinda fluffy grass-and-alfalfa mulch are the satisfying end of this little experiment (well, the real end comes next spring when we see how it does at sheltering the garlic for the winter). For this second batch, the bags are actually step 2, not part 4: I eliminated the greenhouse drying stage by letting the cut dry in the field and bagging it on the spot (which was always the plan—cut, wait, bag—the first time was just a bad weather thing). A small but to me really satisfying part is reusing those big clear leaf bags. We go through at least three or four new ones almost every week of the market season, for fresh cut spinach, mesclun, and other greens. They’re used once, and then I’ve been saving them for the last three years for JUST THIS PURPOSE! It’s great to see your plans materialize, right before your eyes!! Little things, big pleasure…
Roofing the stand

Finally got around to putting the roof on the farm stand. We recycled the old galvanized steel roofing that was replaced during the Milkhouse extension last fall. In the end, a quick job, three hours or so of matching pieces, handing them up one by one (watch the wind), and screwing ’em down. Luckily, there was very little cutting to do, sheets of old metal can be a real nightmare for slicing and gashing (working without gloves, I nicked a finger only once—every so often, it’s good to see a little bit of your own blood running red and true :). In the pic, I’m screwing things down while Bob selects sections. The farm stand is definitely not on course for the ambitious plans of earlier this season, but in good tiny farming fashion, it’s moving along! (Guest photo by Mami.)
Making stakes
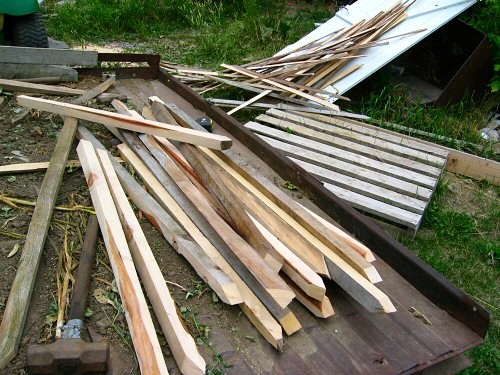
In the building and fixing department, there’s always a queue. Jobs are usually one of three degrees of urgency: Right Away (fix it or we can’t go on!), It Would Be Really Good To Have This Done Soon, and When There’s A Little Extra Time (and that’s often, all the way to Fall). Today, it’s finishing a Right Away job: making up more wooden stakes for the tomatoes. Last year, I bought for very cheap a pile of scrap wood, 10-12′ lengths, rough cut to around 2″ square, from a local sawmill. This year, we found pounding stakes made from this stuff a foot or so into the ground took an insane amount of sledgehammer effort, especially when driving into dry soil. Cutting them down just a bit made a HUGE difference. Using a table saw out in the barn yard, we shaved about 1/2″ lengthwise off each width, winding up with maybe 80 1-1/2″ square stakes. It took a couple of hours overall to save many more in the field, not to mention energy, sweat, frustration. The little things do indeed make all the difference! (Also in the pic, painted white, an old door scrapped during the Milkhouse Extension, and a nice, solid pallet (probably from the seed potato delivery), both to be reused in the composting toilet enclosure, an IWBRGTHTDS project.)