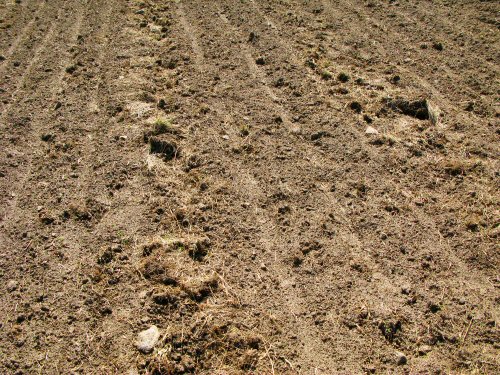
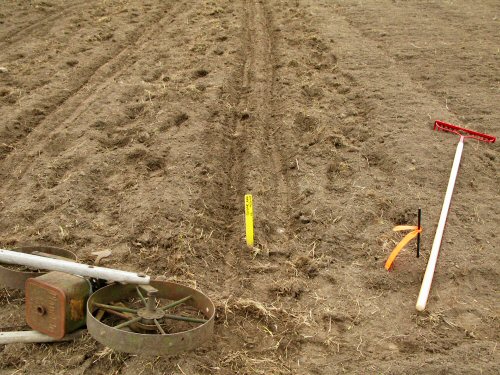
Direct seeding is going ahead at a careful pace. There’s a fair amount of broken up sod in the mix, and it would be nice for it to have more time to settle in and decompose, also for any bits of live grass to start poking up so they can be disrupted again with a light tilling… But we can’t just wait around. Spinach, beets, and radish went in a few days ago, just after the first peas. More peas went in yesterday (Connor for the first time wrestles with the kinda heavy and unwieldy Planet Jr., above, and ends up doing fine on a trial row). Now, the watching and waiting is on for the first plants to emerge in the field…
Tools
Equipment for large-scale agriculture is too big or too expensive, and many home gardening tools don’t work efficiently on larger jobs or break easily. Tiny farming on plots up to two or three acres requires its own special gear…
Direct-seeding peas
The first direct-seeded crop went in today: Sugar Ann snap peas. As usual, the peas were inoculated with Rhizobium bacteria: dampen the seed with a little water, sprinkle with inoculant powder, and shake.
Rhizobium bacteria enter legume roots and form a symbiotic relationship with their hosts, producing plant-usable nitrogen in exchange for carbohydrates and other nutritious goodies from the plants. The net result is…more nitrogen for all! Or as the inoculant package says: “bigger yields and better quality”!
Sounds great. I take it on faith (in the science, I guess), since I haven’t actually observed the with-and-without inoculation difference. I have a couple of times planted without, but I wasn’t taking measurements…
Each legume (peas, beans, clover, etc) needs its own species or strain of Rhizobia. Luckily, there are packets of premixed assortments that cover the common veggie legumes. What I’ve been using, called simply enough, Garden Inoculant, is good for beans, peas, lima beans and sweet peas.
The bacteria do establish in the soil so that they’re available from year to year, but I’m not sure how long and in what quantities it takes to get set up with the strains you need—until I find out, I’ll inoculate every time…
Then it’s on to the seeder. I’m using the older, heavier, probably-antique Planet Jr. over the usual Earthway.
And minutes later, 3oo’ (91m) done. It’s an almost painfully small start for April 20, but I’m figuring that every few days I leave the broken up sod to break down more, the better off we’ll be. Soon, though, all the rest of the early direct seeded crops will just have to go in!
People at work: hoophouse goes up!
Another beautiful and busy day in the field, with Lynn, Mel, Jordan, Tara and, for her first full day, Andie, all variously raking, tilling and building. And eating lunch (can’t wait for proper farm food to kick in!). The most VISIBLE accomplishment today: we put up the frame of the hoophouse, which is the main part of the job. This was mostly done by Andrea and Jordan, first-time building for both of them, with me holding hoops, furnishing tools, and starting them out with some how-to advice. Working with light, pre-formed metal is particularly satisfying, things can go up fairly quickly, to produce dramatic results (or maybe it’s just me, waiting for that greenhouse!!!). It seemed like the satisfaction at the end was pretty deep! :)
Screwing the hoops to the ridge is the main structural task. We used the bucket on the Kubota compact tractor as a raisable platform…
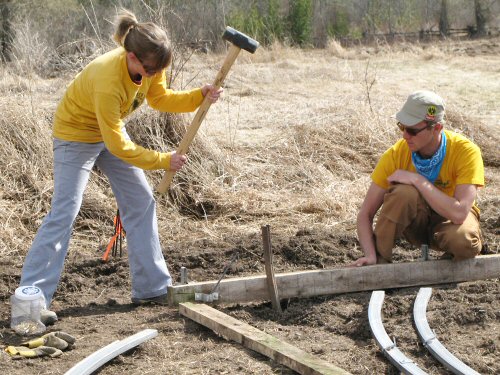
Since this is a re-assembly job, all the parts and pieces were there to be…assembled. First, lay out the 4×4 base, and pound in eight 3′ (0.9m) iron T-bar stakes to anchor the hoophouse. The T-bar is attached to the wood with lag bolts. Pounding was relatively easy, the ground is still soft, but a little bit of a workout. And if you look closely, near Andie’s foot and Jordan’s knee, you can see the brackets that the hollow steel hoops fit over, at 4′ (1.2m) spacing…
Next up, starting the frame. Attaching the first two pairs of hoops to the ridge is the trickiest part. The hoops slip over stubs in the ridge, then they’re screwed in place. A cordless drill and a couple of wrenches were all the tools we used. It’s wobbly at first, the more hoops you add, more stable it gets!
And there we are! Andie tightens up nuts on the cross-braces (purlins). In front, the lumber for an end wall is layed out. Halfway there. All in a tiny farm day’s work…
Tiny machine action
Beautiful weather, around 60°F (15°C) in the full-on sun, with a crisp undercurrent of a breeze… What could be nicer for the first full day of fieldwork?! Lynn, Mel and Jordan came by at 8:30 am, and Tara joined in a little later on. We’re still working on preparing the beds, so the main action was raking and ROTOTILLING…busting up that sod. And everyone’s gearing up for the season, learning where things are and how to do…stuff. Like…rototilling! Mel tries her hand at it for the first time (above)—the Kubota compact tractor is as reliable, steady, and undaunting as ever…
Tara also rototills for the first time. Here, she executes what looks like a nimble little turn…
Mel inspects the results of a pass with the rototiller, checking out the effect of tilling at different speeds. And the tiny farming goes on… (Photos 2 and 3 by Mel)
The rain watch begins (once again)
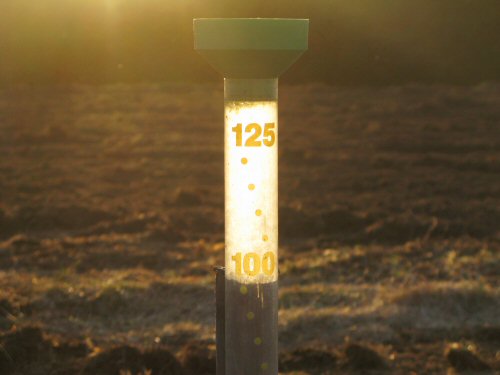
Another rite of spring on this tiny farm: setting out the (jumbo) rain gauge. I did it today. This model, with its big numbers and fluorescent red float, can be “read at 50 feet”! Or something like that. It’s…jumbo. I stake it in a convenient spot that I pass by several times a day, so I’m never straining… And it’s always somewhere in mind: Scientific Measurement meets wow-I-wonder-if-it’s-ever-gonna-rain-again (except for the occasional year of when-is-it-gonna-stop?!!—but the rainbows were nice).
No sooner does the snow go and the ground dry out enough to begin working, than it’s time to wait for rain. This gauge is calibrated in 5 millimeter increments (about 25 mm to the inch, I think in inches when it comes to rain…). It’s emptied daily as necessary, so it never gets nearly this high. Rainfall is recorded on the field calendar to keep track for irrigation (an inch a week total, rain+watering, is the rough target).
Don’t think I’ve seen it go much above 50 mm (2″) in a day, and that only a couple of times in six years. In the market garden, too much rain is at best not helpful, but too little rain is always plain…bad! Here’s to having rain every seven days or so this season, about an inch at a time, gently laid down over one partially cloudy day, followed by a few days of sun. I’m looking forward to that! :)
Compressed air and rototiller repair
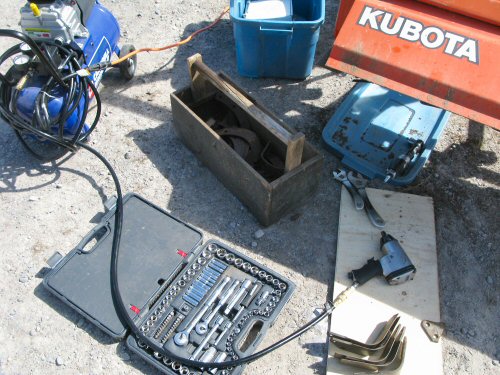
Looks like a whole lotta gear for swapping out one broken rototiller tine. Two bolts. BUT, this was a chance to try out the air tools with the new, tiny (8 gallon) compressor. So far, all it’s done is inflate tires.
The compressor is a smaller-scale replacement for the heavy duty one at the old farm. It’s not an absolutely essential bit of gear, but it does a lot of farm work: inflating, cleaning out things like screens and filters with blasts of compressed air, loosening big nuts and bolts (impact wrench), and removing lots of nuts quickly (air ratchet). And it can do more. I use it at least once or twice a week.
This unit is the top end of the home handyman line. The smaller tank means it can’t put out full pressure continuously for too long.
Sometimes, getting “home” gear for the tiny farm just doesn’t make sense, the equipment isn’t up to what you need it for, or, it breaks. But you often don’t need or can’t afford the same heavier equipment as, say, a more tractor-driven farm. Then, the choice is to rent/hire, or buy lighter duty IF it will really work.
Buying used equipment is another great approach, but, you need lead time—you want a tool there when you need it, not only after a good deal comes along—and you need extra buying skills to make sure you’re getting good used gear…
In this case, compressed air is used quite frequently, I couldn’t justify the cost of a commercial/industrial compressor, and I wanted it right away (here, the difference was two or three hundred dollars, and that adds up). Of course, I figured this one would work out, but you don’t know for sure until you try!
The impact wrench did just fine for de-bolting and re-bolting (I finished tightening up by hand). Now I know this little compressor can handle all the usual tasks on a tiny farm scale. Another CHECK on the new-farm, getting-set-up list. That’s good!
Making space and saving space
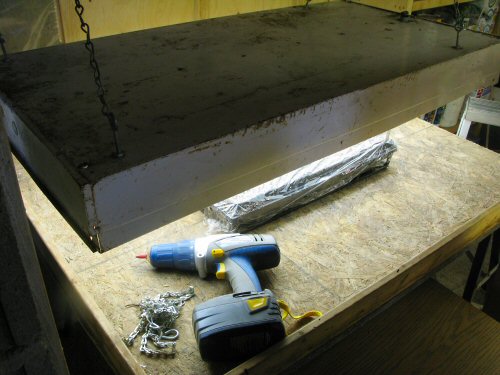
Hanging the lightbox is again this year part of the spring time set-up in the seedling room, when gear comes out of storage for seasonal use. In late winter, the fluorescent lights are put on the light racks, and removed after seedling production is over, usually in June, so the racks can be used as overnight harvest storage. And the lightbox, with its 4 fluorescent tubes, adds extra plant space when it’s need. I put it up today…
At the old farm, in the Extended Milkhouse, there was no space to waste, and it’s the same here in the new seedling room. That means clearing and converting the layout to fit the needs of the moment.
Tight quarters has a lot to do with the weather. Building a space insulated against our fairly brutal Canadian winters, and then keeping it warm enough for seedlings, is relatively expensive, and construction tends to be limited to the minimum you need.
In summer, the same insulation keeps the seedling room cool. It’s good to have a chill-out spot near the field, with phone and Internet (all the modern telecoms conveniences!), tea and cold drinks, chairs and a table…The more room the better. So, the lightbox goes up, and soon it comes down…