
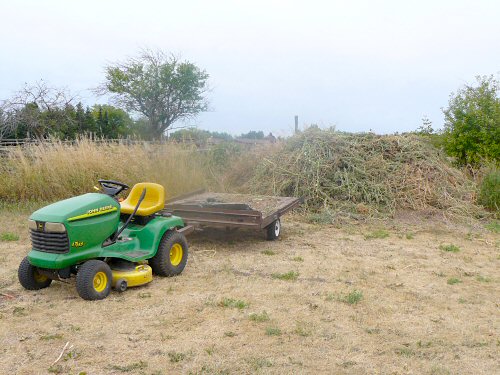
A vast repository of uprooted pigweed is collecting by the wagon load in the southwest corner of the field. It’s crazy the amount of effort that’s been put into pigweed pulling this year, that in addition to hoeing and tilling in younger specimens. The pigweed pile has already achieved almost surreal dimensions and a fascination all its own. I stop and gaze at it on the way by… What can I say? PIGWEED!!!!! Guest photo by Mami.
Tools
Equipment for large-scale agriculture is too big or too expensive, and many home gardening tools don’t work efficiently on larger jobs or break easily. Tiny farming on plots up to two or three acres requires its own special gear…
More from the Market
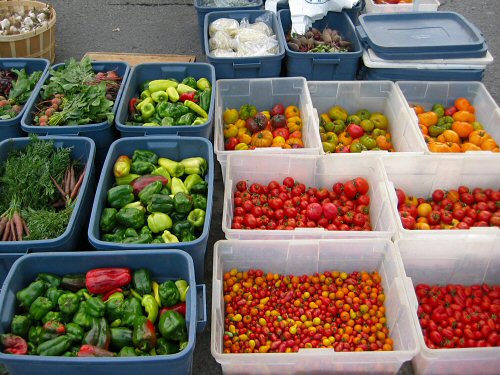
Today’s wares set up behind the stand at the farmers’ market. First thing in the morning (that’s around 7 am), we open and arrange all of the crates and use them to stock the stand and assemble CSA shares. Here, we’re partway into the morning—as the day progresses, crates get stacked. Visible in the pic, an assortment of mainly heirloom tomatoes, carrots, assorted sweet peppers (we picked a lot of ’em green before turning to red rather than let them shrivel in the near-drought conditions), various beets, garlic, and green and yellow beans pre-packed for the CSA. As for the traffic, the day was on the quiet side, despite great weather—it seems the fresh, local, organic trend so pumped in the media this year, and apparently somewhat sweeping the cities, is taking its time hitting the countryside. All in all, though, a decent Saturday!
Harvest board
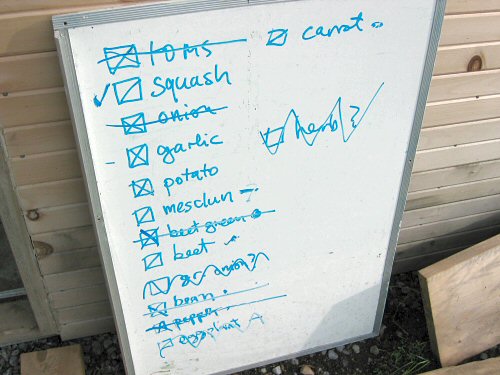
At some point on Thursday evening or Friday morning, I print out the harvest list on, of all things, a dry erase whiteboard! The last time I saw these things in action, they were lining walls floor to ceiling in trendily makeshift loft-style offices in big cities during the original dotcom frenzy. Then, they were covered with all kinds of wild brainstorming notes and diagrams for generally harebrained Web schemes. Now, it turns out they’re also perfect for listing veggies ready to be harvested. They’re fun to write on, quite impervious to a little runaway rinse water, and when it’s all over, easy to wipe clean with a damp cloth and start again! On busy harvest Fridays this year, the harvest board’s been the main way to stay on track, a step larger than the index card in an overall pocket that I used to use when harvesting on my own. Without a list of some sort, it’s amazing how you can forget an entire crop when racing against sundown. And there’s a little markup system: X in the box means harvested (half an X means maybe need more), a strikethrough line means fully sorted, rinsed, bunched or bagged, and counted. A simple and effective tiny farming tool, although a classic chalkboard would do as well!
Water in the air!
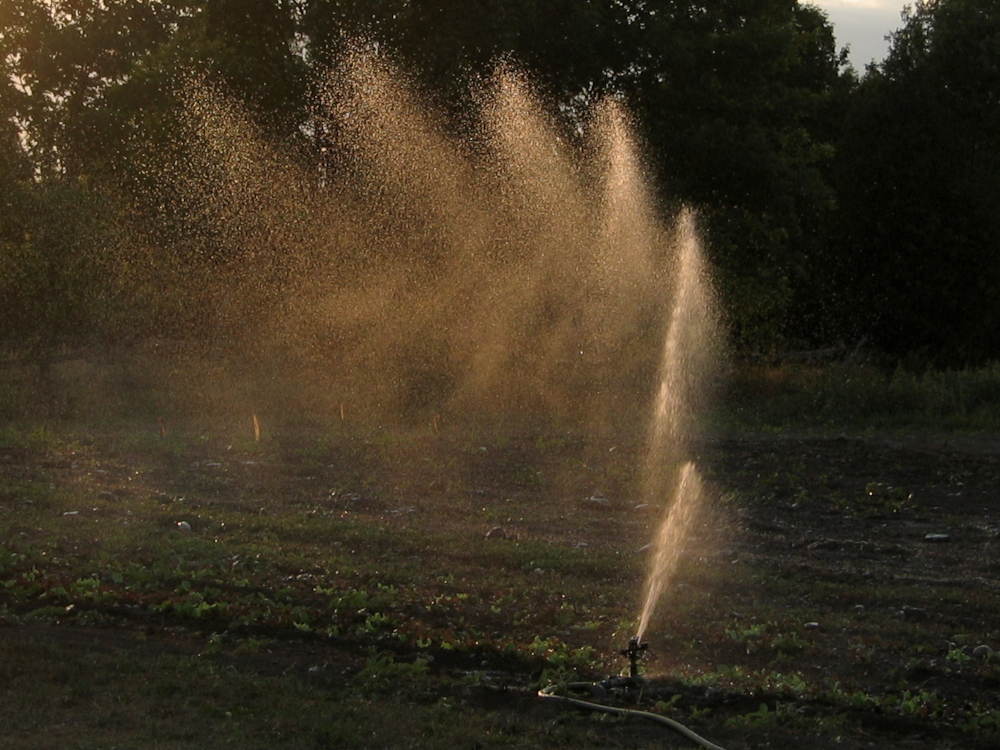
It’s supposed to rain tomorrow… I’m as skeptical as ever, still, as illogical as it is, you figure it’s gotta rain EVENTUALLY, so the longer it’s been, the more accurate the latest “60% chance of showers” forecast must be. Until then, we continue the piecemeal irrigation effort, with a combination of sprinklers and soaker hoses. The pond level is noticeably down, but bottom still isn’t in sight…and it’s gotta rain soon, right!?! :) Here, the latest beds of mesclun and spinach get their daily sprinkle. You can see by the fine mist in the air how easily much of the water can be lost to even a slight breeze, and to evaporation under a hot sun. Still, soaker hoses are only practical for larger standing crops, and pretty near useless for keeping newly seeded beds moist. From the pond pump, we get enough pressure to run four or five sprinklers and have 500′ of soaker hose set up, which means two or three of 40 sections can be covered at once. It takes a couple of hours to put down maybe 3/4-1″ of water. And the majority of days, we have to do early morning and evening sprinklers only, because of wind in the day. So, lots of moving hoses around… Next year, I’ve gotta figure out a drip irrigation solution…
Anti-raccoon measures
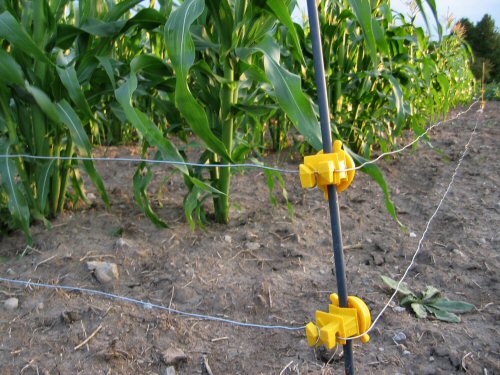
Finally strung up the electric fence to protect the corn from raccoons. Powering the short, hopefully sharp shocks is a solar-charged controller. The lower wire is place about 6″ (15cm) from the ground, with a second strand about 10″ (25cm) above it. The perimeter has to be kept clear of weeds that might ground the fence, which would reduce or eliminate the shocks. In theory, this is a totally effective, non-lethal, physically harmless method, but coons are clever. Already, there’s been some pre-fence eating activity. We shall see what comes next!
Hand tools
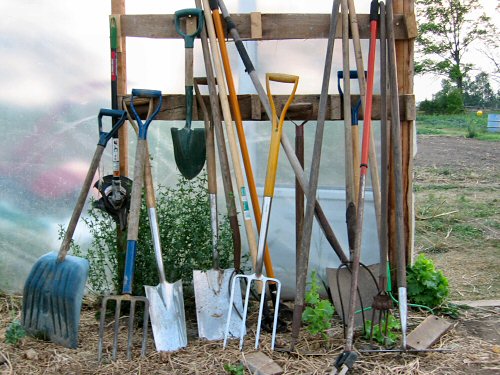
The quick hand tool reorganization in May has worked out well, with everything staying sorted and easy to find. Oddly this year, the hand tools themselves seem to be getting less of a workout than in the past. It only struck me today, kinda strange, so I gave it some thought. Forks are still used regularly for harvest digging, rakes for finishing off beds for seeding, but the various hoes, usually grabbed daily, have in great part been replaced by the wheel hoe! Even the Horse rototiller is getting noticeably less work. Cool. The wheel hoe has proven, as expected, to be a brilliant tool. Saves countless hours, makes tedious jobs fun. Don’t market garden without it!
Row cover mystery
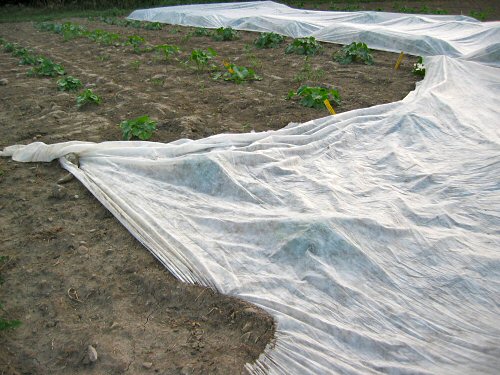
Odd bits of strange, unexplained phenomena turn up in the field from time to time, nothing to get overly excited about, but definitely weird stuff, like this case of mysteriously removed row cover. Earlier in the day, I noticed the cover on one section of risk crop squash was off, thought Conall had removed it, but found when I walked over that about two-thirds of the 50′ (15m) sheet had been ripped off, and lay, bunched up, about 10′ away. In the pic, you can see the remaining piece, perfectly in place, and above it, an adjoining covered row that hasn’t been disturbed in the least. The cover is 14′ wide, and while not hard to tear, isn’t easily sheared right across like that. There’s been no heavy wind in the last few days. There are no footprints or animal tracks in the bed. How did this 35’x14′ section of row cover, anchored by burying the edges every few feet, and with heavy rocks at the corners, manage to detach so cleanly?! It’s a mystery!