Thinning and weeding

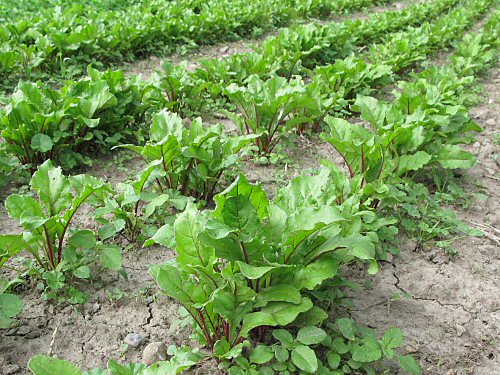
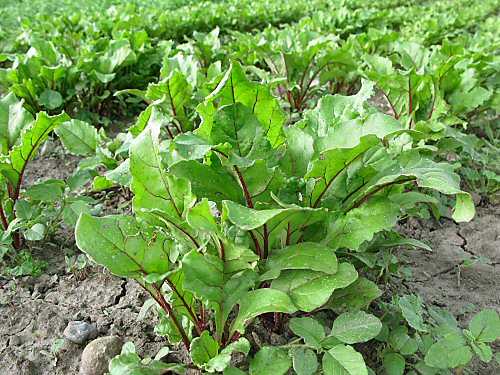
The first beet greens have sized up: lush and looking delicious, they’re ready to harvest. I love beet greens, both raw in salad, and lightly sauteed in olive oil and/or butter (a kind of deluxe spinach). I’ve never grown them as a separate crop, instead, they’re a happy byproduct of thinning the beets—removing the extra plants so that the remaining beets have room to grow. So the greens are both a harvest crop…and a weed. (I guess this is a continuation of yesterday’s post about WEEDS!) As you can see below, with the exception of a few gaps where nothing germinated, the first-planted beets are growing quite solid in their rows, which means a lot of plants have to be removed, maybe as much as 6-8 out for every one left behind (did you know, beet “seed” is actually tiny dried beet fruit containing several seeds?). There’ll be so much from four or five 3-row beds of beets, I won’t be able sell, eat, store or give away all of the greens that’ll pile up, but I can’t leave them in to stunt each other, so at at some point, the thinning becomes…weeding. Funny how that works! :)

Meanwhile, after a quite intensive weeding by hand and hoe a few days ago, the beet beds and paths are in fine shape, with only some growth near the plants that’ll come out during the thinning. (The cracks in the ground are what happens with our heavyish clay-loam soil: it’s not at all concrete-solid, it’s nicely moist, but as the surface dries out, it tends to…crack.) As far as overall weeding, with some quick touch-up hoeing along the way, these beds should be fine till harvest in 3-4 weeks (maybe earlier for some). The increasing leaf cover will keep down weeds near the plants, and the increasingly narrow paths and between-row strips can be quickly walked down with the weed hoe. It should be…sweet! On the other hand, in the potato patch…

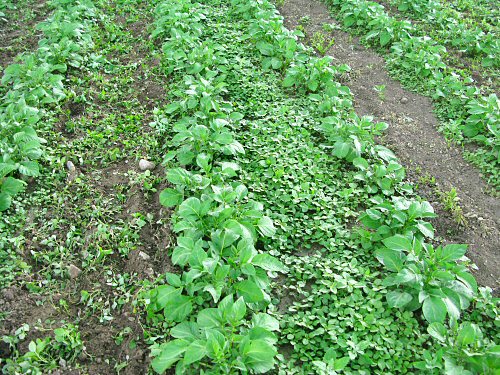
…things have gotten a little crazier. A dense and vigorous mix of mostly pigweed and some lamb’s quarters has carpeted one of the two potato sections. Here, you can see the difference a pass with the wheel hoe makes. On the left, a just-hoed path still looks pretty green. In the middle, it’s untouched and looking a little scary. I’d call this…Stage 2: leave these little guys just a few days longer, and it’ll be a fight to hoe as the pigweed stems in particular will start to get tougher. On the right, a path weed-hoed a couple of days ago (I was on the way through while walking back from hoeing another area)—after a day of sunshine, the cut and uprooted weeds dry up, and you can see how much weeding you’ve really done. There’s still a lot of close work around the plants, but the potatoes are really shooting up now, so once that final weeding is done, the plants will shade out and prevent germination of whatever weed seed’s still near the surface. On the other potato section, the weeds aren’t nearly so…dense. On this one, some of last year’s weeds obviously went to seed, which really increases this year’s population. It almost fee;s like a closed system: what work you get away with not doing now, you eventually pay for later, usually with a little interest…
Crops among the weeds

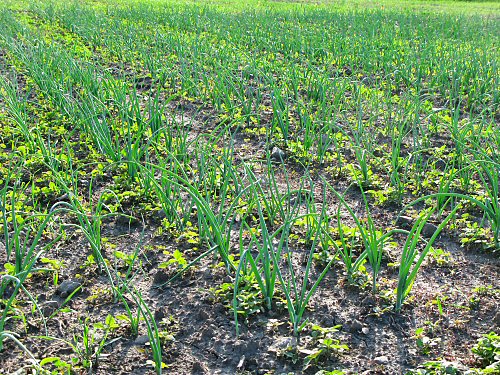
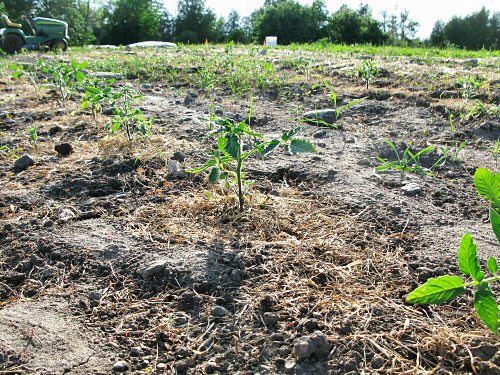
Weeded with the wheel hoe and hoop hoe, the onions looked impressively clear just six days ago, but after a few days of heat and moisture, the tiny weeds that were left shot up to the point where it’s time to do it all over again. Pigweed and lamb’s quarters, along with outbreaks of grass, are working to take over. It may look like a lot was missed. but weeding intensity depends on the crop. With onions, weeds tend to cluster close to the stems, so it usually seems easier to work more quickly and come back again, than spend double or triple the initial time, getting painstakingly close all around each plant (that’s how it seems, maybe not!). With the first section of tomatoes (below), things aren’t so advanced on the weed front, but there’s more grass in this area, and it’s still hard to see the crops in the general green haze of unwanted stuff growing. Hopefully, there will be enough grass mulch ready soon so we can extend the coverage between plants, and then onto the paths. This battle against weeds is the big one. All across the garden, both the veggies and what’s growing with them are at different stages, and require different weeding approaches. Typically, if you’re not using herbicides, tractor cultivation is the quickest way to keep the majority of the weed population down by working between rows. Even then, in-row weeding (between the plants) is still a hand job. It’s a LOT of work, and every few days that a section is not handled, the amount of work required increases as the weeds grow bigger and harder to kill. In a smaller market garden like this, with relatively short 50′ (15m) beds, the tractor is not an option; hand tools and methods rule. The idea is not to keep up this battle year in year out, but to progressively work smarter to reduce the load, through better timing and various techniques: mulching is the most obvious one, but there are lots of things to try. It’s not overnight, but things do improve as you go…!

Finally, a field harvest…

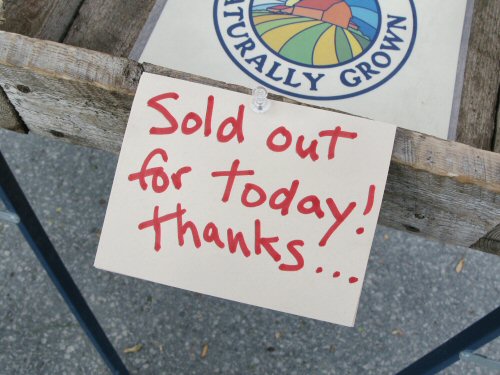
Finally, this year’s field-planted all-lettuce mesclun and spinach were ready for harvest, and that’s all I brought in to the farmers’ market, but in decent quantity. Unfortunately, I still underestimated and was sold out by 10:30 (the market runs 7:00am-1pm). It kinda looks good, being sold out, but really, if you’re doing things right at the market, you want to go home with a very little bit left over. That means you’ve brought enough for everyone who comes by, and have enough to display more than the last one or two of each veggie—it’s a pretty tried-and-true rule that selling the last of anything is harder, one of the few rules that seem useful to me. Overall, I don’t give much thought to sales tactics: with really fresh, high quality veggies, clean presentation, and a (genuinely) cheerful, helpful presence, word of mouth should do the rest. But making the food look attractive I think is a pretty basic part of food enjoyment and…celebration, and having enough for an inviting display right till the market ends is part of that. Of course, selling all you can is another part…the farm may be tiny, but there are still things to buy and normal-sized bills to pay! ;)

Carrots: burlap rules

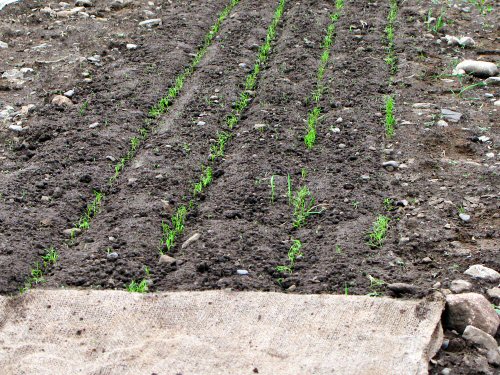
Germinating carrots under a double layer of untreated burlap is the standard now, after last season’s successful trials. Here, a 50′ (15m) bed of Nelson turns out fine. And the burlap is holding up! It originally cost around $30US per bed, which is kinda real expensive if it disintegrated too quickly. But here it is, on the fourth or fifth planting with lots of life left in it. Anywhere under $10 a bed, and it’s way more cost-efficient than the extra watering and weeding that’d have to happen without it. Instead of rolling it up as I’d been doing, I folded this time, in half, and half again, and so on until it was in a neat, compact stack. Easier to handle, and easier to fold out next time around! And a weather note: Overnight, we suddenly slammed into some pretty intense heat. It was already warm and muggy when I stepped outside at 6:30am, and it shot up to around 30°C (90°F) during the day. Not nearly the hottest it can get around here, but with the humidity, it’s quite the shocking change from recent cooler weather. More of the same forecast for the next few days…

Shifting gears for summer…

The spring rush is over, and fieldwork is shifting into summer mode, from mainly planting to mainly weeding and watering, and then, HARVESTING. Seedlings for the most important crops and varieties are in, although there’s still quite a lot to transplant.

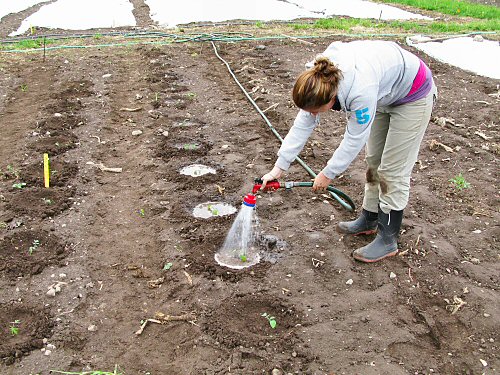
Here, we’ve just finishing another 100 or so tomatoes, with Lynn watering them in (the Redhead water breaker is GREAT, delivers as much water as you’ve got pressure, while softening the flow so that you’re not smashing or burying the seedlings). Creating a little basin around each seedling makes the most of hand watering in.

In my continuing experiment with shortening seedling production time, these are the youngest toms to go out ever, a third set started at the beginning of May, with their first true leaves now just coming in!

There are also more squash, melons, and a few more toms to transplant—in years past, I’d’ve been concerned about the date, but I’m learning to adapt the season’s resources (time, people, irrigation capacity,…) to the WEATHER.

Keep the workflow balanced is my new first mantra, so we also spent a few hours weeding today (Ryan dropped by to help for a few hours, he’s a new CSA-er this year who is also about to move his family to their own tiny farm at the end June!), instead of rushing on the last transplants.

It’s hard to measure, but for this type of small, diverse market gardening, in this time of extreme weather, things quite often don’t work out as they traditionally should. For example, the recent rain and cold, and now, more heat, have created a situation where the dominant weeds—pigweed, mallow, and lamb’s quarters—are seemingly slow, but are in fact about to explode. Weeding now will probably save way more time and deliver more harvest than putting off weeding just to transplant a few more beds a few days earlier.

I dunno, I’m figuring this out as I go, but I think traditonal garden rules and timing have to be increasingly bent as the weather gets crazier… I guess you could say: EXCITING TIMES! :)

Ah, the Home Garden…

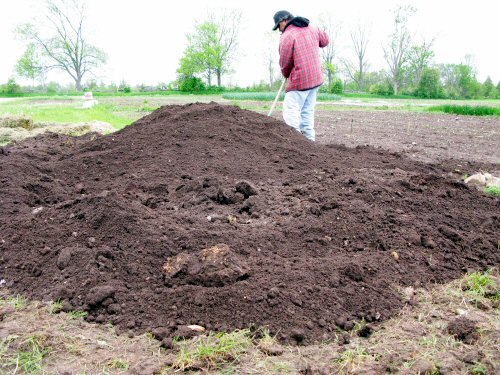
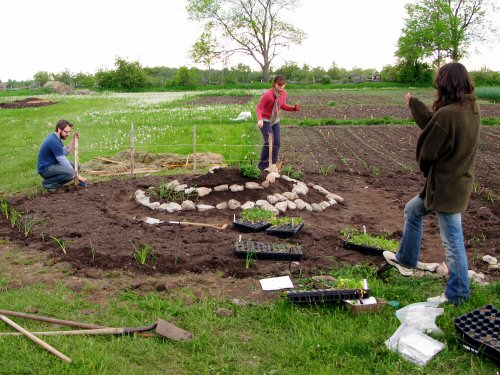
After quite a bit of talking about it, and last year’s false start, a Home Garden is suddenly in place in one corner of the field. The idea is to have a small demonstration veggie plot, to encourage people to grow at least some of their own stuff in whatever space they have. Why? Well, it seemed like fun. Located by the farm stand, it would be an extra little attraction to farm visitors… Just a thing worth doing… Anyhow, last year, I staked out a section, but didn’t get too far in planting anything in it, a couple of tomatoes and a few potatoes… This time around, I’d been chatting with Shannon, who has a lot of permaculture-based ideas, from reading and interning, so I asked her to plan it out. The final design was done really quickly earlier today (it was a busy month…), it’s more a freeform, jumbled garden with a permaculture flavor: all annual veggies, no rows, lots of interplanting, a herb spiral on a mound (a mix of annuals and perennials), an anti-pest barrier of alliums (onions and garlic chives) around the perimeter, and three little keyholes, which are dugouts that you can kneel in to garden within reach around you, as an alternative to working from paths. At about 10’x20′ (3x6m), it’s fairly small. One cool thing: the home garden layout is entirely unlike the rest of the market garden, which is all flat, linear and grid-like, lots of rectangles and squares and straight paths. Now, we have a deliberate elevation and CIRCLES! To make the mound, I dumped a few buckets of compost using the Kubota compact tractor, and raked it into shape. We then added stones for the spiral, and Erin and Mike dropped in and helped plant it out, using odds and ends of transplants and also seed, with Shannon directing. The rough plan is to have Lynn and Raechelle develop and tend it over the season (Shannon leaves tomorrow after a solid month in the field).

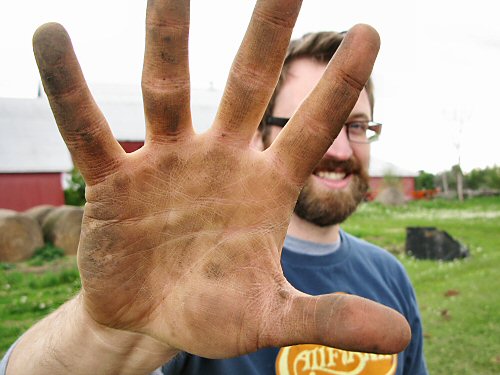
At just over two acres of veggies, the tiny farm is really small by most any modern agricultural standard, and starting up a MUCH TINIER space is its own private…thrill for me. It’s so…opposite! ;) It’ll be interesting to see how Home Garden 1 turns out as the season rolls along! Any way you can, getting your hands dirty is what it’s all about… (Guest photos: top by Shannon, below by Erin.)

Veggie Outpost 2

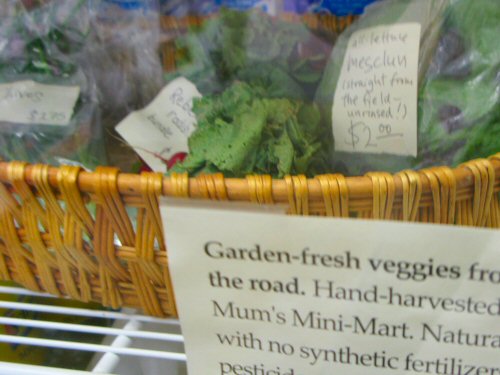
Last year, a little experiment with veggie sales in a town 12 miles (19km) away didn’t go so well. I guess you could sum it up as No Quality Control. This year, in line with the tiny farming trick of thinking SMALLER, I had the sudden idea to put some veggies in at the convenience store three minutes down the road in the village. This is now the only store for quite a ways around, and it has the post office where everyone in the village picks up their mail. Since I’m always meaning to get the farm stand fully open, putting veggies out a couple of minutes away hadn’t quite made sense, but the way it came to mind now was a little different. If I could get a single shelf in one of the coolers, this would be an interesting, easy way to learn about veggies and refrigeration, and even be able to watch a mini version of the supermarket, convenience-shopping experience, by seeing what sells, the effects of labels and pricing, and…whatnot. All on the most casual level. Refrigeration is, of course, yet another of those many worrisome topics that come up along with Peak Oil and the generally somewhat alarming state of the world, BUT, fridges will likely be around as long as any number of other taken-for-granted things, I figure, so whatever’s learned from a little, low-impact experiment like this should be worth it. It’s an extremely simple set-up, with a small sign taped to the inside of the cooler door, hand-labeled bags, and an honor-system account book for inventory. I also like the idea of super-fresh garden veggies popping up in this most unlikely place, just below the shelf where a few supermarket-purchased veggies are kept for resale. Outpost 2, the Shelf, has been open for around three weeks now, stocked with ones and twos of mesclun and spinach, a few radishes, some herbs. I’m by there every day anyway, so I check the veggie condition often…and things are selling… Interesting enough…!