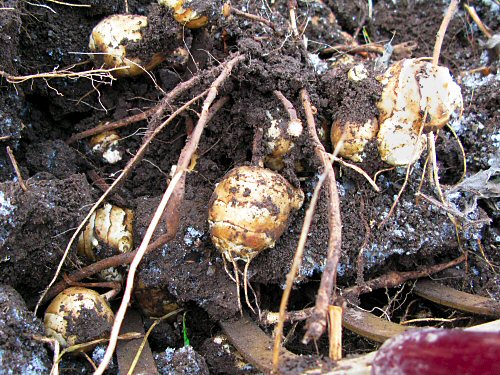
Despite the six inches (15cm) of snow on the big garden, fieldwork goes on. Today, I harvested about 30lbs (13.5kg) of Jerusalem artichoke out of the partially frozen ground, just to be sure planting stock is around over winter in case I need it. Since we don’t have a root cellar or walk-in cooler, storing crops in the ground as winter comes along is a risky but useful alternative. There’s still lots of carrot, parsnip, and some more chokes out there. Until the ground is frozen several inches or more down, it’s possible to harvest, although too much snow can make the whole thing a little crazy. Once thoroughly frozen, I’ve found carrots get killed off and thaw to mush, while parsnip and chokes withstand freezing just fine, staying alive and available again in spring. So far, though, everything’s still cool for digging. You can see the ice crystals in the frozen crust (above), but below that, it’s all cold, friable soil and plump, healthy choke tubers…
storage
Bringing in the pipe
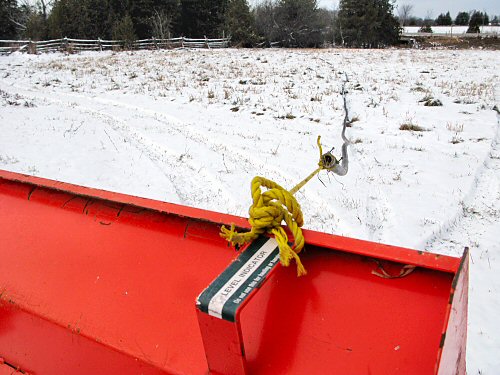
Bit of unusual fieldwork on the menu today, something we don’t do every year. Bob and I brought in about 1,000′ (305m) of 1″ (2.5cm) and 1-1/2″ plastic irrigation pipe, that ran all the way from the pond to the gate into the garden field. Why wasn’t this done in better weather, when, besides having no snow to deal with, warmer plastic would’ve been a lot easier to handle, especially to BEND? There’s no good answer, except maybe, “Didn’t think it’d be this cold and snowy so soon!” Anyhow, it got done, and probably in exactly the same time…
I used the Kubota compact tractor to drag the pipe in three 300′ sections, right into the barnyard (the rope is tied to the front end loader bucket; in the pic, this is at the very end of the garden, where it meets the hay, so all that stubble is mainly long grass). Backing up down the field, I worked it from the far end for the section that lay in the unmown grass right near the fence, so that it could more easily tear its way out of the overgrowth. Then, some coiling (that’s Bob), tying off the loops every few turns with baler twine (plastic twine used to bale hay, it’s all over the place)… Easy!
Drive shed clean-up
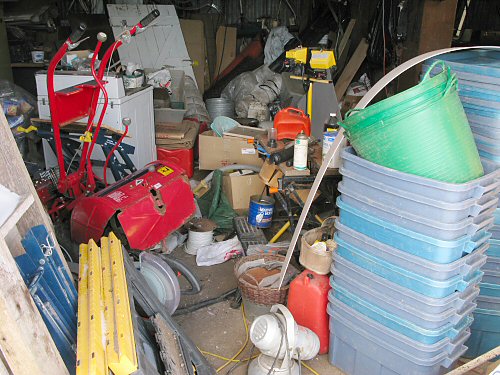
The drive shed is in a transitional mess. I’m part way through the post-season clean-up, delving into shelves, unpacking boxes, dragging things around, sorting it all out. Even with the trusty Troy-Bilt Horse rototiller as a bit of a clue (on the left, in red), to the untrained eye, it might be hard to tell that all of this is essential tiny farming gear. Who’d know that the stacks of Rubbermaid storage bins are in fact our mainstay harvest containers? Or that the weathered cedar trays and folding metal sawhorses (leaning on the left), transform in minutes into the farmers’ market stand. Those indoor/outdoor twin halogen lights are critical lighting components for after-dark veggie sorting and rinsing in the barnyard. That front-loading dryer I’ve kept around for years, in case it could become as useful as its companion the top-loading washer has been as a heavy-duty salad spinner. And so on. Every little item in the pic has its purpose. Much of tiny farming gear is plain, old ordinary stuff, pressed into garden service. And it all works!
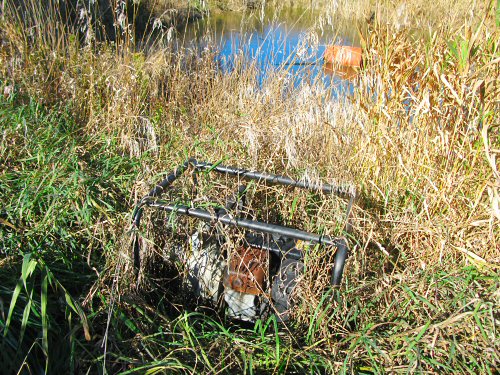
Bringing in the pump
The trusty 6hp irrigation pump was dutifully hauled out to the pond in May, and never seen and barely thought of since. Besides priming it when it was first set out, it had zero use this year. That’s what happens when you get many inches of rain a month, every month, for an entire season. I could’ve brought it in a lot earlier to save it from some weather beating, but today was the day (and it’s a pretty rugged, all-weather pump). So, into the Kubota compact tractor’s loader bucket, and back to the drive shed. Test run for a while, drain the water, and it’s away for the winter!
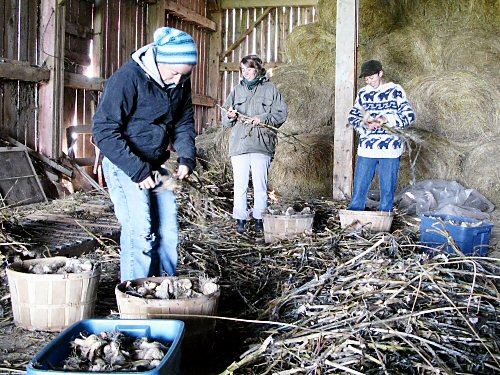
Trimming garlic
From the long stack of garlic drying in the barn, we’ve been taking out about a bushel a week since harvest began in late July. Today, we finished preparing the rest of the harvest. Lynn, Raechelle and Mel snipped the stems and sorted at the same time. (The roots weren’t trimmed; that can be done for some as we go through the bins and baskets each week for CSA shares and the farmers’ market.) In past years, the sorting was for size: dividing the mostly medium and large bulbs, and putting aside the very few tiny and damaged ones. Garlic does best with a dry final month of growth—this time, coming out of ground that had remained quite wet all summer, the harvest wasn’t in as good shape…
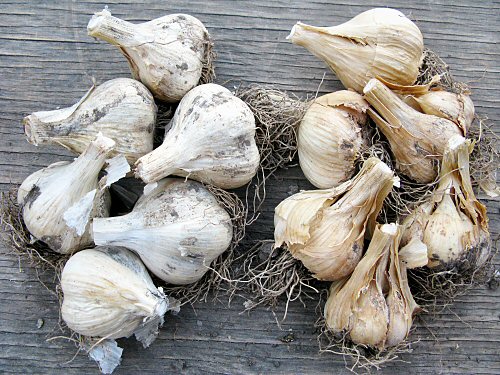
Sizing evened out, with most bulbs about what I call “medium” (this is the most useful size for cooking, but the big ones are so…impressive, everyone loves ’em). A little over half dried not to the usual tight, white skin, instead, to a tan color, wrinkled and split. So, we sorted into “good” and “not so good”… There was also a much higher proportion of really damaged bulbs, maybe 10% compared to a usual couple per hundred. Still, the taste is great, and the cloves themselves are fine. Only appearance and storage life are affected. We’re selling the less pretty, less storable bulbs at a couple of dollars less per pound. They’re good for immediate use (within 3-4 weeks, maybe a little longer) and as seed garlic for fall planting. Overall yield was great, although I’m not sure whether the hugely reduced number of large bulbs was due to weather, or to the more intensive 5-across planting we tried for the first time. As usual, more to observe and learn from. All in all, given the poor garlic weather, it all worked out quite well!
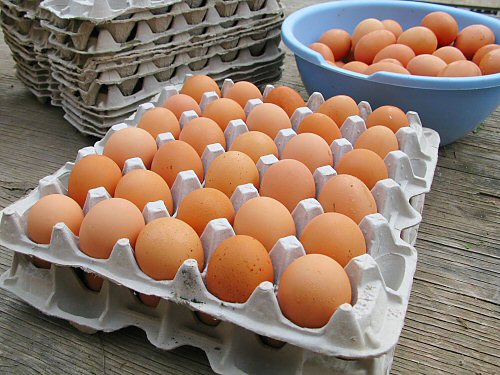
Fantastic egg tray technology!
OK, so they’re just regular cardboard egg trays from the commercial kitchen world, and they’ve probably been around exactly like this for decades. BUT, they haven’t been around HERE. Lynn recycled them from Shelter Valley Folk Festival, where she was last week, where they were feeding big groups of volunteers. The trays are fantastic! Our chickens produce only about two dozen eggs a day, but that still adds up. I’d been keeping them at first in regular one-dozen cartons, then in bowls and small baskets. It was getting a little out of control. Now, they simply, efficiently stack in the fridge, 30 per tray. Every second week, like today, we bring a bunch to the farmers’ market as a bonus in the CSA shares, and the trays make transport a lot easier as well. Amazing. :)
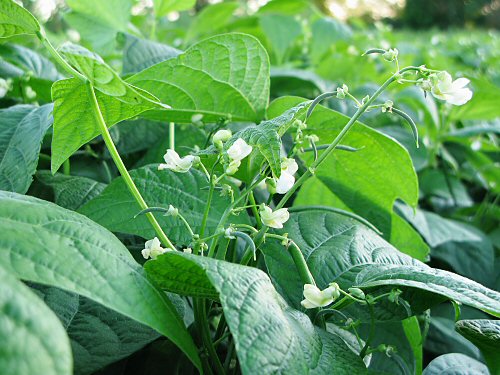
Bean watch
The second bean planting is setting and sizing up nicely, but we didn’t have beans at the farmers’ market today, after a good first and second picking of the first crop over the last two weeks. With succession planting, snap beans are usually a continuous harvest once they start, right through to a killing frost (usually in September, but with row cover, now extended into October in the last couple of years—more of that global warming, I guess). This year, cloudy weather slowed growth and the timing didn’t work out for continuity. There are a couple of ways to insure non-stop beans. Planting really frequently doesn’t work, because if the plantings are too close together, like, only a week or two apart, any two are likely to sync up, either by germinating at different speeds, or catching up during growth (both due to weather), and you’ll have too much one week, and not enough the next. Over-planting is the easiest way to go: if you have a lot ready at once, usually you can hold in the field a week past optimum harvest time and still have good quality, that is, nothing too oversize or woody. Of course, harvesting when ready, then storing in a cooler is the surest way: beans do quite well in cool storage, a good week in the most casual cooler conditions. But of course, there’s fresh and there’s FRESH!