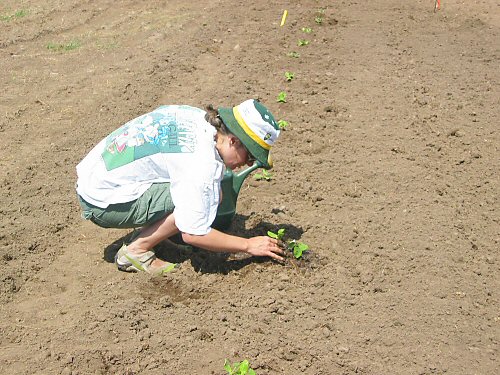
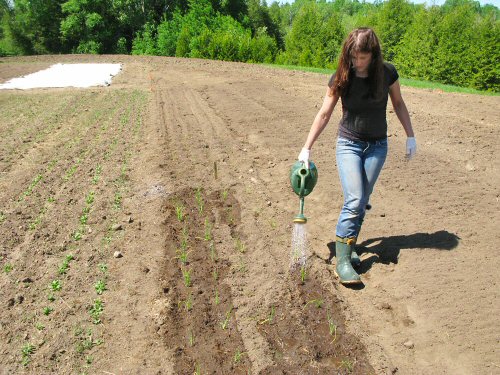
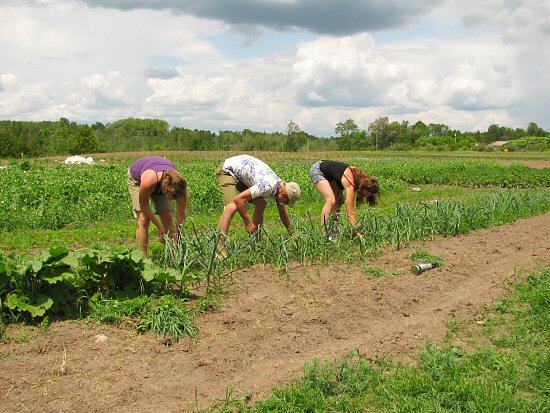
Sprouts!

Sprouts

Sprouts—the tinier tiny farming! After two Saturdays of buying them by the bag at the farmers’ market, I’m totally hooked! I want to grow sprouts, the nutritional claims are quite amazing, most of all, I really love the taste and crunch of EATING them (mostly, by the handful).

Until our first harvest, we’re dropping by our market to stroll around, chat, and buy food. It’s only been a couple of weeks, but I already have a routine with favorite stops, including one to get salad greens (first time in a few years that in-season salads aren’t homegrown), and one for SPROUTS!

I get the megamix, with a little of everything. Can’t even remember the whole list, but there’s something spicy, tastes like mustard, pea, kale, broccoli, I think, lots more.

Sprouts aren’t new to me. As a kid, I remember my mother growing a jar of bean sprouts for a regular Asian-style stir fry-type dish she made, and I’ve bought usually alfalfa sprouts for sandwiches, but I never really NOTICED sprouts till now. They’re great. So, it’s figuring out the simplest way to grow a wide variety for a steady personal supply…

Transplanting team…

Transplanting brassicas

Another big Friday showing of people in the field: Chris, Libby, Jordan and Lynn transplant broccoli and cauliflower, while Andie is on a solo rototilling mission in the other field. Later, everyone got together to plant a few hundred onion seedlings and sets. And some other stuff got done.

Although we’re in the thick of it as far as timing and weather and urgency to get things out, our spring schedule is slower than it could be, and the field days are so far fairly laid back. Slowing things down is the start-up stuff: a ton of tillage to do (working in the grassy remnants of last year’s hay field), water for irrigation to put in place, electricity to run, chickenhouse to build, and a long list of other basic things that we have to put in place along with starting the season’s crops. Getting it all rolling together on this new farm, now that’s fairly intense!

Spot the tiny farm!

Rototilling on the Kubota

What’s in a photo? Depends what you’re looking for! Take this pic of Andie, rototilling today with the Kubota. Pretty straightforward: woman, machine, field. BUT, can you spot practically  EVERY main part of a really tiny farm (at least, of this one), represented right here?

It’s mostly hand work, but there’s some gear: Of course, we have the Kubota compact tractor, flagship of an motley assortment of gear specifically suited to tiny farming. It’s rugged, very much a diesel TRACTOR, but small, and designed more for the big estate crowd than agriculture. Around here, though, it’s the workhorse machine, a people multiplier with its bucket and essential 48″ rototiller. As far as I know, rototillers aren’t core gear on tractor farms, but it’s our ONLY field implement so far, a huge labor-saver over walking up and down with the walking rototiller, or digging by hand. And the turf tires seem to work just fine.

New people diving in: And then there’s Andie, doing (tiny) tractor work within the first few hours of her entire market garden experience. (It’s cool that she’s already looking over her right shoulder, it’s a classic tractor farming pose—except maybe not with GPS?) She also has DIRTY HANDS on the wheel, from checking out the tilling results, and they’ll stay dirty as she moves off the tractor in a few minutes, on to hands and knees to plant onions.

A big shed (aka barn): A barn of some sort is the main, sooner-or-later essential, working structure that separates clear land from a working tiny farm. Really, a basic barn is just a big, all-purpose shed  (this one, 20’x32′, is pretty tiny, just four walls), for getting things out of the weather. You use it to store harvests and gear, and to work out of the wind and rain  (and of course, we have winter). With rough carpentry, you remodel and reconfigure it to fit: an extra hook here, new door there, closed off room in a corner, whatever you need!

Lots of work, all day long: Elsewhere in the pic, less obvious but clear signs of tiny, labor-intensive veggie growing.  In front of the barn, tables of seedlings are hardening off. They’re brought out in the morning, taken in at night, back and forth, back and forth. That’s because the greenhouse (hoophouse frame on the left) isn’t finished yet. And THAT’s because there is just SO MUCH TO DO ALL AT ONCE. Like, mow the grass for mulch, before it gets outta control. And get a new battery for the John Deere riding mower (on the top left), so it can haul around the trailer loaded with whatever we need to get LOTS MORE STUFF done. It all weaves into one big picture of tiny, simple, interdependent tasks that go on and on and on, all day long…

It can get a little intense, but it’s also really fun, if you don’t get all grim and serious about it and try to tie in the state of the entire planet (try to stop following the news!). You get to pretty much see where you’re going. Meet people in a really interesting way. Eat well. Sleep well. Kinda…simple! I think that’s a pretty good start…

Seedlings queue up

Rototilling on the Kubota

It’s a jumble of seedlings around the seedling room, inside and out. Actually, it looks like a good part of the entire market garden, neatly in miniature, lined up in trays… Due to a pile of one-thing-waiting-on-another (for example, we have to run electricity for the fan that inflates the two layers of covering), the greenhouse is STILL not refit with its plastic, so the fallback plan is ferrying the seedlings out to tables—4×8 plywood on sawhorses—in the morning, and back in at night (when it’s still as often as not hovering around freezing).

Hardening off! All that daily moving is a bit of a pain, but they have to come in at night. In the hoophouse, without wind, it’d be a lot easier to row cover, and we could apply a minimum of overnight heat with the kerosene heater (or propane space heater). Outside is too much of a risk, particularly for the tomatoes, peppers, eggplant, squash,… Moving takes a total of maybe an hour a day, around 60 trays in all. (And the upside: it’s always cool to see backup plans work! :)

In the pic, the last of the onions from seed, plus cauliflower, parsley, and summer squash just germinating in the distance. Waiting to go…!

A field day

Seeding with the Planet Jr.

At this point in the season, EVERY day is a field day, unless it’s totally rained out. Today was no exception. Lynn brought a couple of friends, Julia and Tom, to check things out and lend a hand. They’re off to work in one of our fine parks this summer, but wanted to see what was going on on this tiny farm. No problem!

I seem to’ve gotten pretty good at tossing people into the tiny farming action, with little work-up or ceremony. A quick tour around (and here, there’s not much to see just yet), and it’s on to the hands-on. Neither Tom nor Julia had experience with market gardening, but in no time, they were seeding with the seeder of the day, the trusty and heavy Planet Jr. (above). We’re doing a second planting of spinach, and a third of peas…

The Planet Jr. can take a little getting used to, so there I am, explaining how it works as we go! Knowing exactly what a tool is doing and why really makes learning to use it so much more…satisfying. I think.

Just about EVERYTHING in tiny farming is quite simple and straightforward (there’s just a LOT of simple things to know!), still, some people have a natural talent for this or that. Like, Tom can clearly walk a very straight line as he measures off more beds for onions and peas. The current bed marking method: measure and stake the path centers at both ends of the bed, and walk ’em in! It’s pretty simple.

For getting your hands dirty, there’s nothing quite like crawling along in the dirt, pushing Stuttgarter-type yellow cooking onion sets into the ground, six inches (15cm) apart, by the hundreds. Once you get into the rhythm, you can sow and chat, and things get done in no time! All in all, relaxing and productive day in the field. Fun and useful, I hope, for all! (Photos 2, 3 by Lynn.)

Ways to spread

Spreading compost by hand

This has gotta be the most painstaking way to plant out two acres of veggies! To recap: different sections of the two fields are at different stages of tillage (Peter down the road has had to come back a couple of times to disc, and there’s STILL a small section to go), and of course there was no time to spread manure in the fall. It’s even a little more complicated, with a fair amount of chopped up sod getting in the way. Sooo, we’re working a few beds at a time, with different treatments depending on the crop.

Here, Tara and Lynn prepare a 50′ x 3′ (15.2m x 0.9m) bed for baby lettuce for mesclun. Because it’s seeded densely and grows quickly, we decided to apply a fair amount of that expensive certified organic compost, and then reuse this bed for at least one or two more mesclun plantings later in the season.

Spreading from Bags Method 1: We brought over a stack of 40lb (18kg) bags in the bucket of the Kubota compact tractor, emptied 8 bags one by one, and lightly raked them in. Thinking about it afterwards, it seemed easier to empty the bags into the bucket, use a shovel to spread, then rake it in. An extra step, but overall quicker to incorporate.

Definitely hand-work, especially compared to loading up an 8-ton manure spreader and driving it around with a big tractor, like we mostly used to do! Good thing we’re only giving this special treatment to a few beds for salad greens. And it is all getting done…

Spring garlic?

Garlic cloves prepped for planting

With the timing of the move to the new farm, there was no fall garlic planting for this year. Very sad—over the last three seasons, we’ve grown 2,000-3,000 bulbs a year, it’s a much-loved crop all around (starting with me!), and it’s been the very first sign of new veggie life as the fields wake up every spring. Oh, well, we should be back to full-on garlic this fall!

Meanwhile, what we have INSTEAD is about 200 of the toughest, most I-will-survive garlic cloves ever, going in today for a really late start, late even for spring planting! After long months of storage, and an accidental total freezing, the loss of garlic I’d been saving was pretty huge, these 200 out of maybe a thousand.

The guys who made it got an overnight cleansing and rejuvenating bath in a mild solution of baking soda (anti-fungal) and kelp extract (boost), and they’ll be quickly rinsed in alcohol just before going in. Especially for this small, late planting, all this prep probably doesn’t matter much, but they deserve it (personify and pamper your seeds and plants when you can, it’s friendly, until you harvest and eat ’em!).

So, it’ll be a first-hand test of whether it’s worth planting spring garlic at all. From what I’ve heard, chances are we’ll get at best smaller, later bulbs, some misfires with no bulbs forming, and the same great garden-grown garlic taste! We shall see…!