Pumpkins and pigweed

Today, the pumpkins came in, wrested from a jungle of pigweed gone wild. Every year, a few of the 40 50’x50′ sections that make up the 2.5 acre garden get a little overrun with one weed or another (usually, pigweed). This year’s pumpkin patch was a good example, with pigweed growing unchecked for a good six weeks—no time made to weed, not IMPORTANT enough a crop—until today, when Raechelle used the belly-mounted 52″ mower deck on the Kubota compact tractor to mow it down!

Of course, this is exactly what you DON’T EVER DO in a garden: allow weeds to flourish and go to seed, then mow them down, broadcasting seed everywhere… Oh, well. The alternative, pulling the pigweed by hand, then carting it off, we also do when necessary—see the Pigweed Mountain—but once in a while, I go for the instant gratification of seeing a section clean and clear in an hour or two. The millions of pigweed seeds, ensuring healthy future generations for years to come, will be dealt with…later. (As long as we weed on time next time around, how bad can it get?! :) Anyhow, it’s all part of the grand experiment! Guest pumpkin photo by Lynn.

Garlic all in

Harvested in three parts over the last week, the garlic is now all in! This crop seems to’ve done well once again (I LOVE growing garlic!). For the first time, there’s a small pile of damaged goods, water-logged from all the rain. But overall, things are looking good. The combination of oat straw (from last fall’s cover crop) and grass mulch worked great (below)—weeds were kept down, and although the paths weren’t as heavily mulched as around the plants, they weren’t bad. We’ve been having trouble starting the riding mower, which means no trailer, so the tractor bucket took its place for transport duties. The garlic is stacked on pallets in the barn. Lynn seems to’ve taken to garlic harvesting and went to town: fork and pull, fork and pull…around 3,000 garlic bulbs hit the local food chain!

Working the tiny tractor

Rototilling with the Kubota compact tractor

Working with the tiny tractor always looks like fun: after three seasons, it’s still fun for me, and just about everyone else seems to enjoy it, too! This Kubota compact tractor is dead simple to operate, rugged and reliable, easy on diesel, and nonthreateningly…tiny. And it’s as close as we’ve gotten to the other world of big, mechanized agriculture. Tilling with the 48″ rototiller is the Kubota’s main in-the-garden-beds field duty (and that’s something I try to keep to a minimum). I’ve come to rely on it for this one critical task, and to a lesser degree, for moving earth, manure, compost and other things with the front-end loader. Particularly, when time gets short and weeds on open sections start to go crazy, it’s great to have around. Here, Libby tries rotilling for the very first time, working up two sections for planting out fall brassicas (broccoli, cauliflower, cabbage,…). And, yep, looks like she’s having fun!

Crops among the weeds

Weeded with the wheel hoe and hoop hoe, the onions looked impressively clear just six days ago, but after a few days of heat and moisture, the tiny weeds that were left shot up to the point where it’s time to do it all over again. Pigweed and lamb’s quarters, along with outbreaks of grass, are working to take over. It may look like a lot was missed. but weeding intensity depends on the crop. With onions, weeds tend to cluster close to the stems, so it usually seems easier to work more quickly and come back again, than spend double or triple the initial time, getting painstakingly close all around each plant (that’s how it seems, maybe not!). With the first section of tomatoes (below), things aren’t so advanced on the weed front, but there’s more grass in this area, and it’s still hard to see the crops in the general green haze of unwanted stuff growing. Hopefully, there will be enough grass mulch ready soon so we can extend the coverage between plants, and then onto the paths. This battle against weeds is the big one. All across the garden, both the veggies and what’s growing with them are at different stages, and require different weeding approaches. Typically, if you’re not using herbicides, tractor cultivation is the quickest way to keep the majority of the weed population down by working between rows. Even then, in-row weeding (between the plants) is still a hand job. It’s a LOT of work, and every few days that a section is not handled, the amount of work required increases as the weeds grow bigger and harder to kill. In a smaller market garden like this, with relatively short 50′ (15m) beds, the tractor is not an option; hand tools and methods rule. The idea is not to keep up this battle year in year out, but to progressively work smarter to reduce the load, through better timing and various techniques: mulching is the most obvious one, but there are lots of things to try. It’s not overnight, but things do improve as you go…!

Big rototiller breakdown

This is the not-good look of torn metal, not something you want to see on gear that’s both fairly essential to the tasks at hand, and ALWAYS expensive to repair. Right in the middle of some very satisfying tilling on Thursday, I heard a mild, unalarming scraping-squeaking sound coming from the rototiller on the Kubota compact tractor, so I stopped to check, just in case. When I rotated the tines by hand, I noticed the shaft had a lot of play on the left side, you could move it up and down a good inch or two. I cleaned off some wound up bits of plant and then dirt from the end and found the cap protecting the bearings had been split and peeled back. Uh-oh. It turned out to be not great, but could’ve been a lot worse. Somehow—not enough grease, or dirt finding its way into the bearings and gearbox, or both, or…something else—the shaft that drives the tines had completely pulverized the bearings and had been rotating directly against metal! Imagine the heat, the tortured, red-hot metal-on-metal—but it was still tilling real good… In the pic below, you can see where it ground out its own path, that extra piece of  hole on top of the larger one. It had burned through the tiller housing, another plate behind it, and a heavy die-cast fitting that supports the shaft (that bolted-on square piece in the pic above), and jogged up enough to split the dust cover. Man!

Of course, PARTS are always at hand, it just takes cash and a call to the tractor dealer, and presto, delivery by next day. Like an expensive little miracle… I hate buying parts, you need ’em, have absolutely no way to tell what they’re “really” worth, and they cost a fortune. This little boxful: $400 (well, besides the 4-bolt flange bearing, oil seal plate, bearing cover, and a couple of other bits, that includes the annual air and oil filters, and oil…). Anyhow, that’s the way it goes: things break down, gotta be fixed! This morning it was put back together, like nothing had happened at all…

Field day!

Winter-killed brassicas

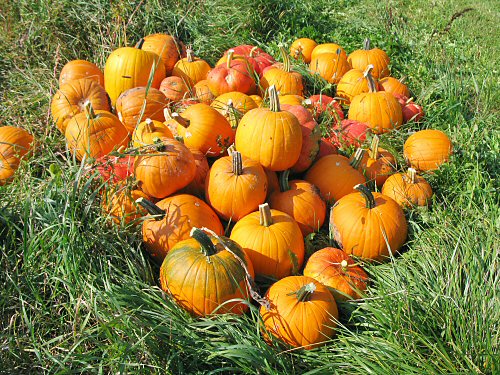
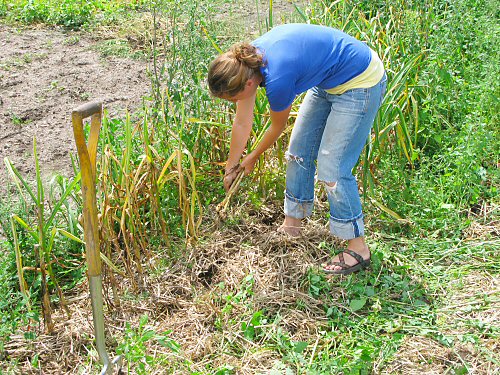
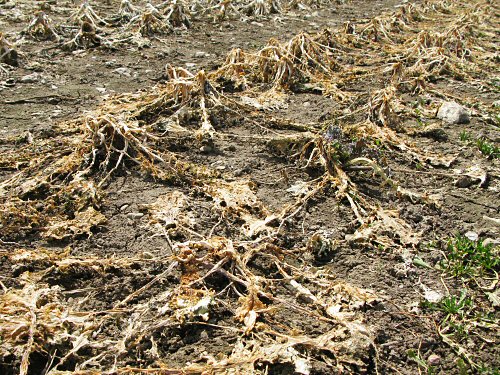
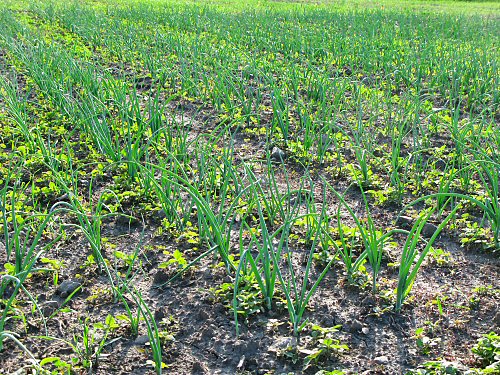
Left to the last possible harvest in the fall, brassicas like kale, Brussels sprouts, cabbage, broccoli and cauliflower (above), were eventually winter-killed and now have to be cleaned up—one of the first field-readying jobs of spring! Today, I started. (EVERY day is a field day from here on in, through November at least, or the first heavy snow that sticks.) A day of tiny farming fieldwork is really just a whole lotta gardening… Now that the ground has dried out enough to be tillable (that could’ve been yesterday, but…errands and CHICKENS), and warmed up enough to direct seed the crops that germinate in cooler soil, it’s a whole new world of things to do…and think about doing. There are two basic ways to ponder the progress of the season’s garden: by timing and by area, each useful in its own way. Timing is mainly about the plants: when to seed, when to water, when to harvest. Area is about where to locate particular plantings, which in my case doesn’t mean absolutely running out of space, since there’s lots more field to expand the garden into if I wanted to (which I don’t), but more like where to position stuff efficiently, so you’re maintaining crop rotation, but not having to, say, drag hoses all the way down the garden to a couple of newly seeded beds that need daily watering in (although there’s a field production plan made up, there are lots of adjustments on the way—where to put stuff will come up again and again!). So, the start of the season is mainly about area, because you have to prep beds and get veggies in in a rough order—cool soil seed, then cool weather transplant, then warm soil seed and transplants—and the timing is a constant: it’s all right away! One way I keep overall track of this garden is by counting sections: it’s about 2.5 acres, divided into 40 50’x50′ squares (each fits 10-16 beds, depending on width). At some point in the next six weeks or so, almost all SHOULD be planted out, nearly 40/40. Today, I started seeding in one…

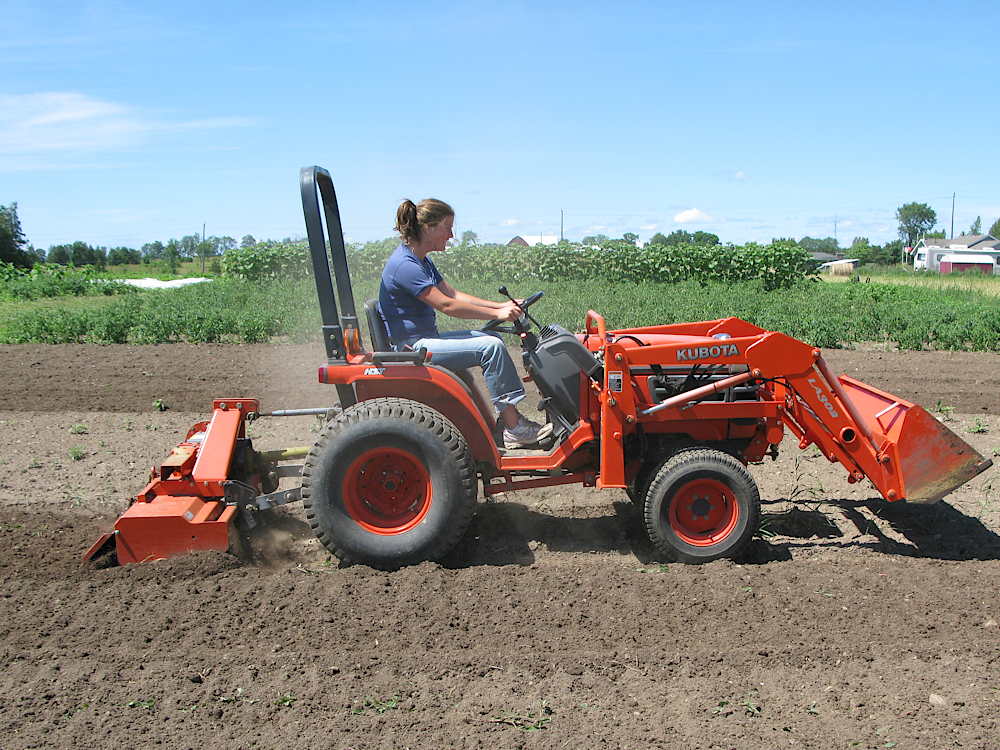
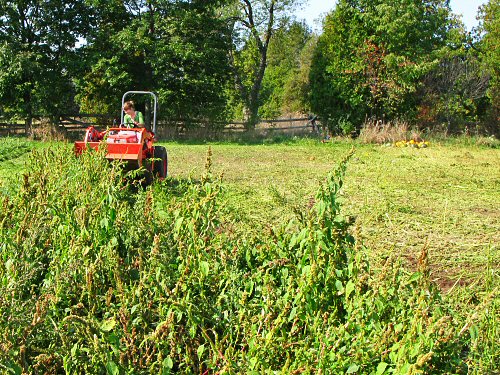
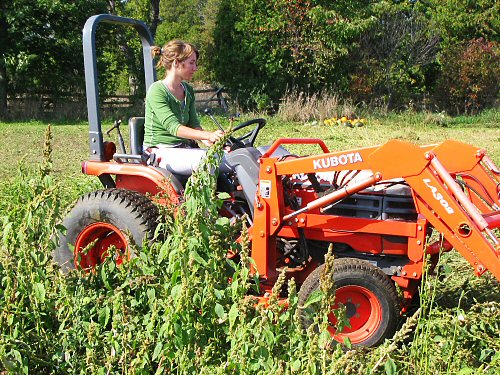
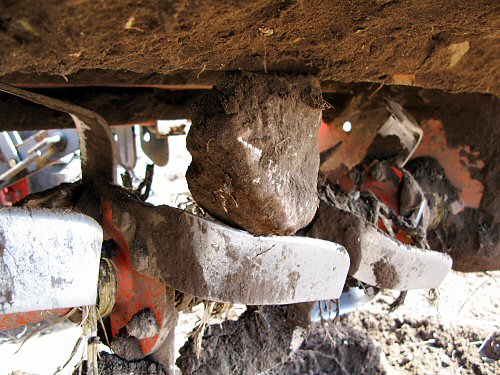
Tilled and untilled: Partially composted cow manure was spread and incorporated in the fall. Now, a light rototilling to prepare for seeding is all that’s needed. Today, I used the tiller on the Kubota compact tractor.

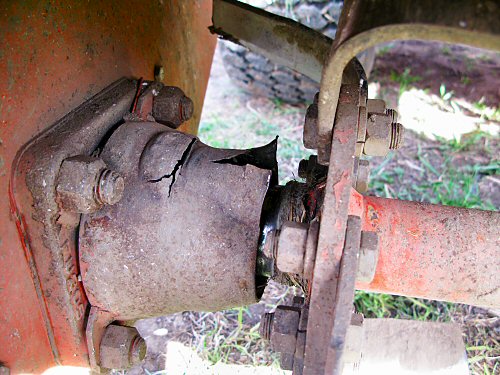
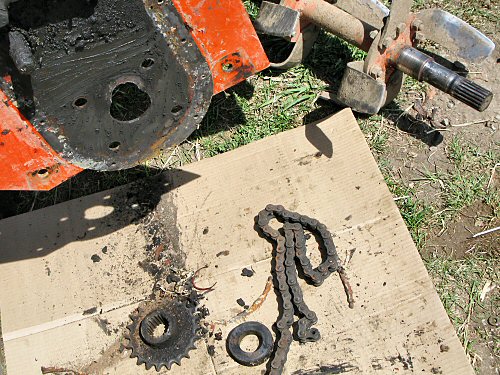
Rock beats tiller: There are lots of stones in this field, they work their way up continually, and even a fist-sized rock, caught in the right way, can stall out the 48″ rototiller on the Kubota (it’s a tiny tractor!). No problem: remove and restart.

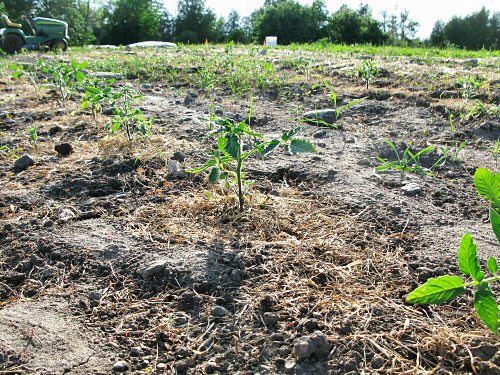
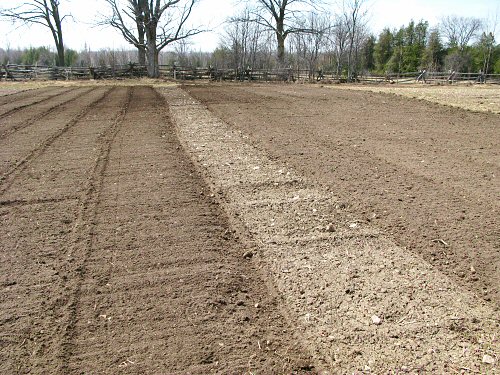
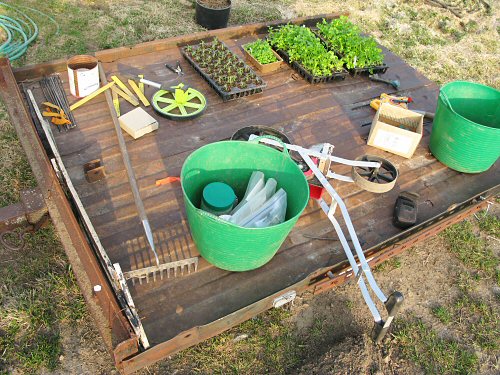
Getting set to seed: I work mostly one or two sections at a time, prepping an area with the tiller, marking the beds, then seeding (or transplanting). This way, I can get the crops that need to be started in as quickly as possible. Here’s the cart towed by the riding mower, loaded with assorted seeding gear (and some transplants being ferried to the greenhouse).

Making beds: Oh, there’s A LOT of tiny farm history behind my bed marking methods. :) I’m still working on the most efficient way to set up beds. Right now, it’s fairly streamlined, involving a 100′ tape measure, stakes, and pacing off distances. This year, I’m planting in 3′, 4′, and 5′ beds (that’s path included), depending on the crop.

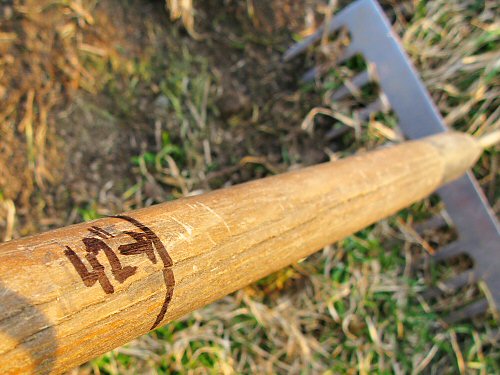
Customizing the Rake: Every season, I re-ink faded measurement markings on a couple of hand tools I use the most. Here’s a convenient mark for 42″ from the top of the handle (that’s the planting area width for a 5′ bed. There are other marks further up the handle, and the whole rake is exactly 5′. It’s convenient for quick checks, especially on the favorite rake that I use for touching up beds right before seeding. And so, off we go…!

The Drive Shed

The Drive Shed

Finally got the tiny tractors in out of the weather. The diesel Kubota took hours and some warming and recharging to get started (I should’ve put ’em in sooner, but I wasn’t believing in the COLD). You can just make out the John Deere riding mower, parked sideways and in for the winter. The Kubota I fire up every few days to keep it limber, and it goes on snow clearing outings, mainly to make paths to the greenhouse. Unheated and uninsulated, the Drive Shed is still the place to be for machines in the cold! This version was built in the 1940s (here’s a view from the other side, it’s sticking in on the left), and like most things on the farm, has quite the history of…uses. All manner of vehicles, probably in the hundreds, have been stored or repaired here: tractors, cars and trucks, dirt bikes, snowmobiles, buggies and sleighs (that’s a 1977 Ford F-150 pick-up on the right, slowly being repaired by Bob’s son, Robert). The upper level is quite huge. It’s now mainly crammed with parts and pieces—assorted useful “junk”—but back in the day, a pulley system raised and lowered a wooden platform (it’s a manual, open elevator), and as the seasons changed, the farm’s various horse-drawn carts and buggies would be swapped up and down with sleds and sleighs for different purposes. Now, they’re long gone—one sleigh and no horses remain—but maybe they’ll be back!