
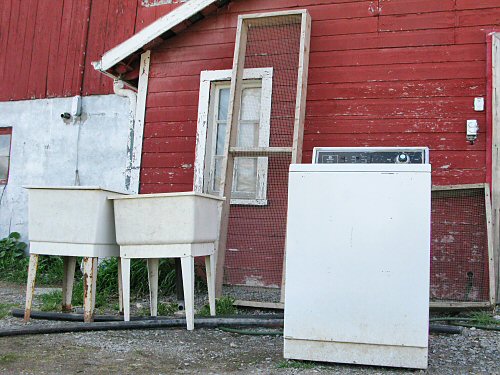
Today was the day I decided to bring out the rinsing gear! Upfront for its fourth (or fifth?) season, the trusty Maytag washer turned giant salad spinner. Once again, after a winter in the unheated drive shed, it started up (on Spin, of course) without a protest. (Maybe it’ll get a cool paint job this year, finally?!) Leaning up against the Milkhouse wall, there’s the original, square screen table (formerly used to sift gravel), and beside it, the new one I built last year—just add sawhorses… On the left, the pair of laundry tubs. Drainage pipes lie on the ground… First harvest can’t be far off!
Tools
Equipment for large-scale agriculture is too big or too expensive, and many home gardening tools don’t work efficiently on larger jobs or break easily. Tiny farming on plots up to two or three acres requires its own special gear…
Seedlings stack up
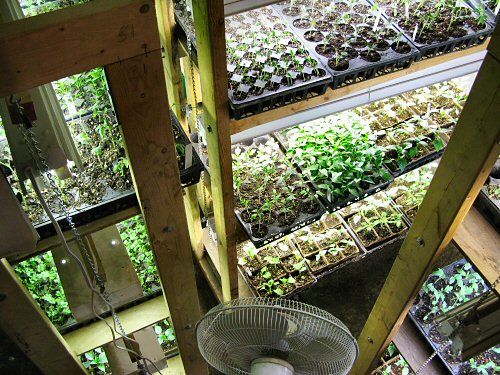
With the cold snap about to break, the final potting up is fully underway, a few days later than last year, but no worries. Even with the new, fourth grow rack, things are tight, with four trays to a shelf instead of the ideal two—better to give ’em all an equal ration of light for a couple of days until the first wave is out in the greenhouse, than leave some of them on unlit tables. At the same time, started the cucurbits: several varieties of cucumber and summer squash, with melons, winter squash and pumpkins soon to follow. The rain so far has been good, over an inch (25mm) in the last couple of days, and a bit more apparently to come. OK, cool. Then, bring on the heat!
Big rototiller breakdown
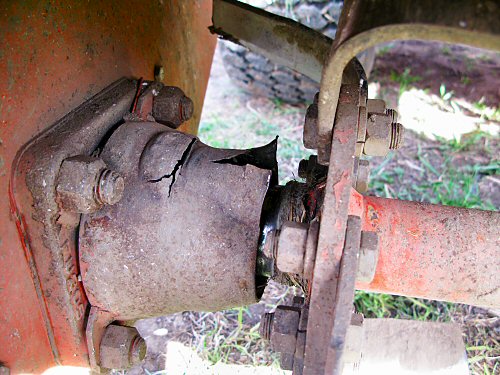
This is the not-good look of torn metal, not something you want to see on gear that’s both fairly essential to the tasks at hand, and ALWAYS expensive to repair. Right in the middle of some very satisfying tilling on Thursday, I heard a mild, unalarming scraping-squeaking sound coming from the rototiller on the Kubota compact tractor, so I stopped to check, just in case. When I rotated the tines by hand, I noticed the shaft had a lot of play on the left side, you could move it up and down a good inch or two. I cleaned off some wound up bits of plant and then dirt from the end and found the cap protecting the bearings had been split and peeled back. Uh-oh. It turned out to be not great, but could’ve been a lot worse. Somehow—not enough grease, or dirt finding its way into the bearings and gearbox, or both, or…something else—the shaft that drives the tines had completely pulverized the bearings and had been rotating directly against metal! Imagine the heat, the tortured, red-hot metal-on-metal—but it was still tilling real good… In the pic below, you can see where it ground out its own path, that extra piece of hole on top of the larger one. It had burned through the tiller housing, another plate behind it, and a heavy die-cast fitting that supports the shaft (that bolted-on square piece in the pic above), and jogged up enough to split the dust cover. Man!
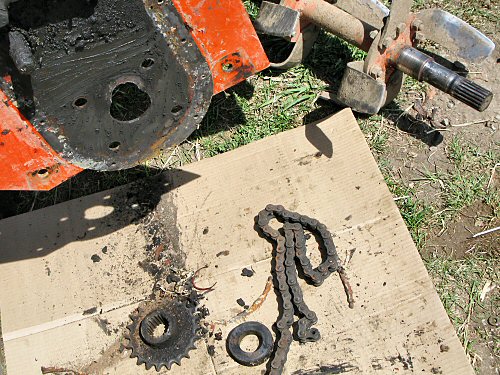
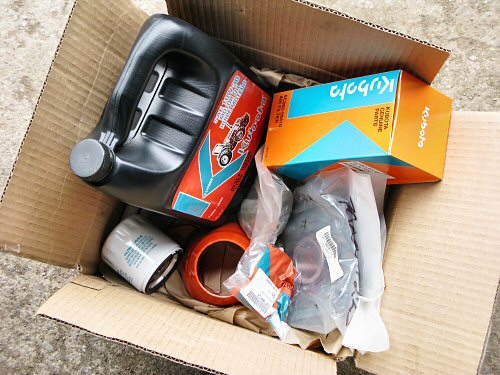
Of course, PARTS are always at hand, it just takes cash and a call to the tractor dealer, and presto, delivery by next day. Like an expensive little miracle… I hate buying parts, you need ’em, have absolutely no way to tell what they’re “really” worth, and they cost a fortune. This little boxful: $400 (well, besides the 4-bolt flange bearing, oil seal plate, bearing cover, and a couple of other bits, that includes the annual air and oil filters, and oil…). Anyhow, that’s the way it goes: things break down, gotta be fixed! This morning it was put back together, like nothing had happened at all…
Tangling with hoses
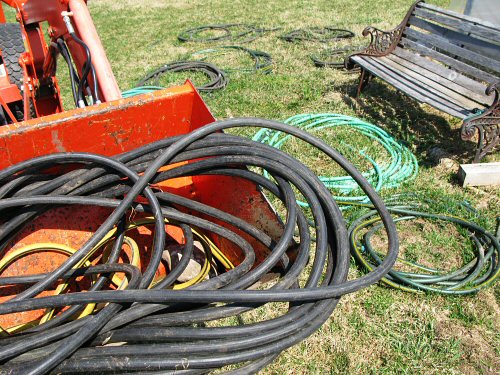
In smaller gardens (tinier farms!), hoses are generally a fact of life. In spring, it’s time to uncoil them all, check the fittings, and get set to deliver water largely by hand.
On BIG veggie farms, “hoses” are usually big pipes (3″/7.5cm and up), part of full-blown irrigation systems that suck up and spew MILLIONS of liters of water a season. Here on this tiny farm, we’re way closer to the garden hose end of the scale.
Our irrigation system is a work in progress. Drip tape is the ultimate goal, but there are obstacles to work around, like the limited water available from the barn well, and the distance to and lack of electricity at the spring-fed pond. Right now, watering is about regular 5/8″ hoses, fed by a 1″ plastic pipe that runs from the barn well to the pond located WAY at the other end of the field, with taps at 100′ intervals.
Actual watering is done with a combination of soaker hoses, sprinklers when there’s no wind, and various hand nozzles for watering in newly seeded beds. Quick connectors are a major convenience when hooking up the various combos of multiple hoses and other attachments. I try to find a balance between not too many hoses, because you can’t leave them lying around, and not so few that you’re moving the same rig all over the plot.
Accidentally tilling hoses that were left snaking around instead of being promptly put away has turned into a not absolutely rare occurrence, and a time-waster (untangling and splicing takes more than a minute). Just put away that 300′ of hose plus 500′ of soaker hose when you’re done! ;)
Spot irrigation with hoses on two acres is a bit tedious, but like everything else, you do get used to it, it’s part of the routine, and it gets the job done, which is satisfying in the end…
That’s the state of the watering art around here as we head into a new season, and I’m promising myself advances on the drip side of things. Of course, it could happen to rain all the time, about an inch (2.5cm) once a week would be fine, and then hoses would largely vanish from the garden landscape. That’s not at all that likely (and when it’s a really rainy year, you wish for hot, sunny hose weather), but…YOU NEVER KNOW!
Field day!
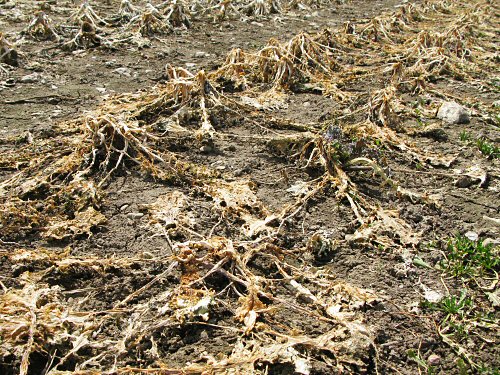
Left to the last possible harvest in the fall, brassicas like kale, Brussels sprouts, cabbage, broccoli and cauliflower (above), were eventually winter-killed and now have to be cleaned up—one of the first field-readying jobs of spring! Today, I started. (EVERY day is a field day from here on in, through November at least, or the first heavy snow that sticks.) A day of tiny farming fieldwork is really just a whole lotta gardening… Now that the ground has dried out enough to be tillable (that could’ve been yesterday, but…errands and CHICKENS), and warmed up enough to direct seed the crops that germinate in cooler soil, it’s a whole new world of things to do…and think about doing. There are two basic ways to ponder the progress of the season’s garden: by timing and by area, each useful in its own way. Timing is mainly about the plants: when to seed, when to water, when to harvest. Area is about where to locate particular plantings, which in my case doesn’t mean absolutely running out of space, since there’s lots more field to expand the garden into if I wanted to (which I don’t), but more like where to position stuff efficiently, so you’re maintaining crop rotation, but not having to, say, drag hoses all the way down the garden to a couple of newly seeded beds that need daily watering in (although there’s a field production plan made up, there are lots of adjustments on the way—where to put stuff will come up again and again!). So, the start of the season is mainly about area, because you have to prep beds and get veggies in in a rough order—cool soil seed, then cool weather transplant, then warm soil seed and transplants—and the timing is a constant: it’s all right away! One way I keep overall track of this garden is by counting sections: it’s about 2.5 acres, divided into 40 50’x50′ squares (each fits 10-16 beds, depending on width). At some point in the next six weeks or so, almost all SHOULD be planted out, nearly 40/40. Today, I started seeding in one…
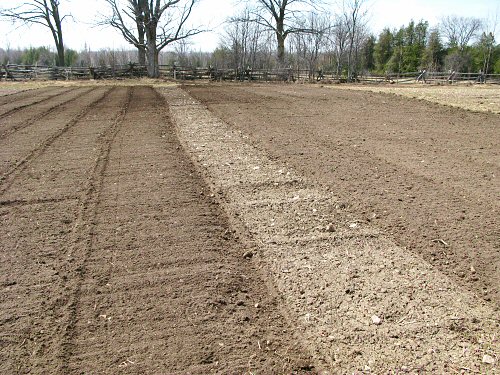
Tilled and untilled: Partially composted cow manure was spread and incorporated in the fall. Now, a light rototilling to prepare for seeding is all that’s needed. Today, I used the tiller on the Kubota compact tractor.
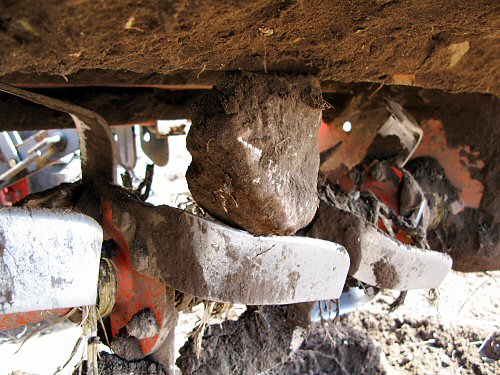
Rock beats tiller: There are lots of stones in this field, they work their way up continually, and even a fist-sized rock, caught in the right way, can stall out the 48″ rototiller on the Kubota (it’s a tiny tractor!). No problem: remove and restart.
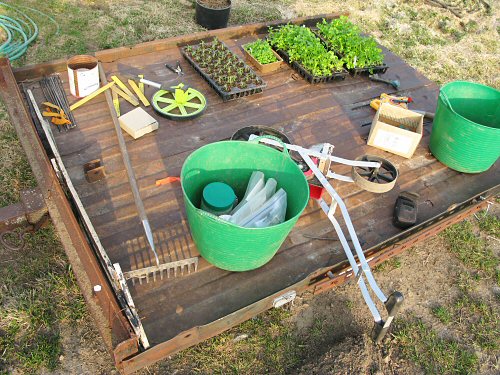
Getting set to seed: I work mostly one or two sections at a time, prepping an area with the tiller, marking the beds, then seeding (or transplanting). This way, I can get the crops that need to be started in as quickly as possible. Here’s the cart towed by the riding mower, loaded with assorted seeding gear (and some transplants being ferried to the greenhouse).
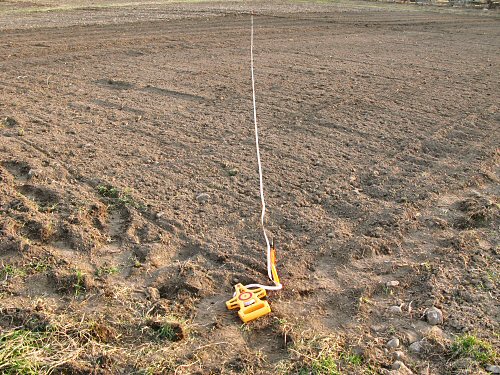
Making beds: Oh, there’s A LOT of tiny farm history behind my bed marking methods. :) I’m still working on the most efficient way to set up beds. Right now, it’s fairly streamlined, involving a 100′ tape measure, stakes, and pacing off distances. This year, I’m planting in 3′, 4′, and 5′ beds (that’s path included), depending on the crop.
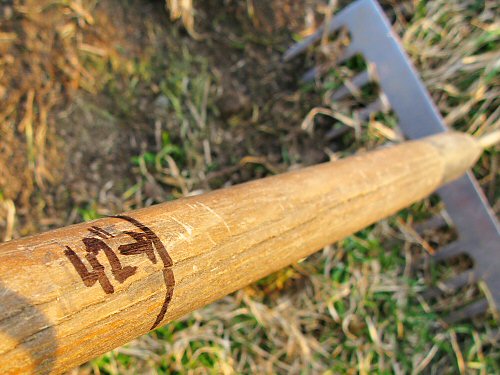
Customizing the Rake: Every season, I re-ink faded measurement markings on a couple of hand tools I use the most. Here’s a convenient mark for 42″ from the top of the handle (that’s the planting area width for a 5′ bed. There are other marks further up the handle, and the whole rake is exactly 5′. It’s convenient for quick checks, especially on the favorite rake that I use for touching up beds right before seeding. And so, off we go…!
Head out on the highway…
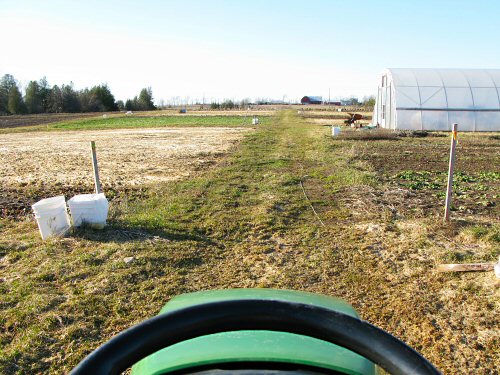
A couple of days ago, things seemed to be moving in slow motion, today, it’s the wide open highway! (A poor analogy, perhaps, given the soaring price of gas, but anyway…) Sitting at the wheel of the little riding mower, heading to the greenhouse down the main path with trays of seedlings in tow, a warm sun shining down, a good part of the field just about ready to work, all the possibility of a brand new garden season ahead, and no weeds in sight felt…really fantastic. With a nice adrenaline rush!
As the warm weather kicks in, there’s a whole series of winter-to-summer changes, and my body memory of fieldwork details starts to come back. It’s not like I’ve been doing this forever, each new season, there’s a spring ramp up of remembering routines, pathways, ways to do a thousand little things.
Last week, I moved the Kubota compact tractor and the riding mower out of winter parking in the drive shed, to make room for summer storage. The greenhouse is now almost completely set-up for full seedling mode. Today, I test started the Horse walking rototiller and walked it around, set out the rain gauge, stripped off the draft-sealing duct tape to open the Milkhouse side door (a milestone spring moment!), and hooked up the hose from the barn well to the pipe that runs down the field and supplies the greenhouse (the hose goes through one of the holes at the bottom left of the door). Practically overnight, there is SO MUCH TO DO, RIGHT AWAY. There’s tons of tilling as soon as possible so the cover crop residue can start breaking down, and immediate seeding of, at least, peas and spinach, in the next couple of days of sunny weather, before the big rain forecast for Friday and the weekend. And CHICKENS should be here tomorrow… Fun!
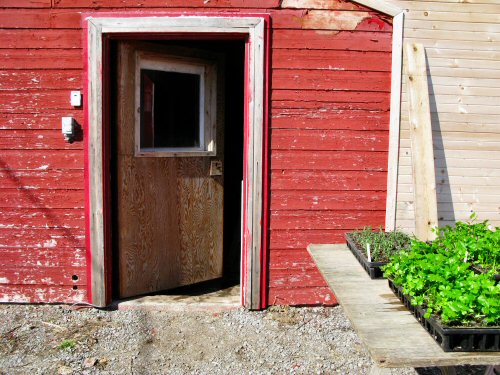
Inside and out…
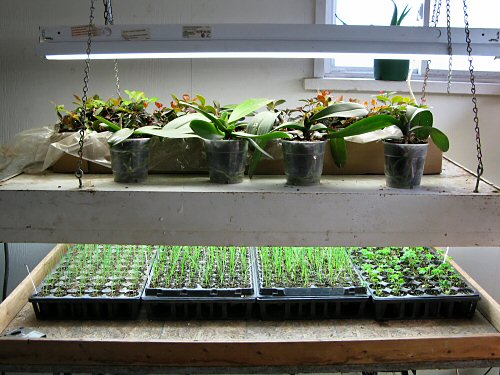
Inside, in the increasingly GREEN Milkhouse, this year’s artificial sun set-up is done. It’s about fitting in as much area-under-lights as possible, while making sure all of the trays are easily reachable, for watering, rotation, thinning. So, there are the four grow racks, and the lightbox (that’s leek, onions and parsley under there), with its second level (why waste a flat surface that comes with chains?!). For now, this extra space is the new spot for the rescued-and-passed-along decorative plants (the heather was too dried out and didn’t make it, the wintergreen are doing fine, and the orchids seem OK…), but they’ll eventually be crowded out and moved somewhere else. The shelves are filling up fast… MEANWHILE, outside, it’s snowing and snowing, again. That’s a lot of snow. Around here, we’re definitely off to a later start this year than at least the last couple, but I’m still not particularly put off, not just yet. Although, it’s not supposed to warm up for another week, maybe two…
This is today’s peaceful but uninspiring view of the garden from the north-facing Milkhouse window…