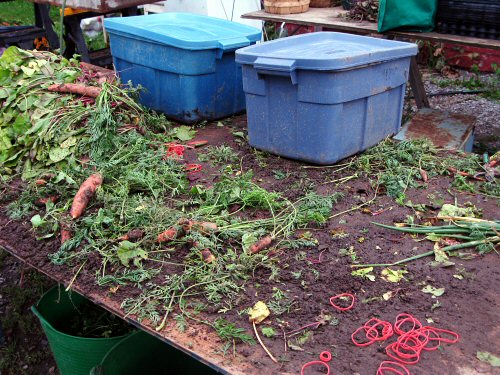
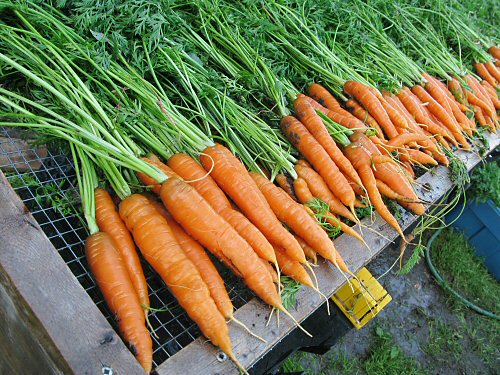
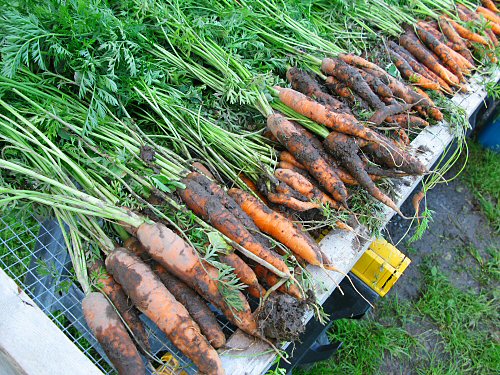
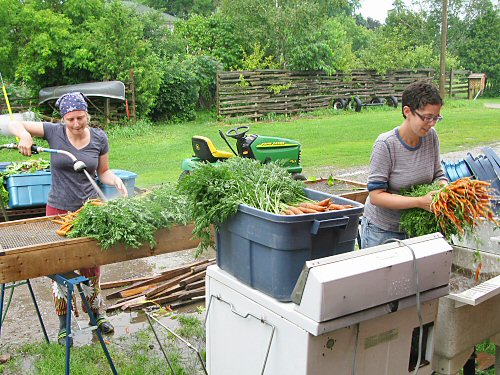
Sorting and packing after harvest—post-harvest processing!—is in good part a wet job, made a lot messier in rainy weather when root crops come in with a load of mud attached. Once again this season, the main work surface for sorting is a 4’x8′ sheet of plywood set on sawhorses. Actually, we added a second table, so now there are…two. Here, we’ve just finished sorting and bundling carrots, which then went for a rinse on the screen table. Sometimes, rinsing is done first, depending mostly on who’s doing what and what else is going on. In the closed blue bins, which hold a little over a bushel each, are carrots already bundled, rinsed and ready to go. This week, there are four bins of carrots, around 160 lbs (73kg). The residue is sorted out: here, damaged carrots will probably be topped and kept for house use, and the greens (there are some beet greens as well at the end of the table) are fed to the goats, some to the chickens, and the rest onto the compost pile. Then the table is hosed off. Couldn’t be simpler or wetter!
carrot
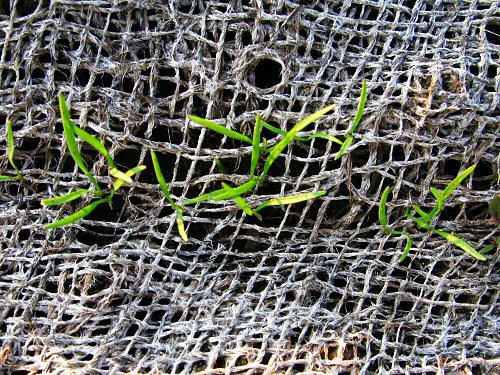
Burlap expires
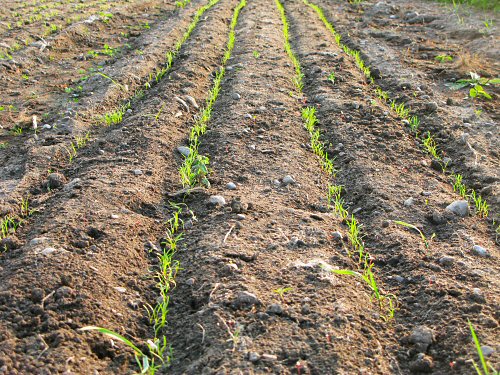
After a nice long ride, the burlap (of the burlap carrot germination method) is finally breaking down, shredding as we fold it up off the final carrot beds of the season.
Even in this wet weather, the burlap makes a big difference, probably because it holds the soil heat—the difference is clear at the ends of the beds, where the seed drills extend past the burlap, and germination has barely started.
I haven’t been keeping accurate count, but this batch has done at least eight seedings over the last two years. At about $30 a bed for a double layer of burlap (100’/30m) over a 50′ (15 m) x 4 row bed, that makes it less than $4 per 200′ (60m) of carrots, more than worthwhile. If we’d taken better care of it during this wet weather, mainly by making sure it dried out quickly, it may’ve even lasted for a seeding or two more.
Like floating row cover, burlap is an outside input that I don’t like to rely on, but for now…it works!
What’s new at the farmers’ market…
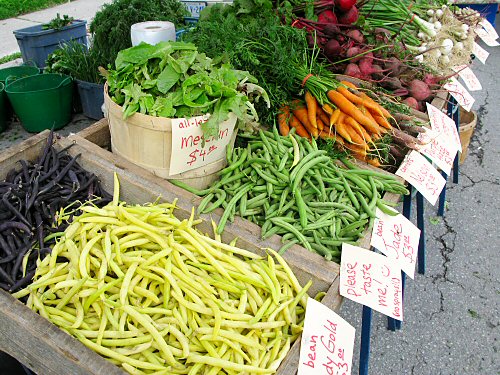
Ahhh, something new on the farmers’ market stand: BEANS in three colors (we had the first green beans last week)! There’s yellow (Indy Gold), purple (Royal Burgundy), and of course, green (Jade). One way I watch the season unfold is through the debut market days for the headliner crops, the big people pleasers. Lettuce is always the first up, a hit partly because it’s the first fresh veg of the season. Then, roughly in order, there’s spinach, peas, carrots, beans, garlic, and tomatoes. Strawberries and corn are also standard hits around here, but we don’t grow berries, and when we do have corn, it’s only for CSA shares. I find it odd that these particular veggies are so generally popular. What about delicate and delicious summer squash, lightly grilled? Versatile and tasty beets, diced and broiled, or grated raw with carrots in salad? Beet greens and Swiss chard, sauteed in butter and olive oil? The list goes on and on… Just about ALL of the 20+ basic garden veggies we grow are equally great to me, but that’s not the case for most people. Curious…
Rinsing…
On-going debates about the merits of rinsing are…academic right now as the near daily rains continue, and the soil remains between moist and mucky. Even on a rare hot and sunny day like today, crops are coming up caked in mud. Carrots are messy…
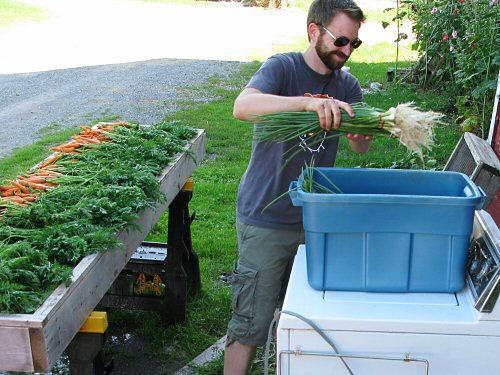
…and so are green onions (being rinsed by Mike) with tangled roots that hold clumps of mud so well…
More carrots
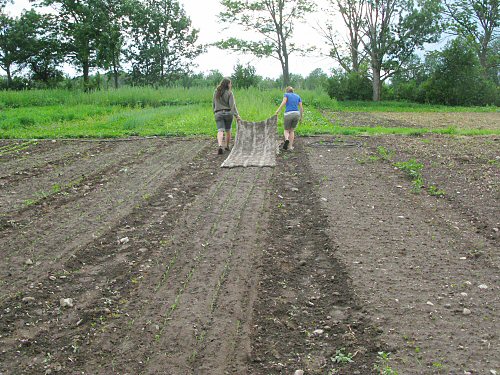
Wouldn’t DREAM of starting carrots without the burlap method now. Maria and Lynn remove burlap from the third planting of the season, using the fold and fold again approach rather than rolling it up…
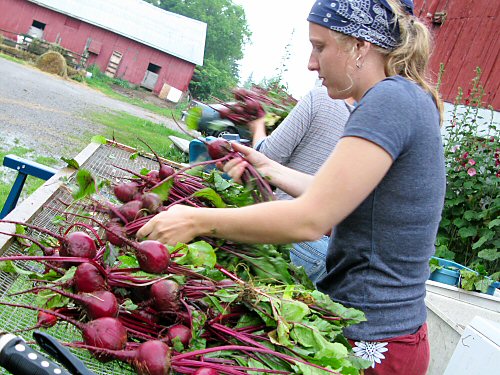
Harvest wet work
Yet another in this summer’s series of wet and gray afternoons, the weather blending perfectly with the wet work of rinsing and sorting muddy root crops. Instant efficient team chemistry between Rachel and Mel, both doing post-harvest here for the first time. (Above, carrots, below, beets.) The process is very small scale and manual. Crops are first dumped from harvest bins onto the screen table, clinging earth is quickly blasted off with the jet setting on the water wand. Next, double handful bunches are dunked for a final rinsing. Then it’s back into the bins… Simple and quick for a few bushels. Get wet!
View from the stand
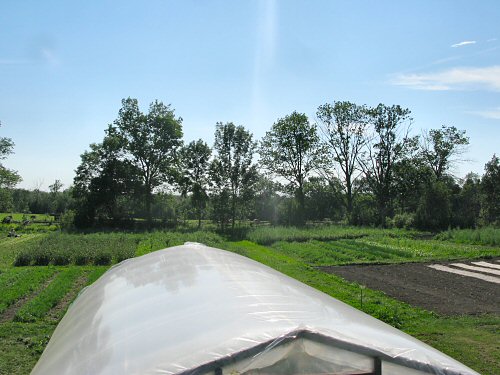
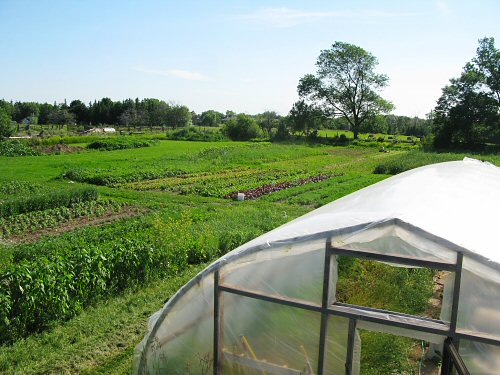
It’s mid-July, and on a (recently rare) sunshiney afternoon, things are looking OK. Better from a distance than up close, because a few sections, like the summer and winter squash, are quite severely in the weeds and in need of intensive hand pulling. And the ground remains almost constantly wet. Our moisture-retaining clay-loam soil, such an advantage in the usual near drought conditions we’ve had over the last three years, is now a bit of a hindrance. Sprawled tomatoes are particularly at risk if they don’t dry out against damp ground, and instead contract early blight (more about that another time!). Still, carpe diem, huh—seize the day! From atop the farm stand, the view is fine! We have the north end (above), with carrots under burlap (third planting), brassicas (newer transplants still under row cover), the cover in the far middle over squash, in front and more to the right, tomatoes, with a windbreak of giant sunflowers at the very right, and sweet potato bottom center. Open sections will include brassica transplants in a couple of weeks, and a fall cover crop. Out of sight to the north are onions…
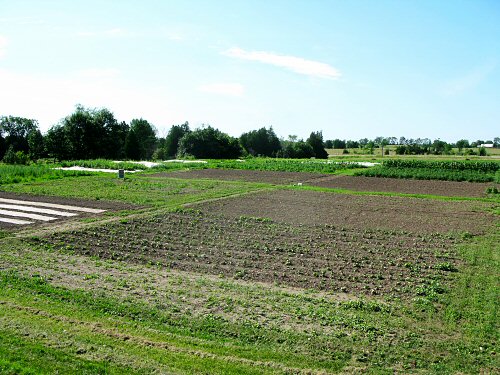
In the middle, clockwise from the left, there’s a second planting of carrots, fifth mesclun right in the corner (with Maria weeding on the Greens Machine), garlic and parsnips, and potatoes in the distance (with more big WEEDS), the first planting of beets, carrots and green onions, and the edge of the third carrots under burlap from the first photo.
And then, the south end of the field, going left from the peak of the greenhouse, the garlic and Maia in the mesclun, the second planting of carrots and beets (that slash of of red is Bull’s Blood beets), the fourth mesclun , a weedy area with nasturtiums and tomatillos, and to the bottom left, herbs and flowers (fairly towering Jerusalem artichoke at the bottom left). (Guest photos by Lynn)