Ways to spread

Spreading compost by hand

This has gotta be the most painstaking way to plant out two acres of veggies! To recap: different sections of the two fields are at different stages of tillage (Peter down the road has had to come back a couple of times to disc, and there’s STILL a small section to go), and of course there was no time to spread manure in the fall. It’s even a little more complicated, with a fair amount of chopped up sod getting in the way. Sooo, we’re working a few beds at a time, with different treatments depending on the crop.

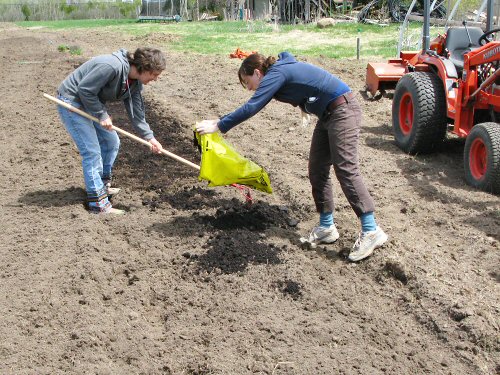
Here, Tara and Lynn prepare a 50′ x 3′ (15.2m x 0.9m) bed for baby lettuce for mesclun. Because it’s seeded densely and grows quickly, we decided to apply a fair amount of that expensive certified organic compost, and then reuse this bed for at least one or two more mesclun plantings later in the season.

Spreading from Bags Method 1: We brought over a stack of 40lb (18kg) bags in the bucket of the Kubota compact tractor, emptied 8 bags one by one, and lightly raked them in. Thinking about it afterwards, it seemed easier to empty the bags into the bucket, use a shovel to spread, then rake it in. An extra step, but overall quicker to incorporate.

Definitely hand-work, especially compared to loading up an 8-ton manure spreader and driving it around with a big tractor, like we mostly used to do! Good thing we’re only giving this special treatment to a few beds for salad greens. And it is all getting done…
Spring garlic?

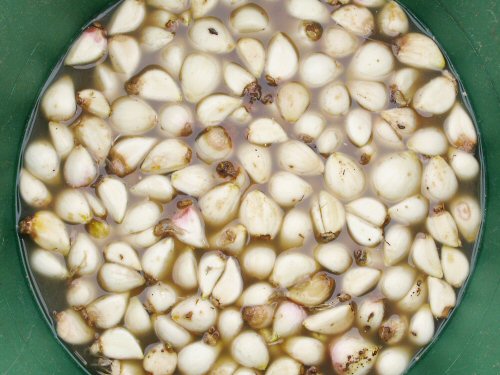
Garlic cloves prepped for planting

With the timing of the move to the new farm, there was no fall garlic planting for this year. Very sad—over the last three seasons, we’ve grown 2,000-3,000 bulbs a year, it’s a much-loved crop all around (starting with me!), and it’s been the very first sign of new veggie life as the fields wake up every spring. Oh, well, we should be back to full-on garlic this fall!

Meanwhile, what we have INSTEAD is about 200 of the toughest, most I-will-survive garlic cloves ever, going in today for a really late start, late even for spring planting! After long months of storage, and an accidental total freezing, the loss of garlic I’d been saving was pretty huge, these 200 out of maybe a thousand.

The guys who made it got an overnight cleansing and rejuvenating bath in a mild solution of baking soda (anti-fungal) and kelp extract (boost), and they’ll be quickly rinsed in alcohol just before going in. Especially for this small, late planting, all this prep probably doesn’t matter much, but they deserve it (personify and pamper your seeds and plants when you can, it’s friendly, until you harvest and eat ’em!).

So, it’ll be a first-hand test of whether it’s worth planting spring garlic at all. From what I’ve heard, chances are we’ll get at best smaller, later bulbs, some misfires with no bulbs forming, and the same great garden-grown garlic taste! We shall see…!

Direct seeding

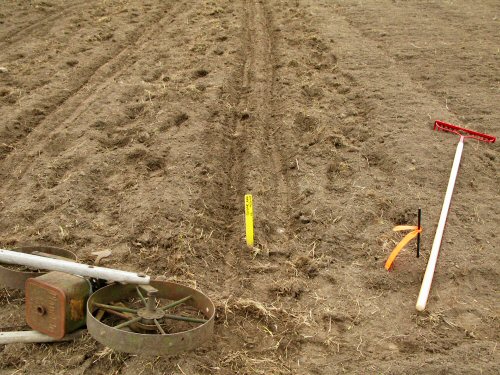
Direct seeding is going ahead at a careful pace. There’s a fair amount of broken up sod in the mix, and it would be nice for it to have more time to settle in and decompose, also for any bits of live grass to start poking up so they can be disrupted again with a light tilling… But we can’t just wait around. Spinach, beets, and radish went in a few days ago, just after the first peas. More peas went in yesterday (Connor for the first time wrestles with the kinda heavy and unwieldy Planet Jr., above, and ends up doing fine on a trial row). Now, the watching and waiting is on for the first plants to emerge in the field…

Disc action

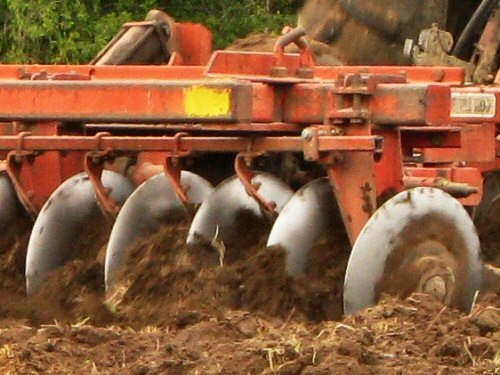
It’s steel in the field… Big machine work was the tiny farm highlight today, not the machinery itself but the intense and much-needed sod-busting action. Peter, a (certified organic) beef and grain farmer on the next two (much bigger) farms down the road,  dropped by just ahead of a bit of a rainstorm, to disc the fields he’d moldboarded in the fall. There was time for two passes on the south field, then the weather hit, bringing plowing to a sudden stop as the ground almost instantly got too slippery and soft.

My experience with big tractor work is limited. Maybe someday I’ll get more involved with heavy machinery—to watch, at least, big machines are fascinating and…cool. Or perhaps I’ll go the other way, d/evolving all the way to Fukuoka-like farming with little more than an intricate method and a stick… Probably stay somewhere in between… :)

In any case, this is all one-time stuff. The double row of discs do some serious pizza-cutter work on the dense, moldboarded strips, so we’ll be able to rototill more easily and effectively, without tearing the little tiller apart. And then, the soil food web can rebuild.

Elsewhere, earlier, I direct seeded the first spinach, beets and radish. Following their progress in the new garden ground will be interesting…

Direct-seeding peas

The first direct-seeded crop went in today: Sugar Ann snap peas. As usual, the peas were inoculated with Rhizobium bacteria: dampen the seed with a little water, sprinkle with inoculant powder, and shake.

Rhizobium bacteria enter legume roots and form a symbiotic relationship with their hosts, producing plant-usable nitrogen in exchange for carbohydrates and other nutritious goodies from the plants. The net result is…more nitrogen for all! Or as the inoculant package says: “bigger yields and better quality”!

Sounds great. I take it on faith (in the science, I guess), since I haven’t actually observed the with-and-without inoculation difference. I have a couple of times planted without, but I wasn’t taking measurements…

Each legume (peas, beans, clover, etc) needs its own species or strain of Rhizobia. Luckily, there are packets of premixed assortments that cover the common veggie legumes. What I’ve been using, called simply enough, Garden Inoculant, is good for beans, peas, lima beans and sweet peas.

The bacteria do establish in the soil so that they’re available from year to year, but I’m not sure how long and in what quantities it takes to get set up with the strains you need—until I find out, I’ll inoculate every time…

Then it’s on to the seeder. I’m using the older, heavier, probably-antique Planet Jr. over the usual Earthway.

And minutes later, 3oo’ (91m) done. It’s an almost painfully small start for April 20, but I’m figuring that every few days I leave the broken up sod to break down more, the better off we’ll be. Soon, though, all the rest of the early direct seeded crops will just have to go in!

Tiny machine action

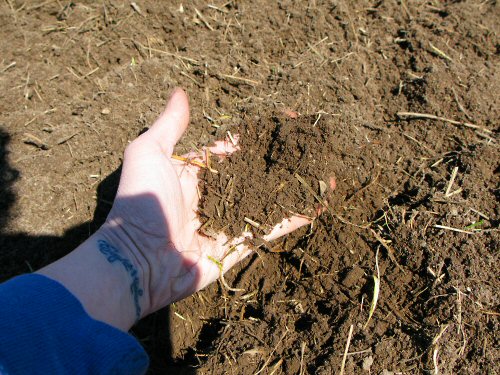
Beautiful weather, around 60°F (15°C) in the full-on sun, with a crisp undercurrent of a breeze… What could be nicer for the first full day of fieldwork?! Lynn, Mel and Jordan came by at 8:30 am, and Tara joined in a little later on. We’re still working on preparing the beds, so the main action was raking and ROTOTILLING…busting up that sod. And everyone’s gearing up for the season, learning where things are and how to do…stuff. Like…rototilling! Mel tries her hand at it for the first time (above)—the Kubota compact tractor is as reliable, steady, and undaunting as ever…

Tara also rototills for the first time. Here, she executes what looks like a nimble little turn

Mel inspects the results of a pass with the rototiller, checking out the effect of tilling at different speeds. And the tiny farming goes on… (Photos 2 and 3 by Mel)

The rain watch begins (once again)

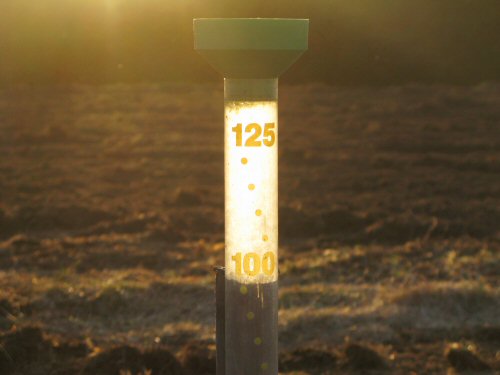
Another rite of spring on this tiny farm: setting out the (jumbo) rain gauge. I did it today. This model, with its big numbers and fluorescent red float, can be “read at 50 feet”! Or something like that. It’s…jumbo. I stake it in a convenient spot that I pass by several times a day, so I’m never straining… And it’s always somewhere in mind: Scientific Measurement meets wow-I-wonder-if-it’s-ever-gonna-rain-again (except for the occasional year of when-is-it-gonna-stop?!!—but the rainbows were nice).

No sooner does the snow go and the ground dry out enough to begin working, than it’s time to wait for rain. This gauge is calibrated in 5 millimeter increments (about 25 mm to the inch, I think in inches when it comes to rain…). It’s emptied daily as necessary, so it never gets nearly this high. Rainfall is recorded on the field calendar to keep track for irrigation (an inch a week total, rain+watering, is the rough target).

Don’t think I’ve seen it go much above 50 mm (2″) in a day, and that only a couple of times in six years. In the market garden, too much rain is at best not helpful, but too little rain is always plain…bad! Here’s to having rain every seven days or so this season, about an inch at a time, gently laid down over one partially cloudy day, followed by a few days of sun. I’m looking forward to that! :)